Mark Smith
24 January 2019 at Knowl Hill Village Hall

Potters Day with Mark Smith – January 2019
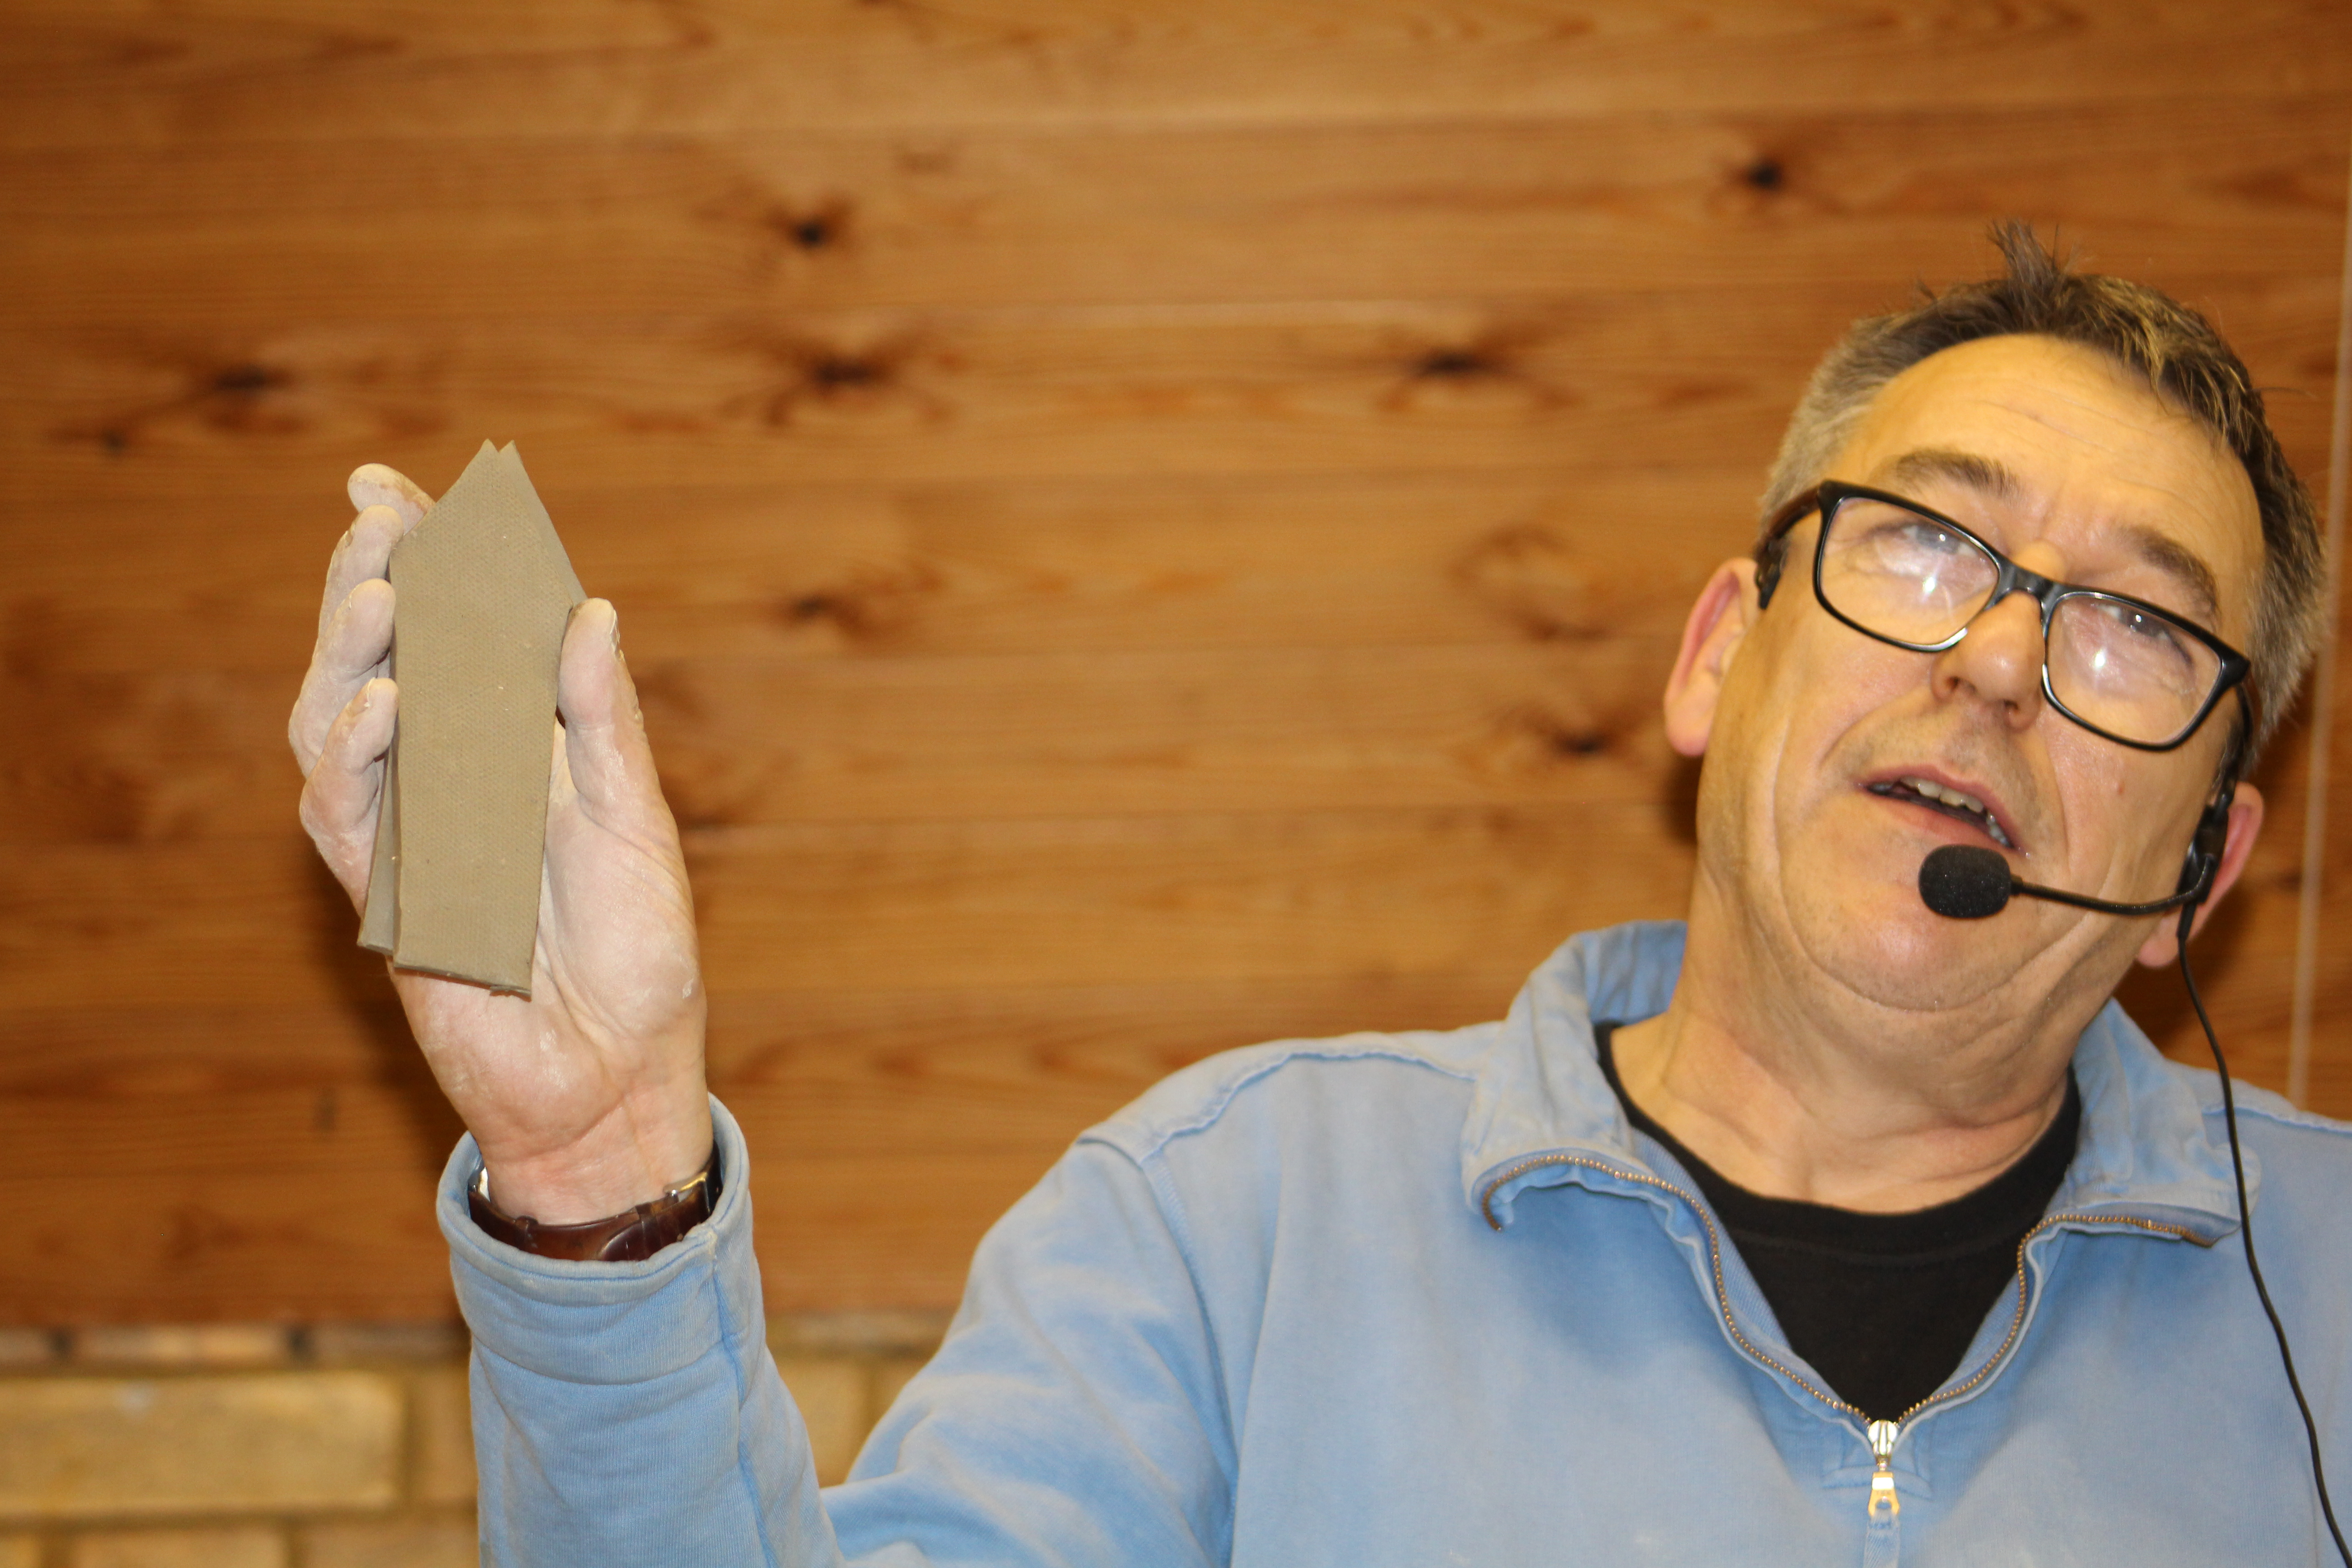
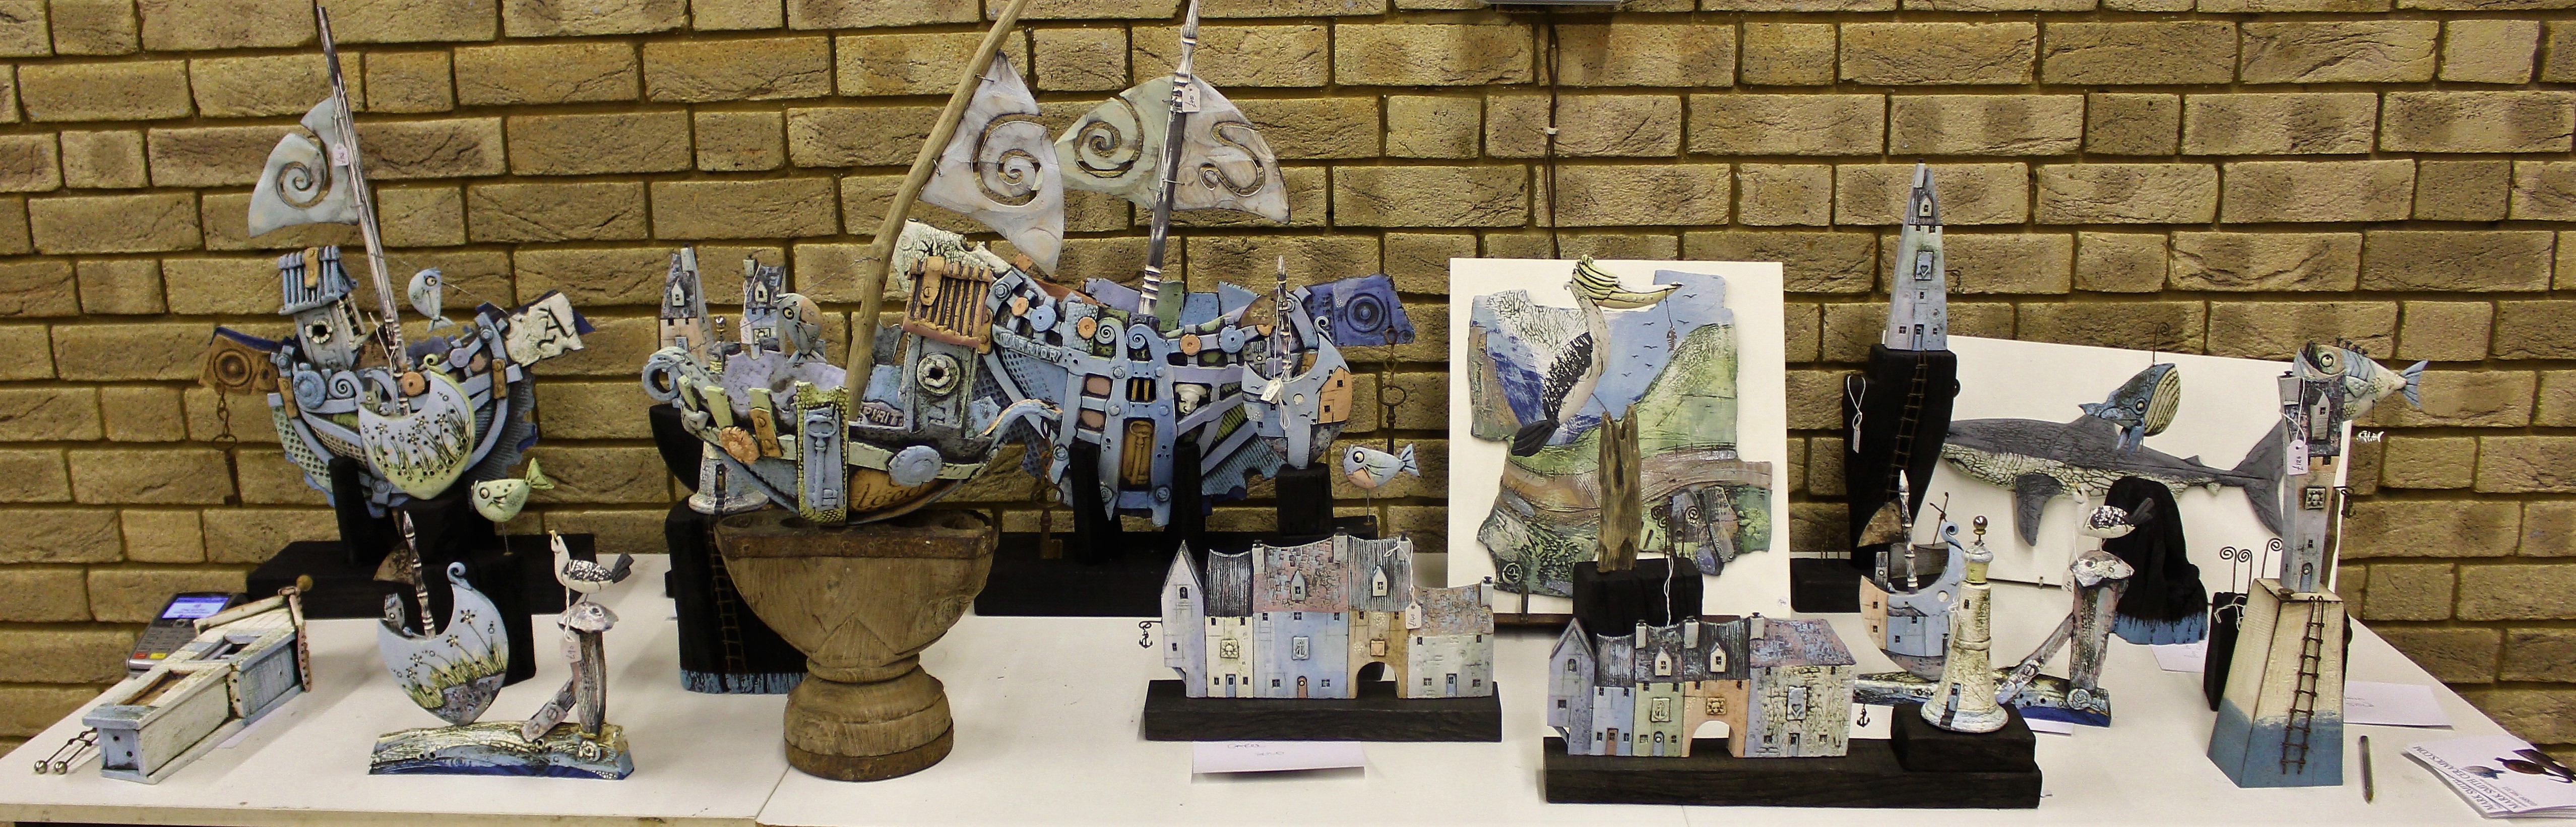
Describing himself as ‘a bit of a Womble’ Mark says this is due to the fact that he is a regular skip raider, reclamation yard dweller, beachcomber and avid collector of all things rusty! I think he must be the proud owner of a serious man cave! All the pieces he collects appear as either backdrops, supports or embellishments for his quirky colourful ceramic sculptures. For example the keys he has collected since childhood are added to represent an anchor, as well as helping to tell a story, and that story is broadly about reducing landfill. Coming from a ‘serious potting’ background; thrown salt glazed ware it was an incredibly brave step to change direction and follow his passion for hand built sculpture when he was so established in his career. But change he did in 1992 and happier he has been as a result. He has however very recently gone back to a bit of throwing after 15 or so years, but luckily ‘ it’s a bit like riding a bike’ and I feel his brand new range of lighthouses are going to prove highly popular!
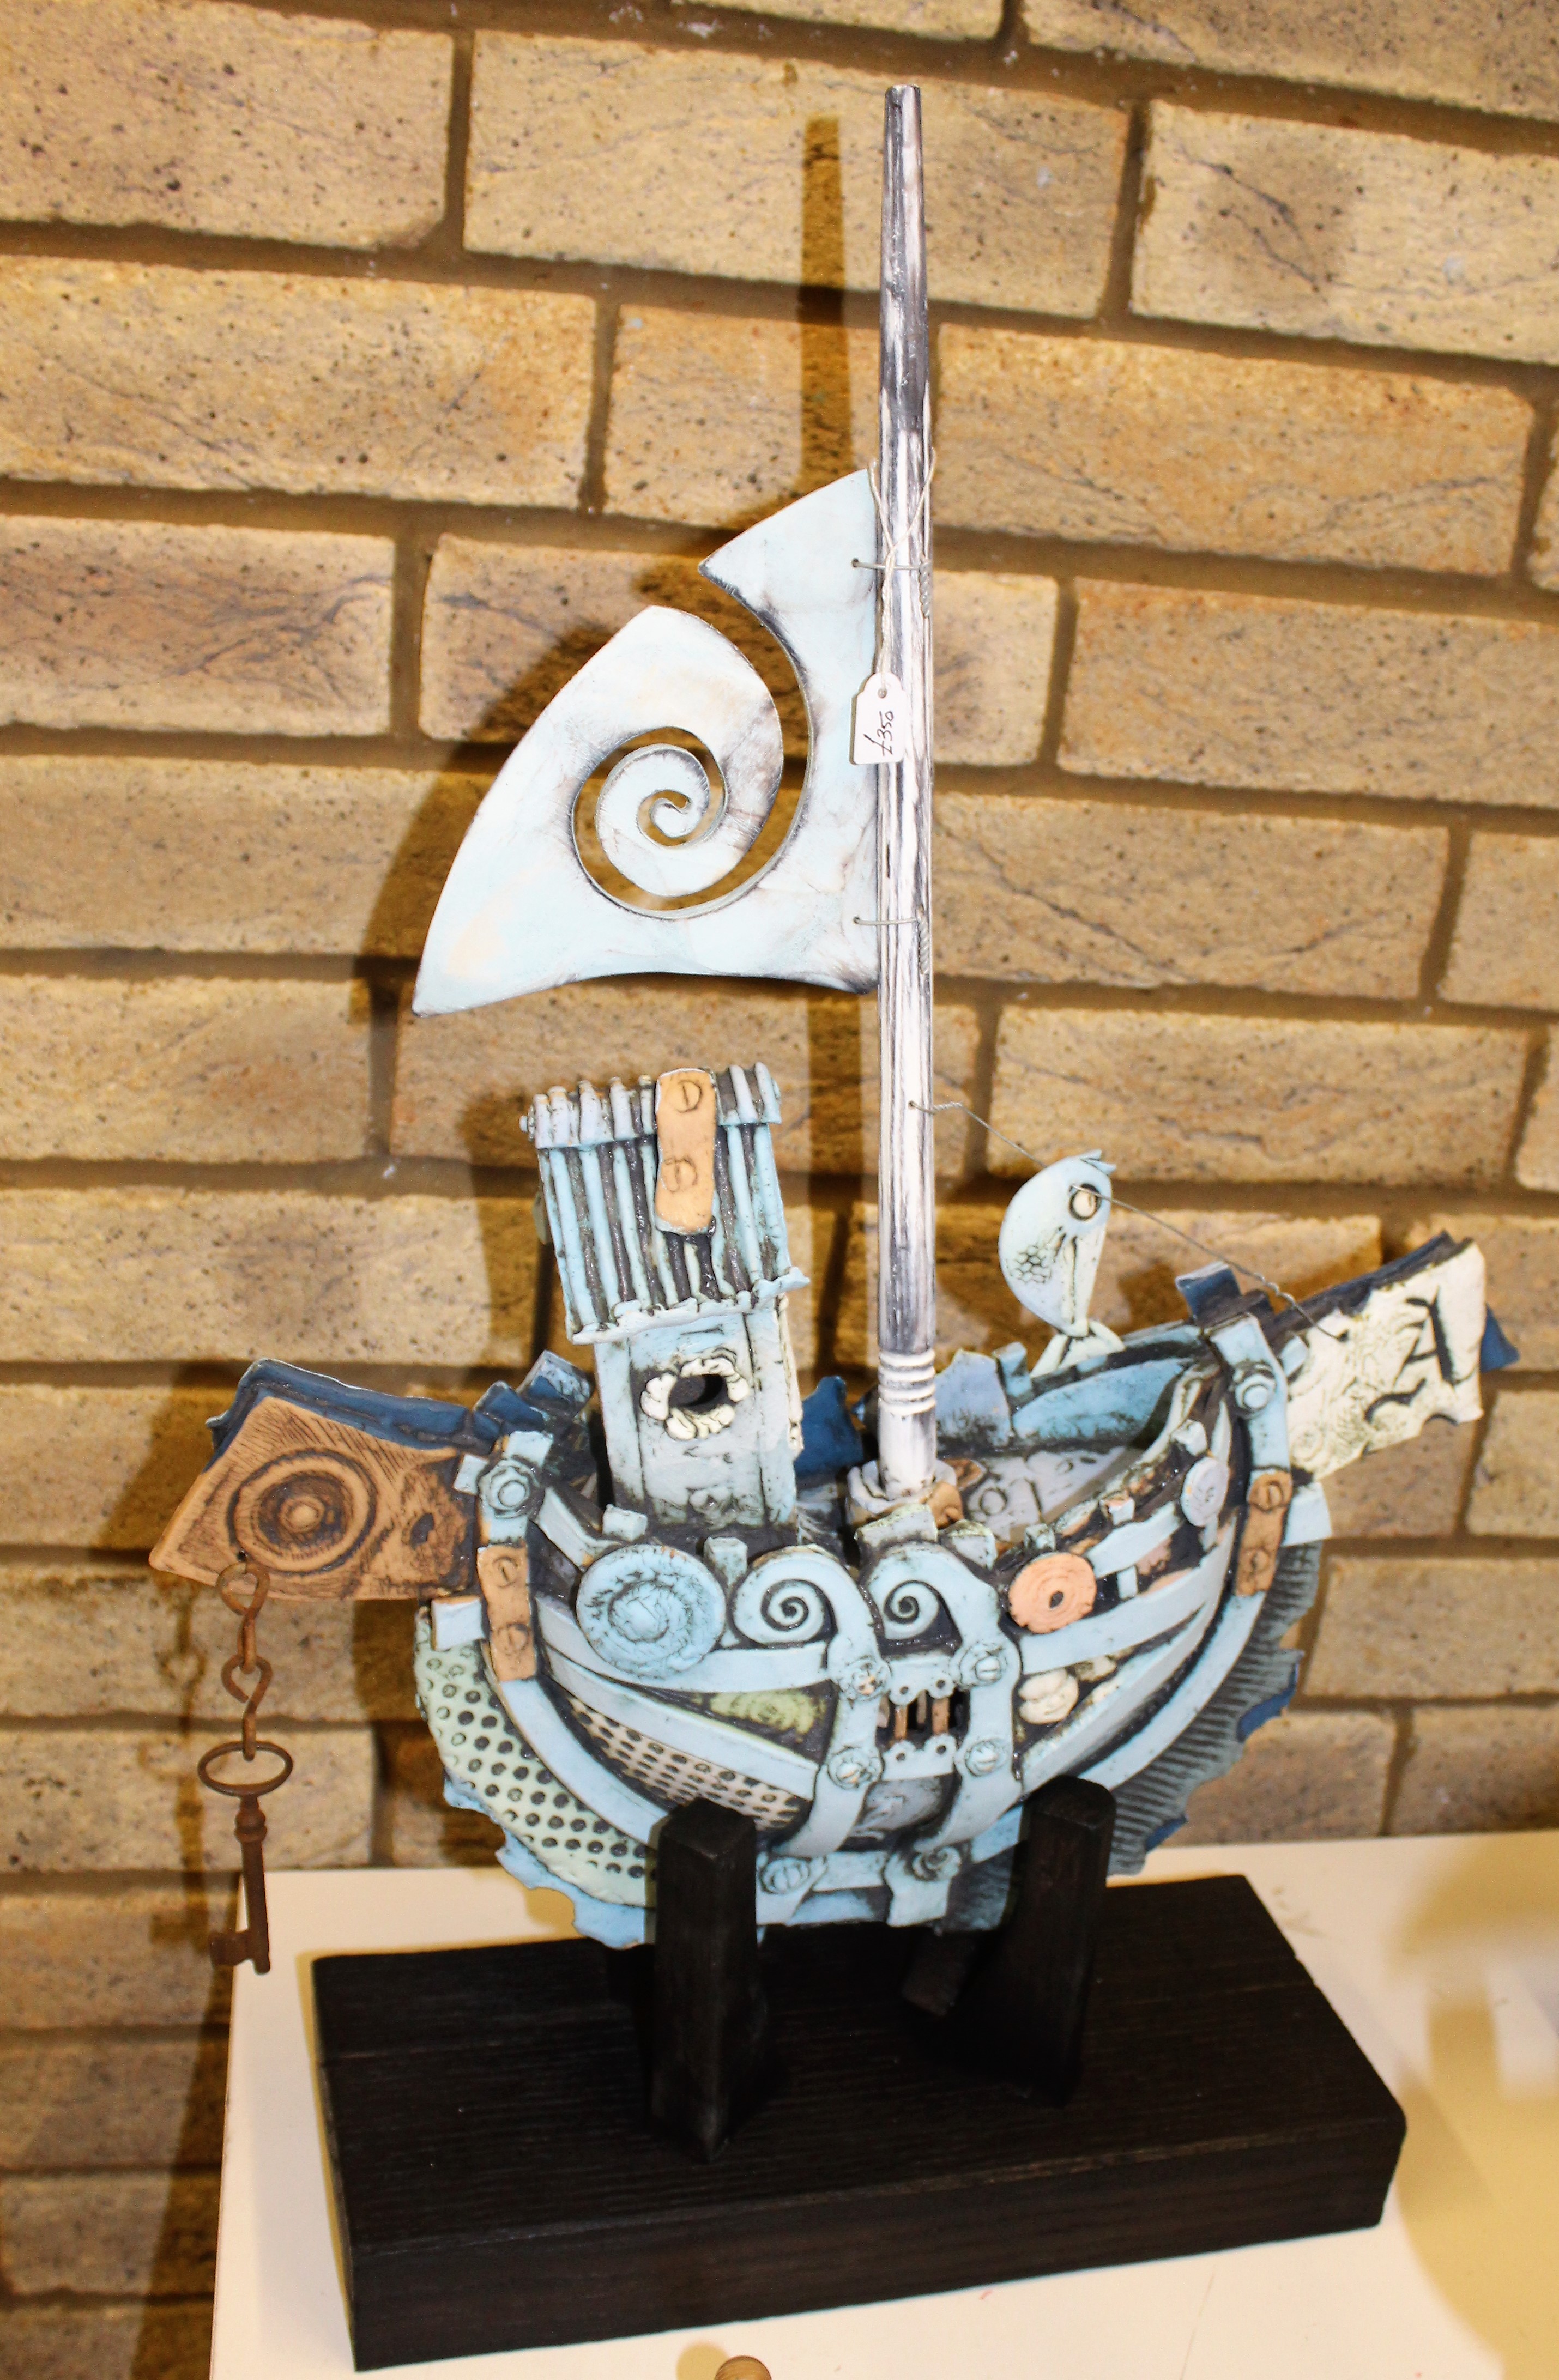
Mark uses a range of Stoneware clay; Spencroft Grogged AWS1G (in the blue bag) for his large boats and a Valentines Stoneware for the smaller cottages and, although only firing to a glost of 10800 C, he prefers the low shrinkage and forgiving nature of these Stoneware bodies compared with earthenware. He also likes the fact that with the addition of half a teaspoon of vinegar per pint he can make a really sticky joining slip negating the need to score. He fires to a Bisque of 10000 C after decorating with porcelain slips made with Audrey Blackman Porcelain and body stains from Top Pot Supplies. One of our potters recommended CTM stains to him as she finds them very good. He slakes the Porcelain down then adds the stains by eye, these are applied on to the sculptures when dry in layers building up from a loose wash to a buttery consistency to get the vibrant colours we see on the finished piece. Being made from a porcelain slip they naturally crackle through slight shrinkage in the firing. A reactive glaze called Cobblestone (available from Mayco) is applied before the glost firing, this glaze creates a shattered cobbled surface when fired, and is available in black or white but you can add you own colour should you desire. Oxides are added after the bisque firing and consist of Black Copper and Manganese, these are brushed on then sponged off to accentuate areas.
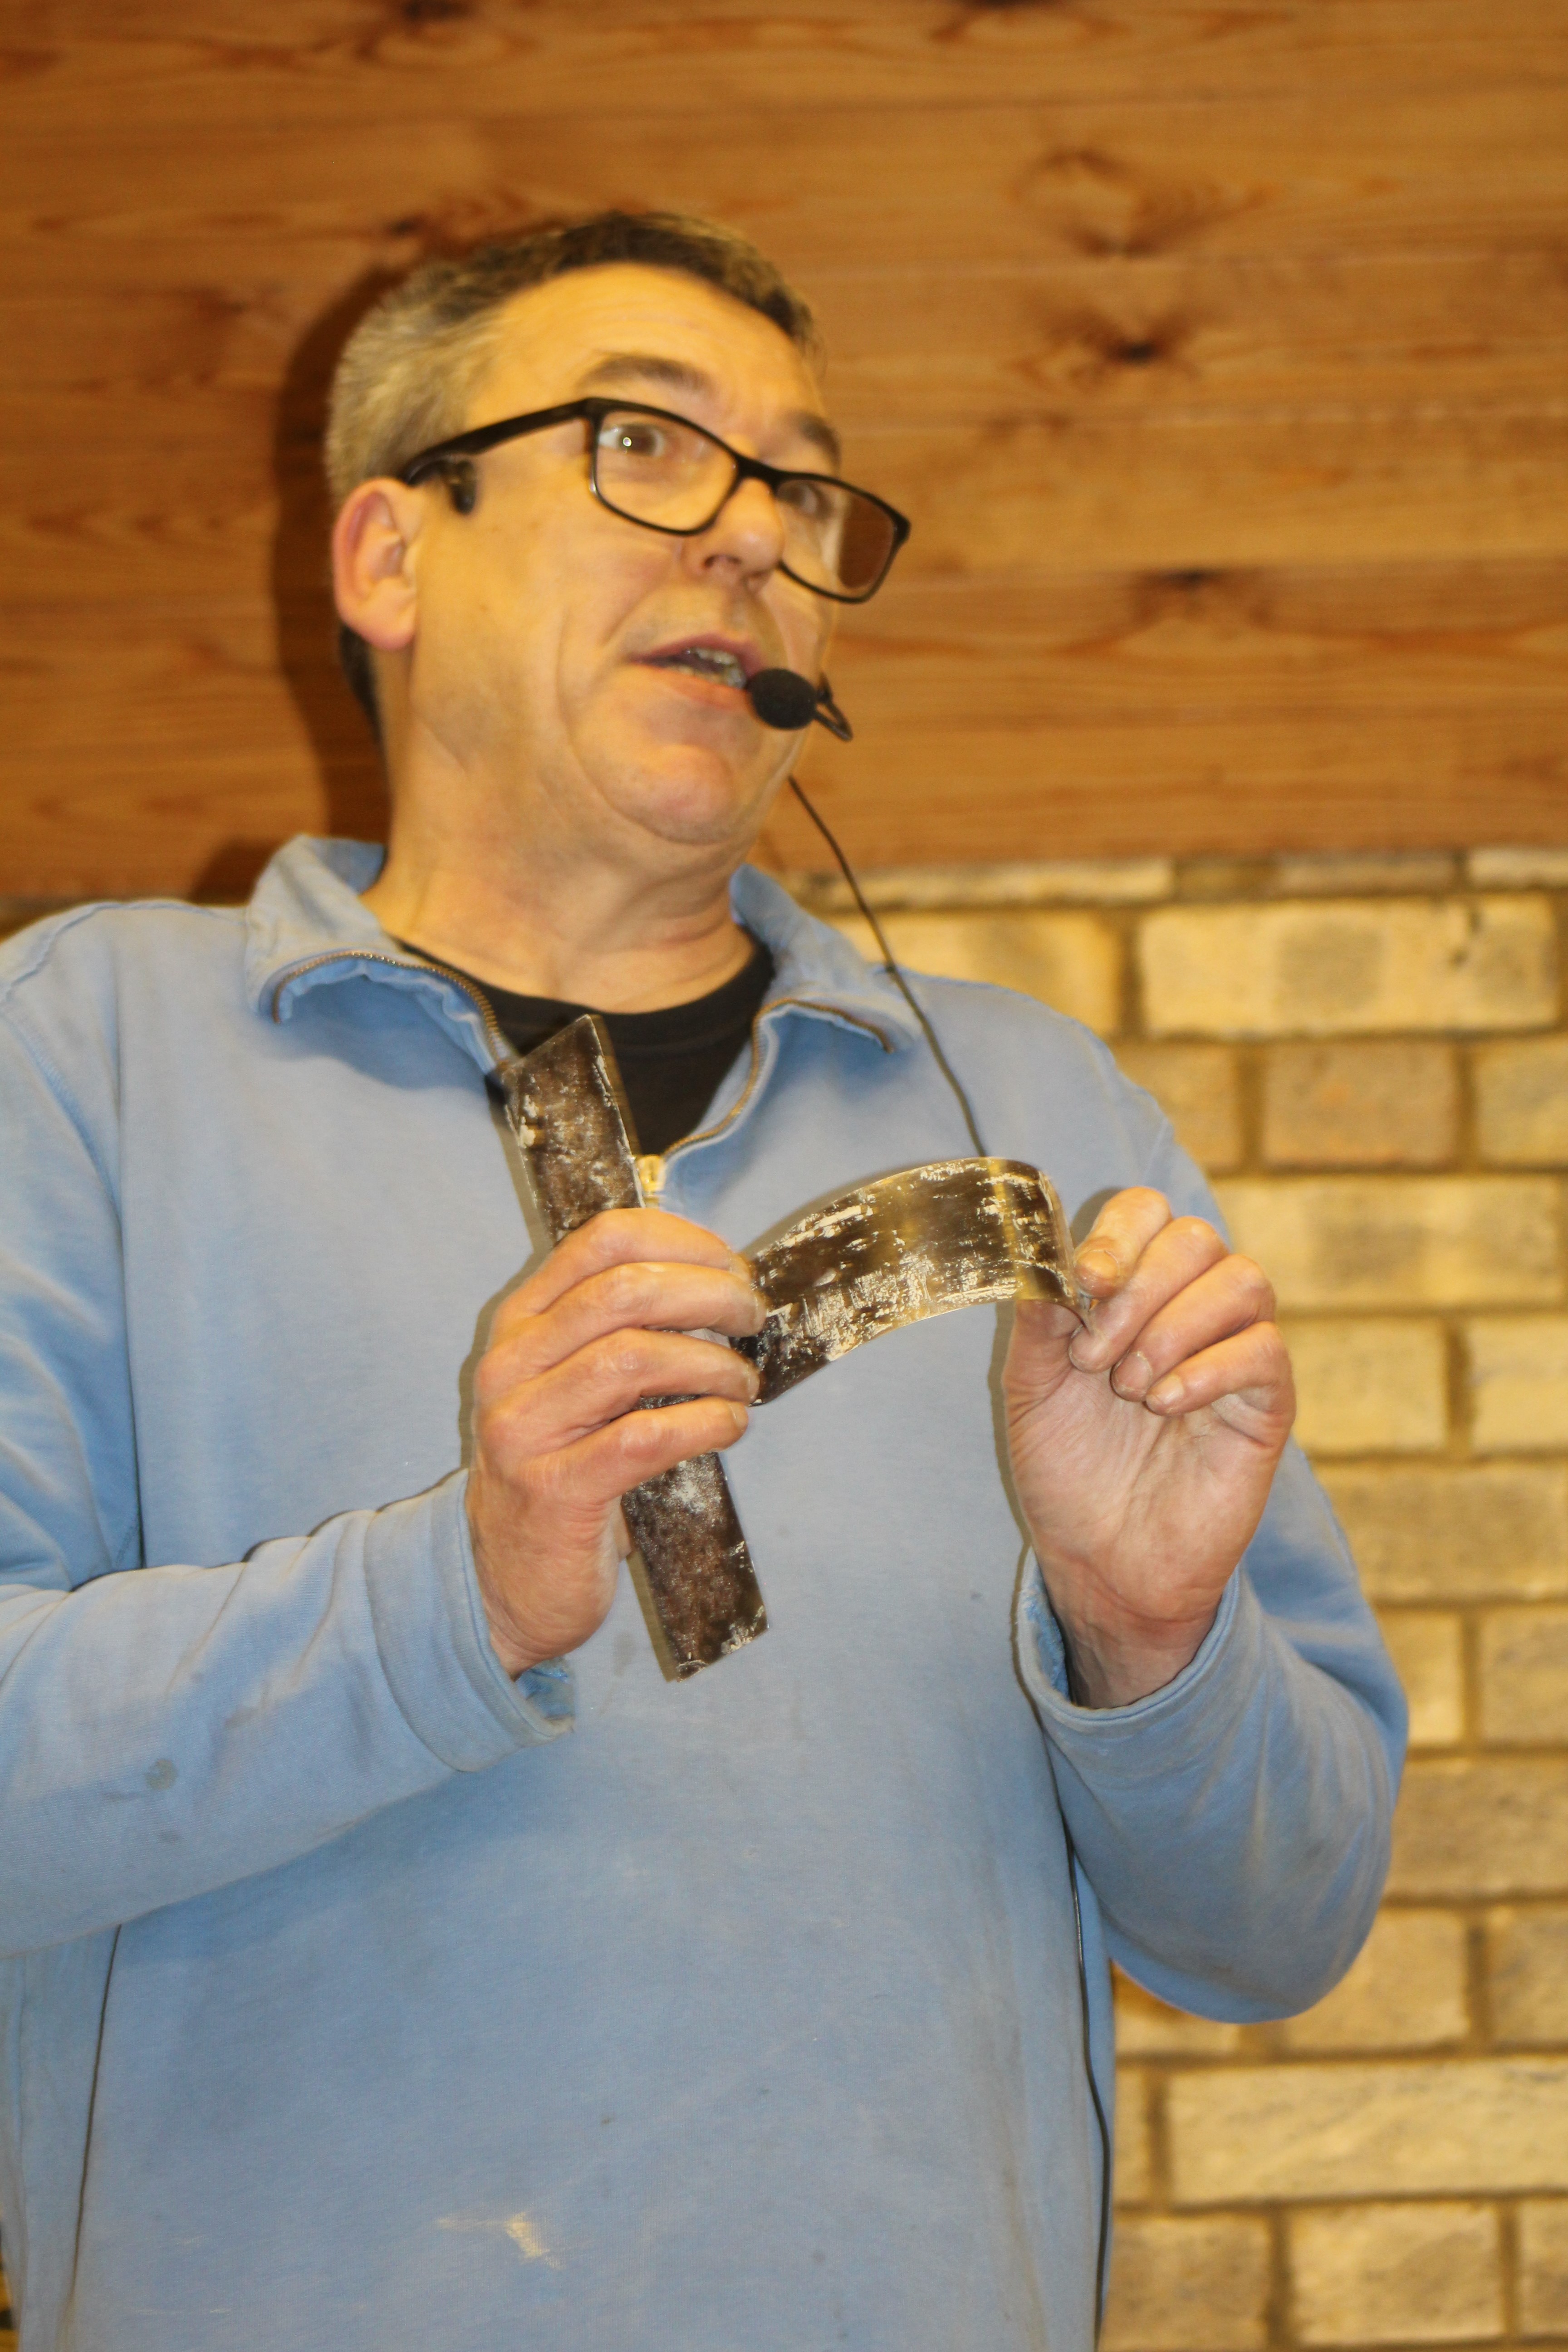
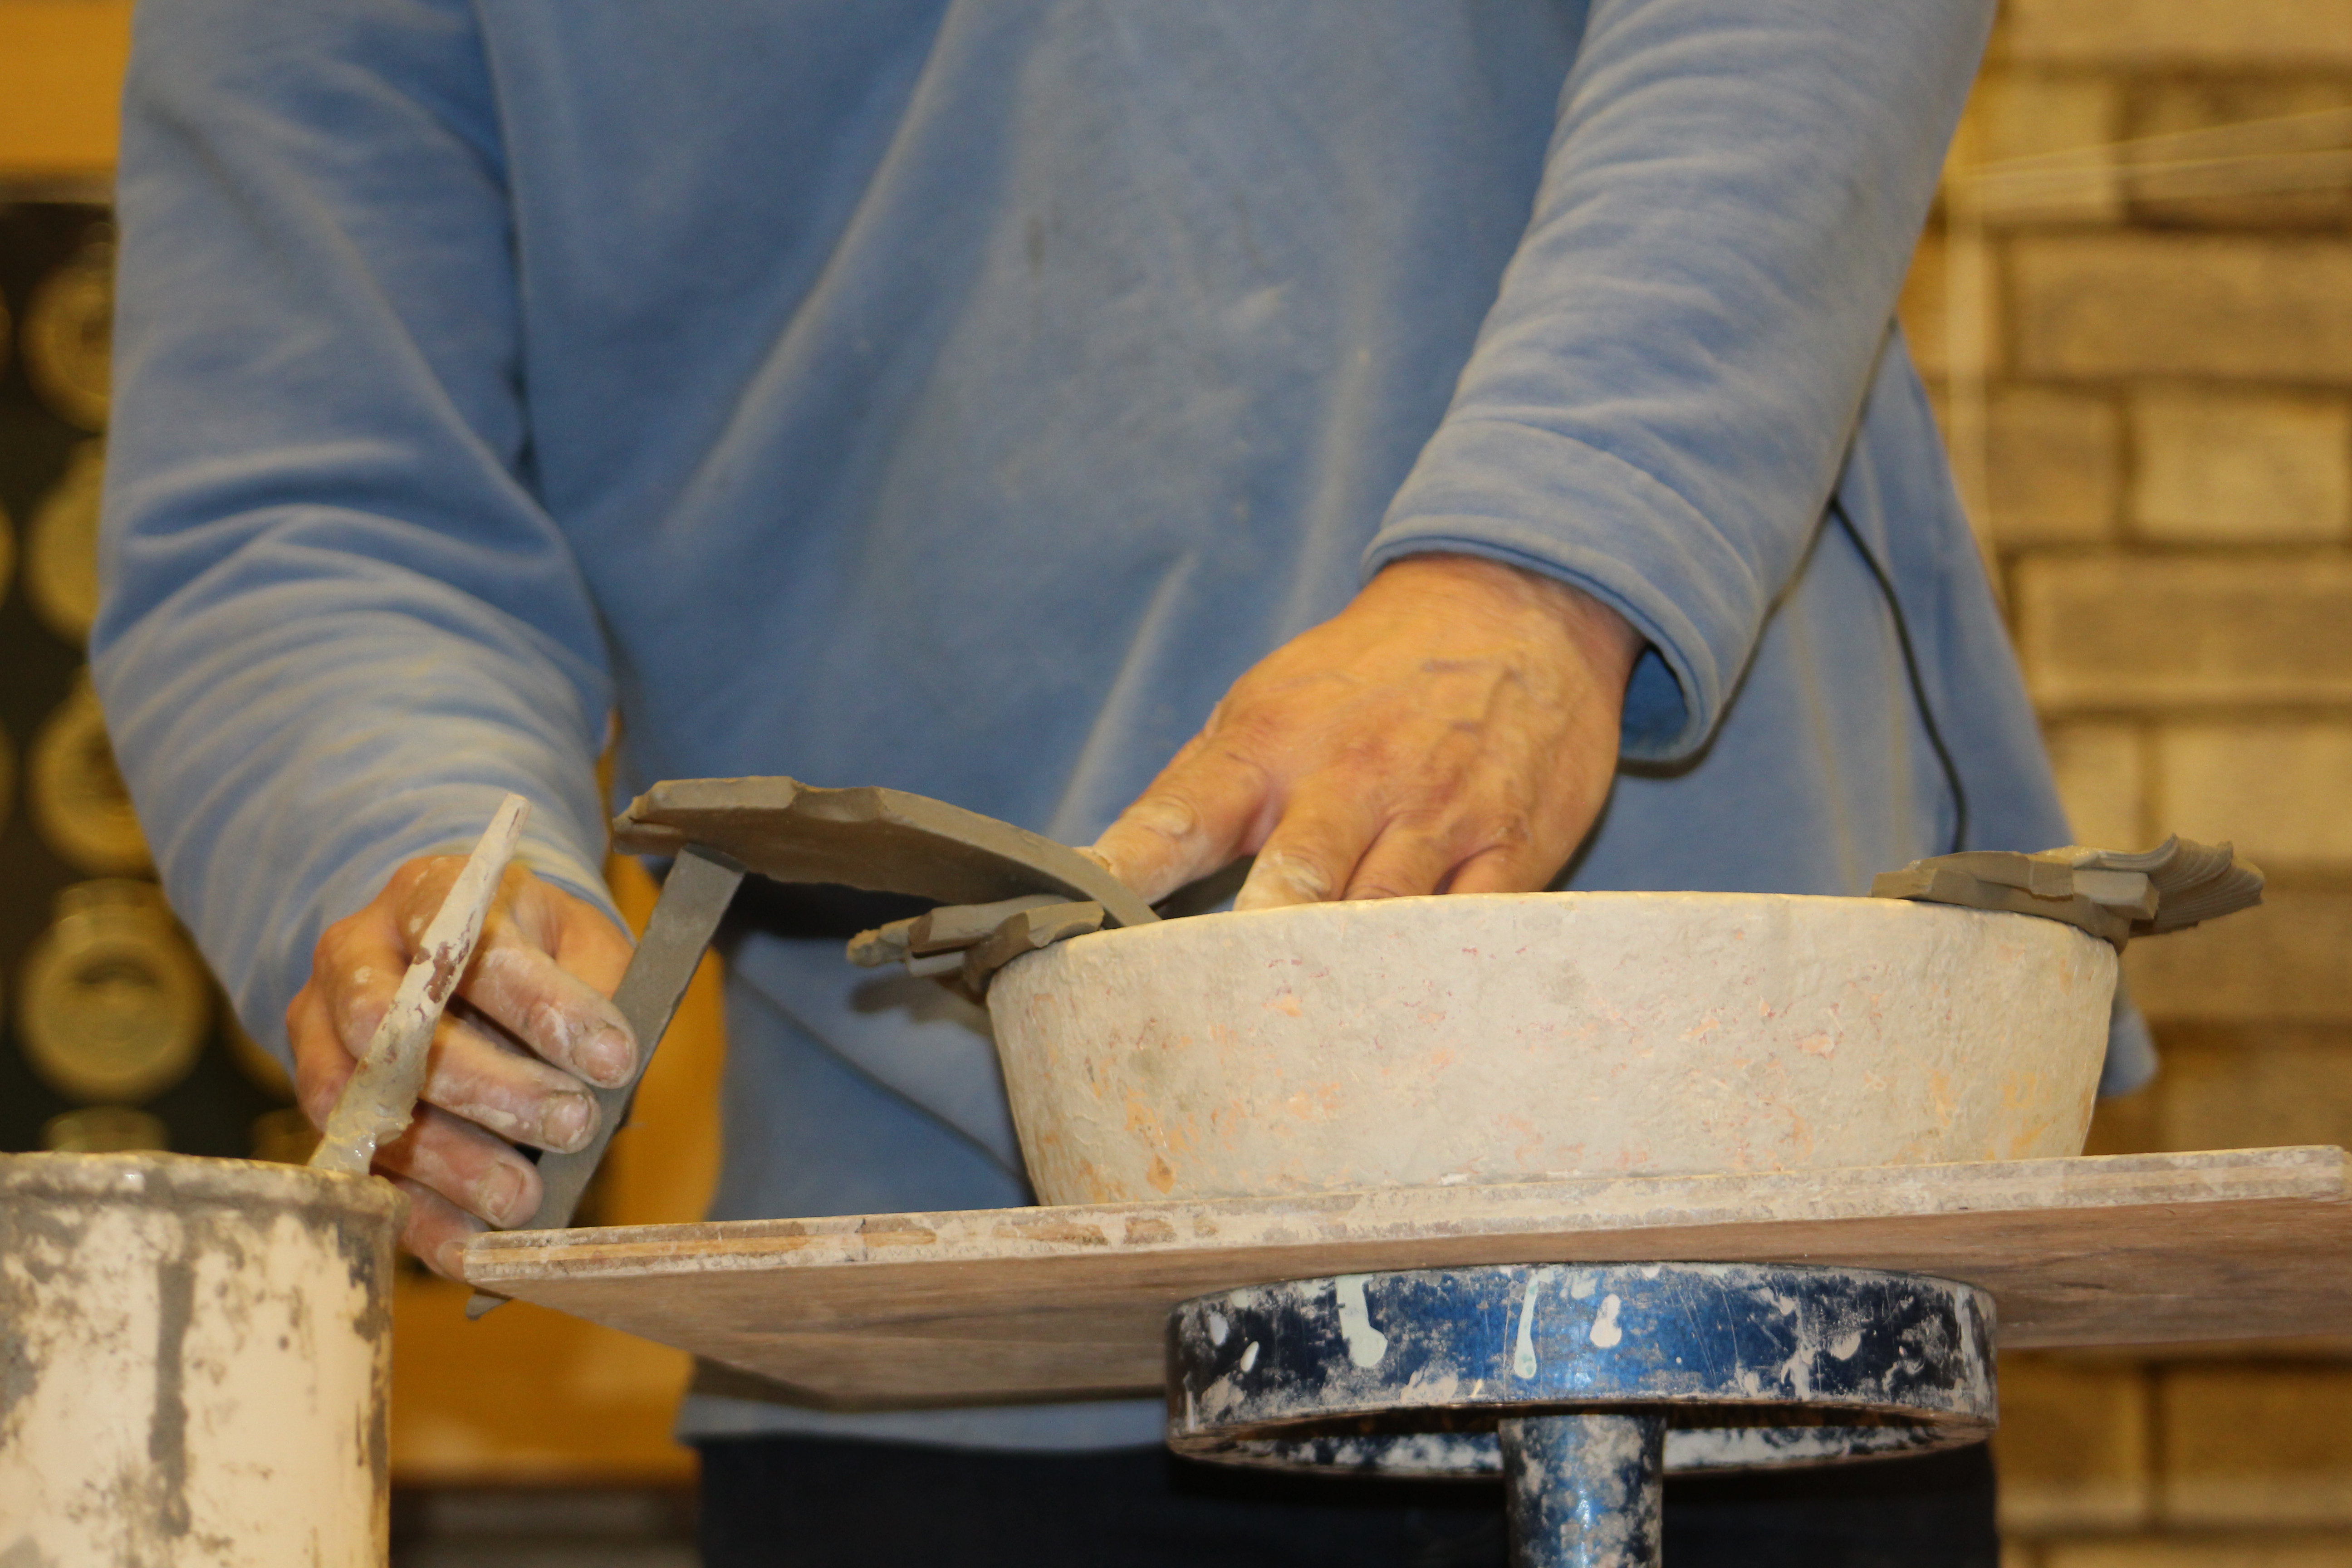
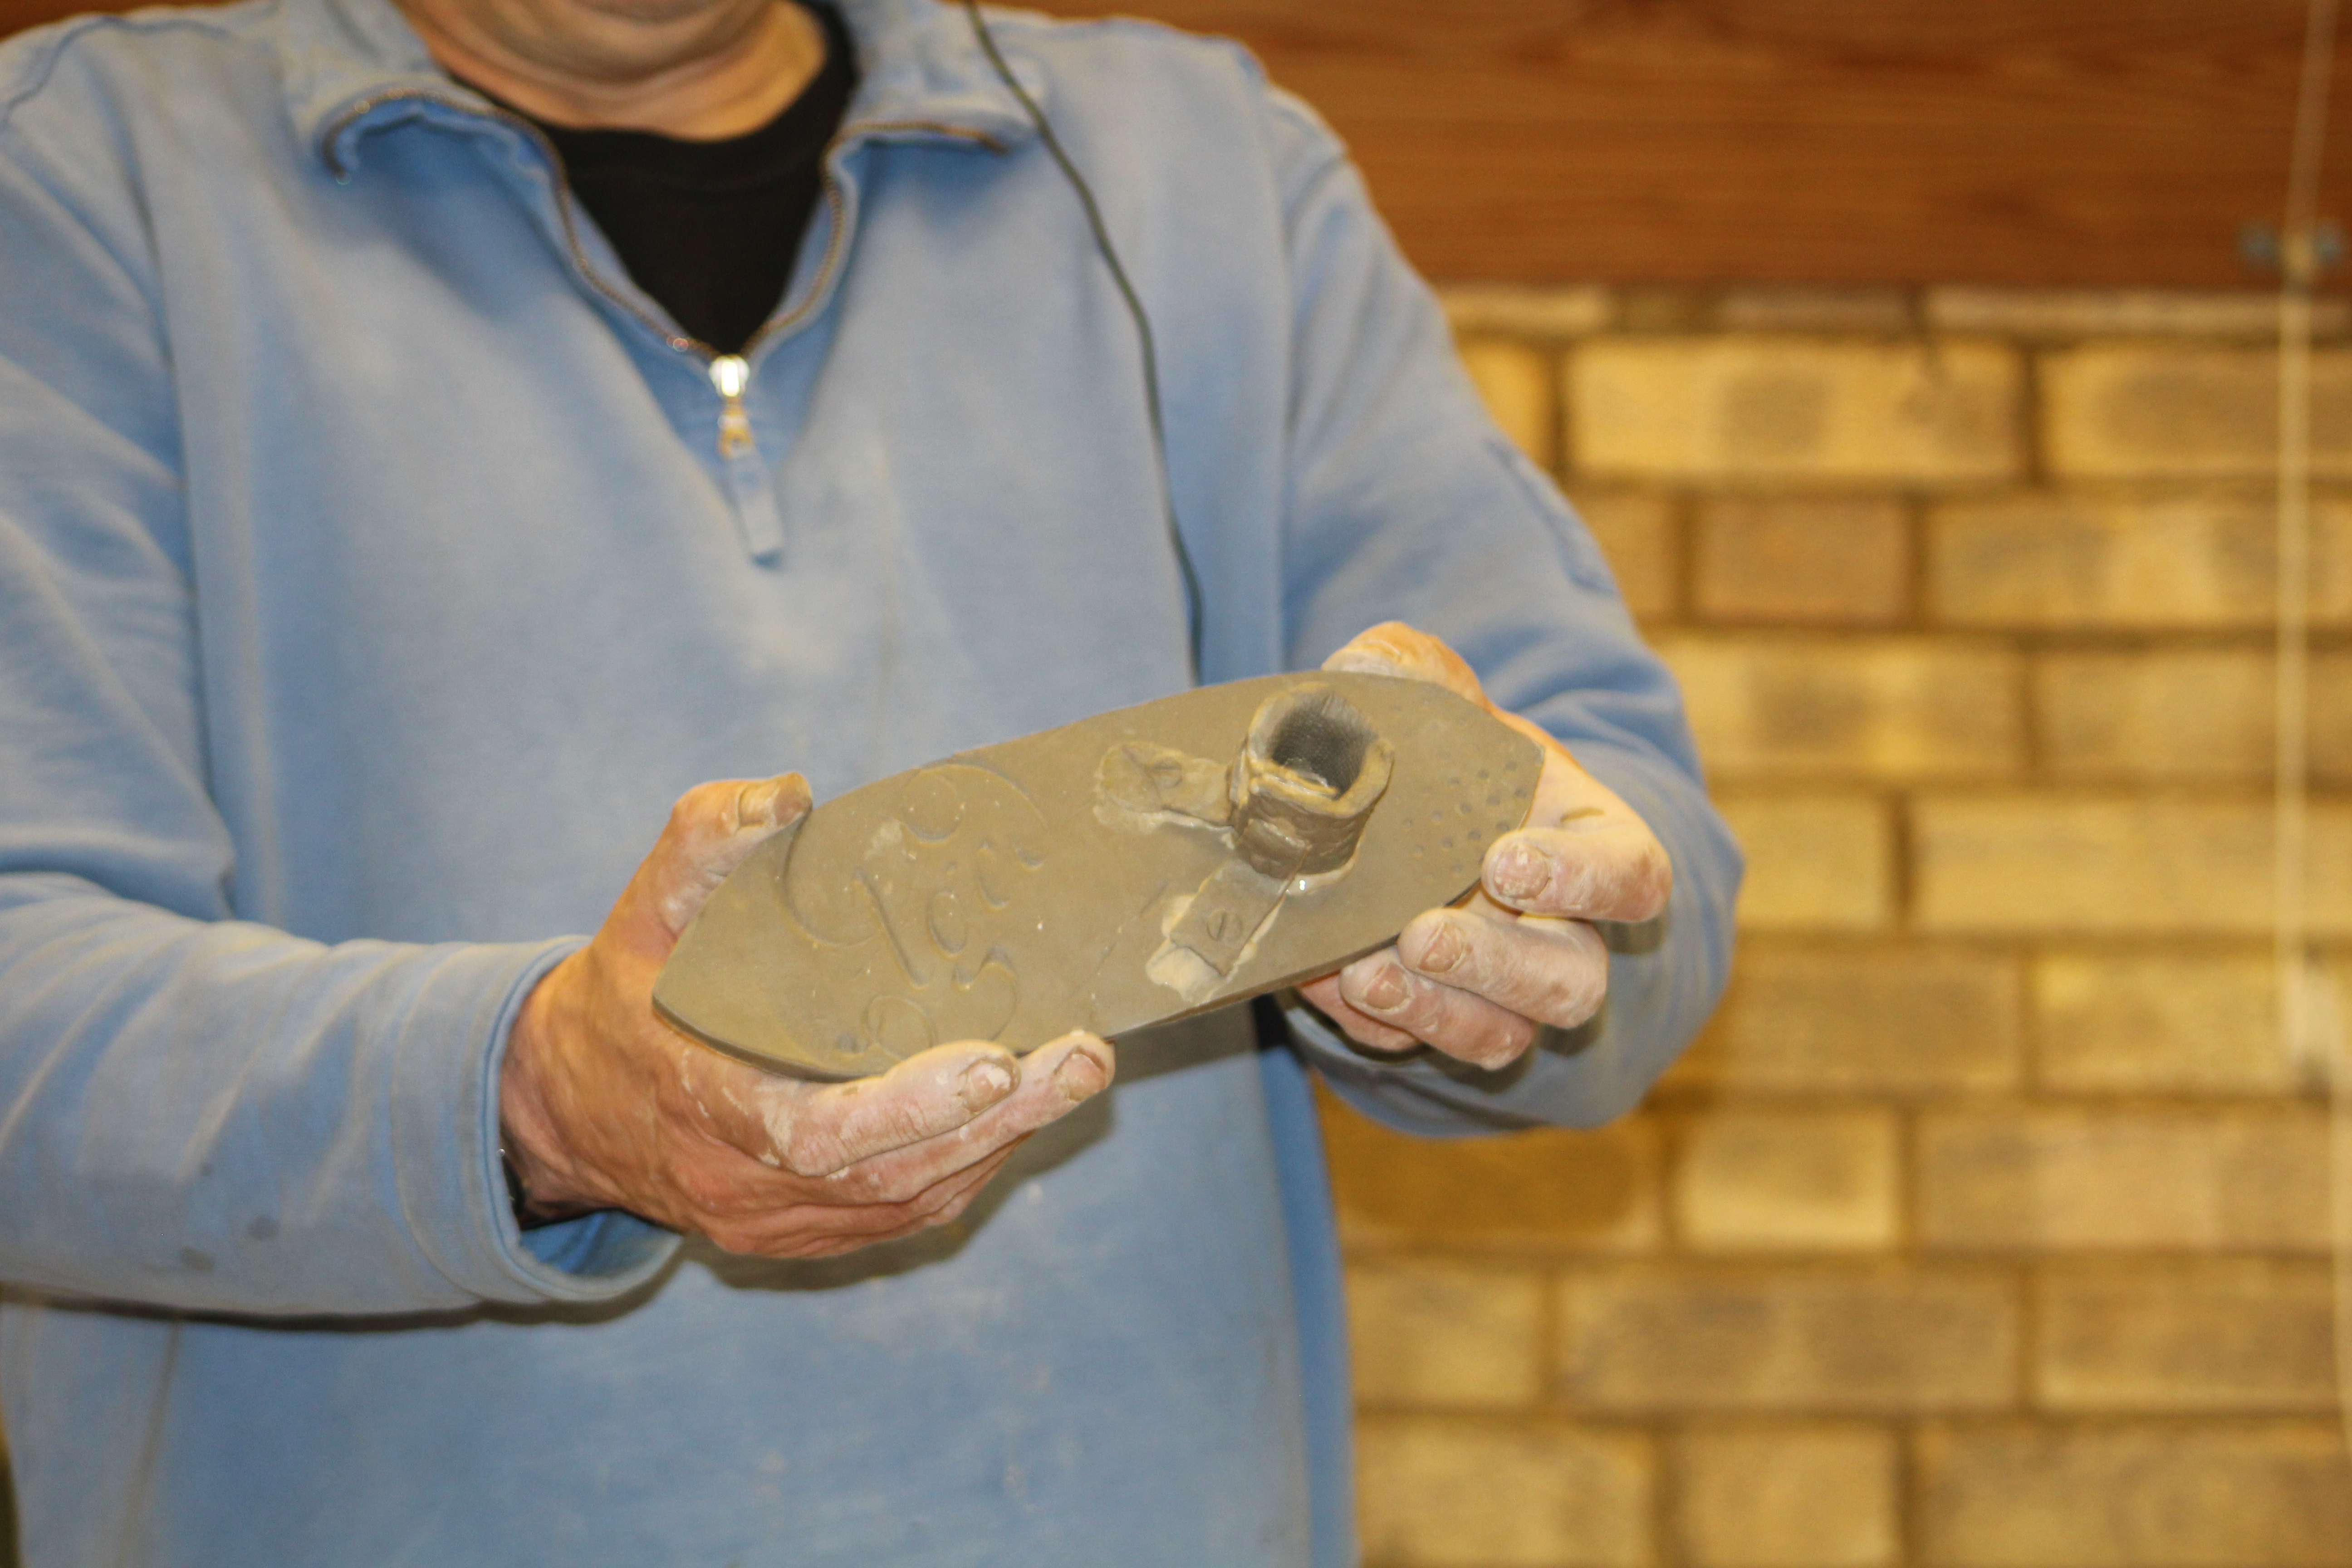
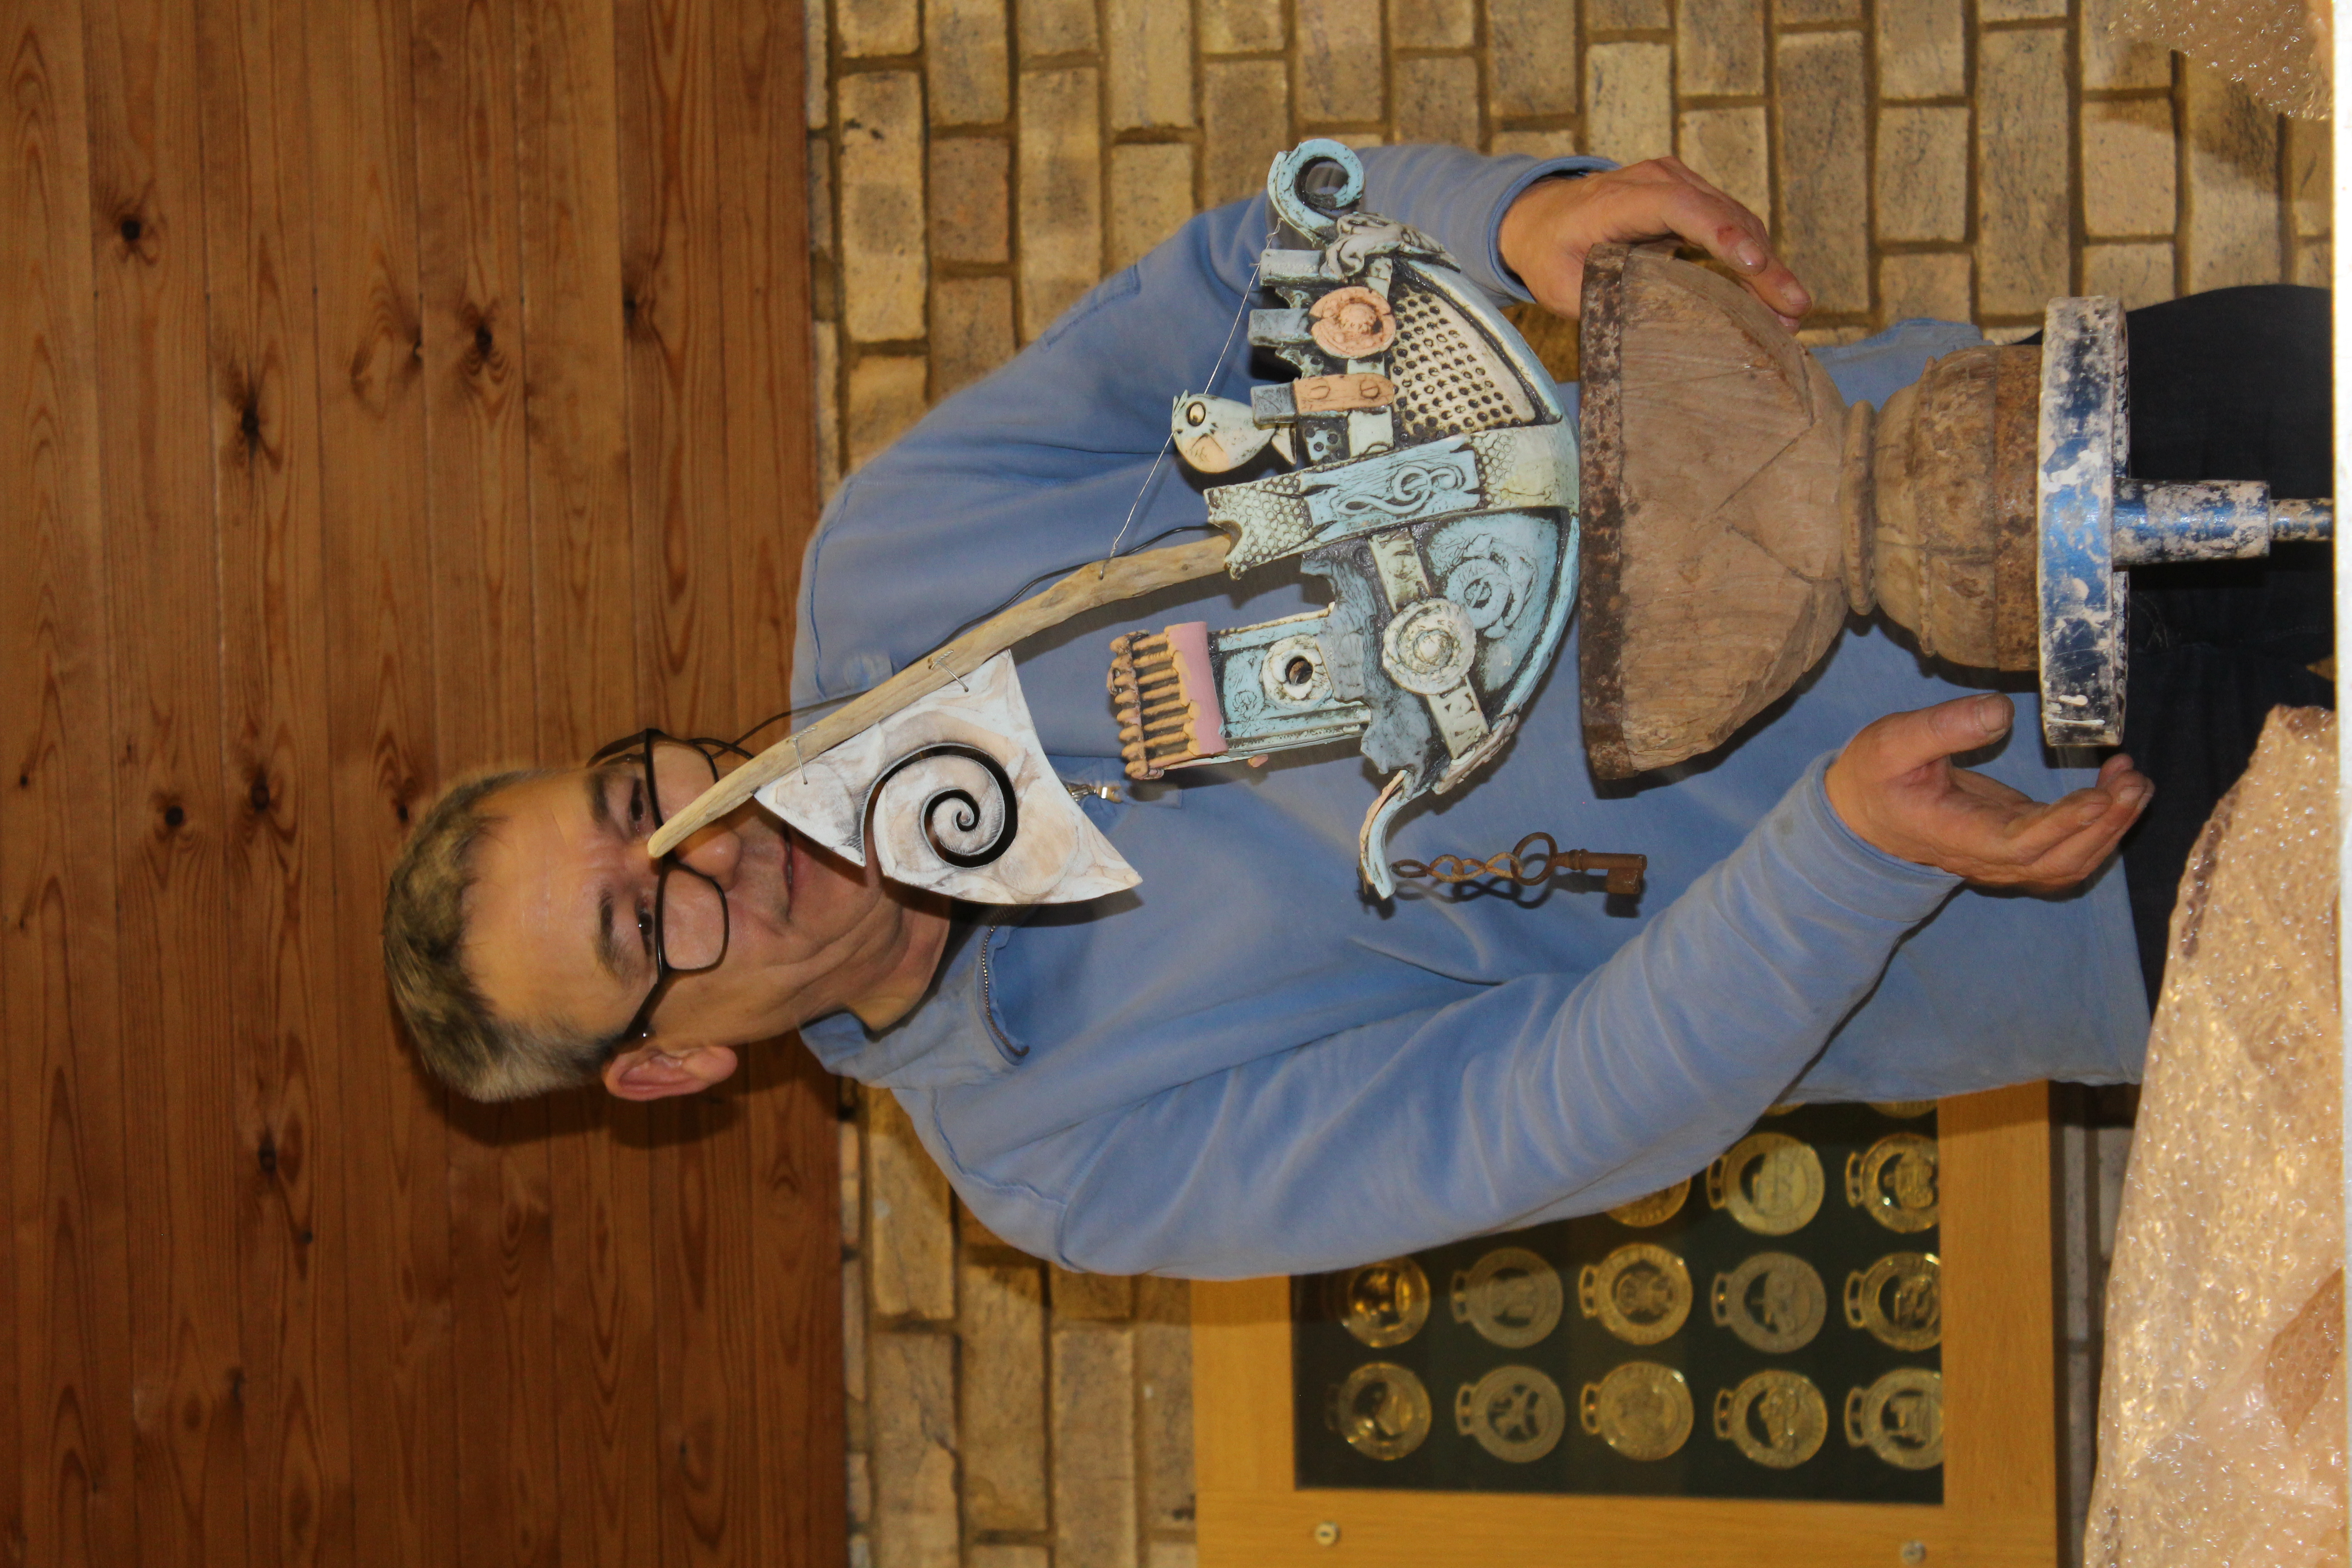
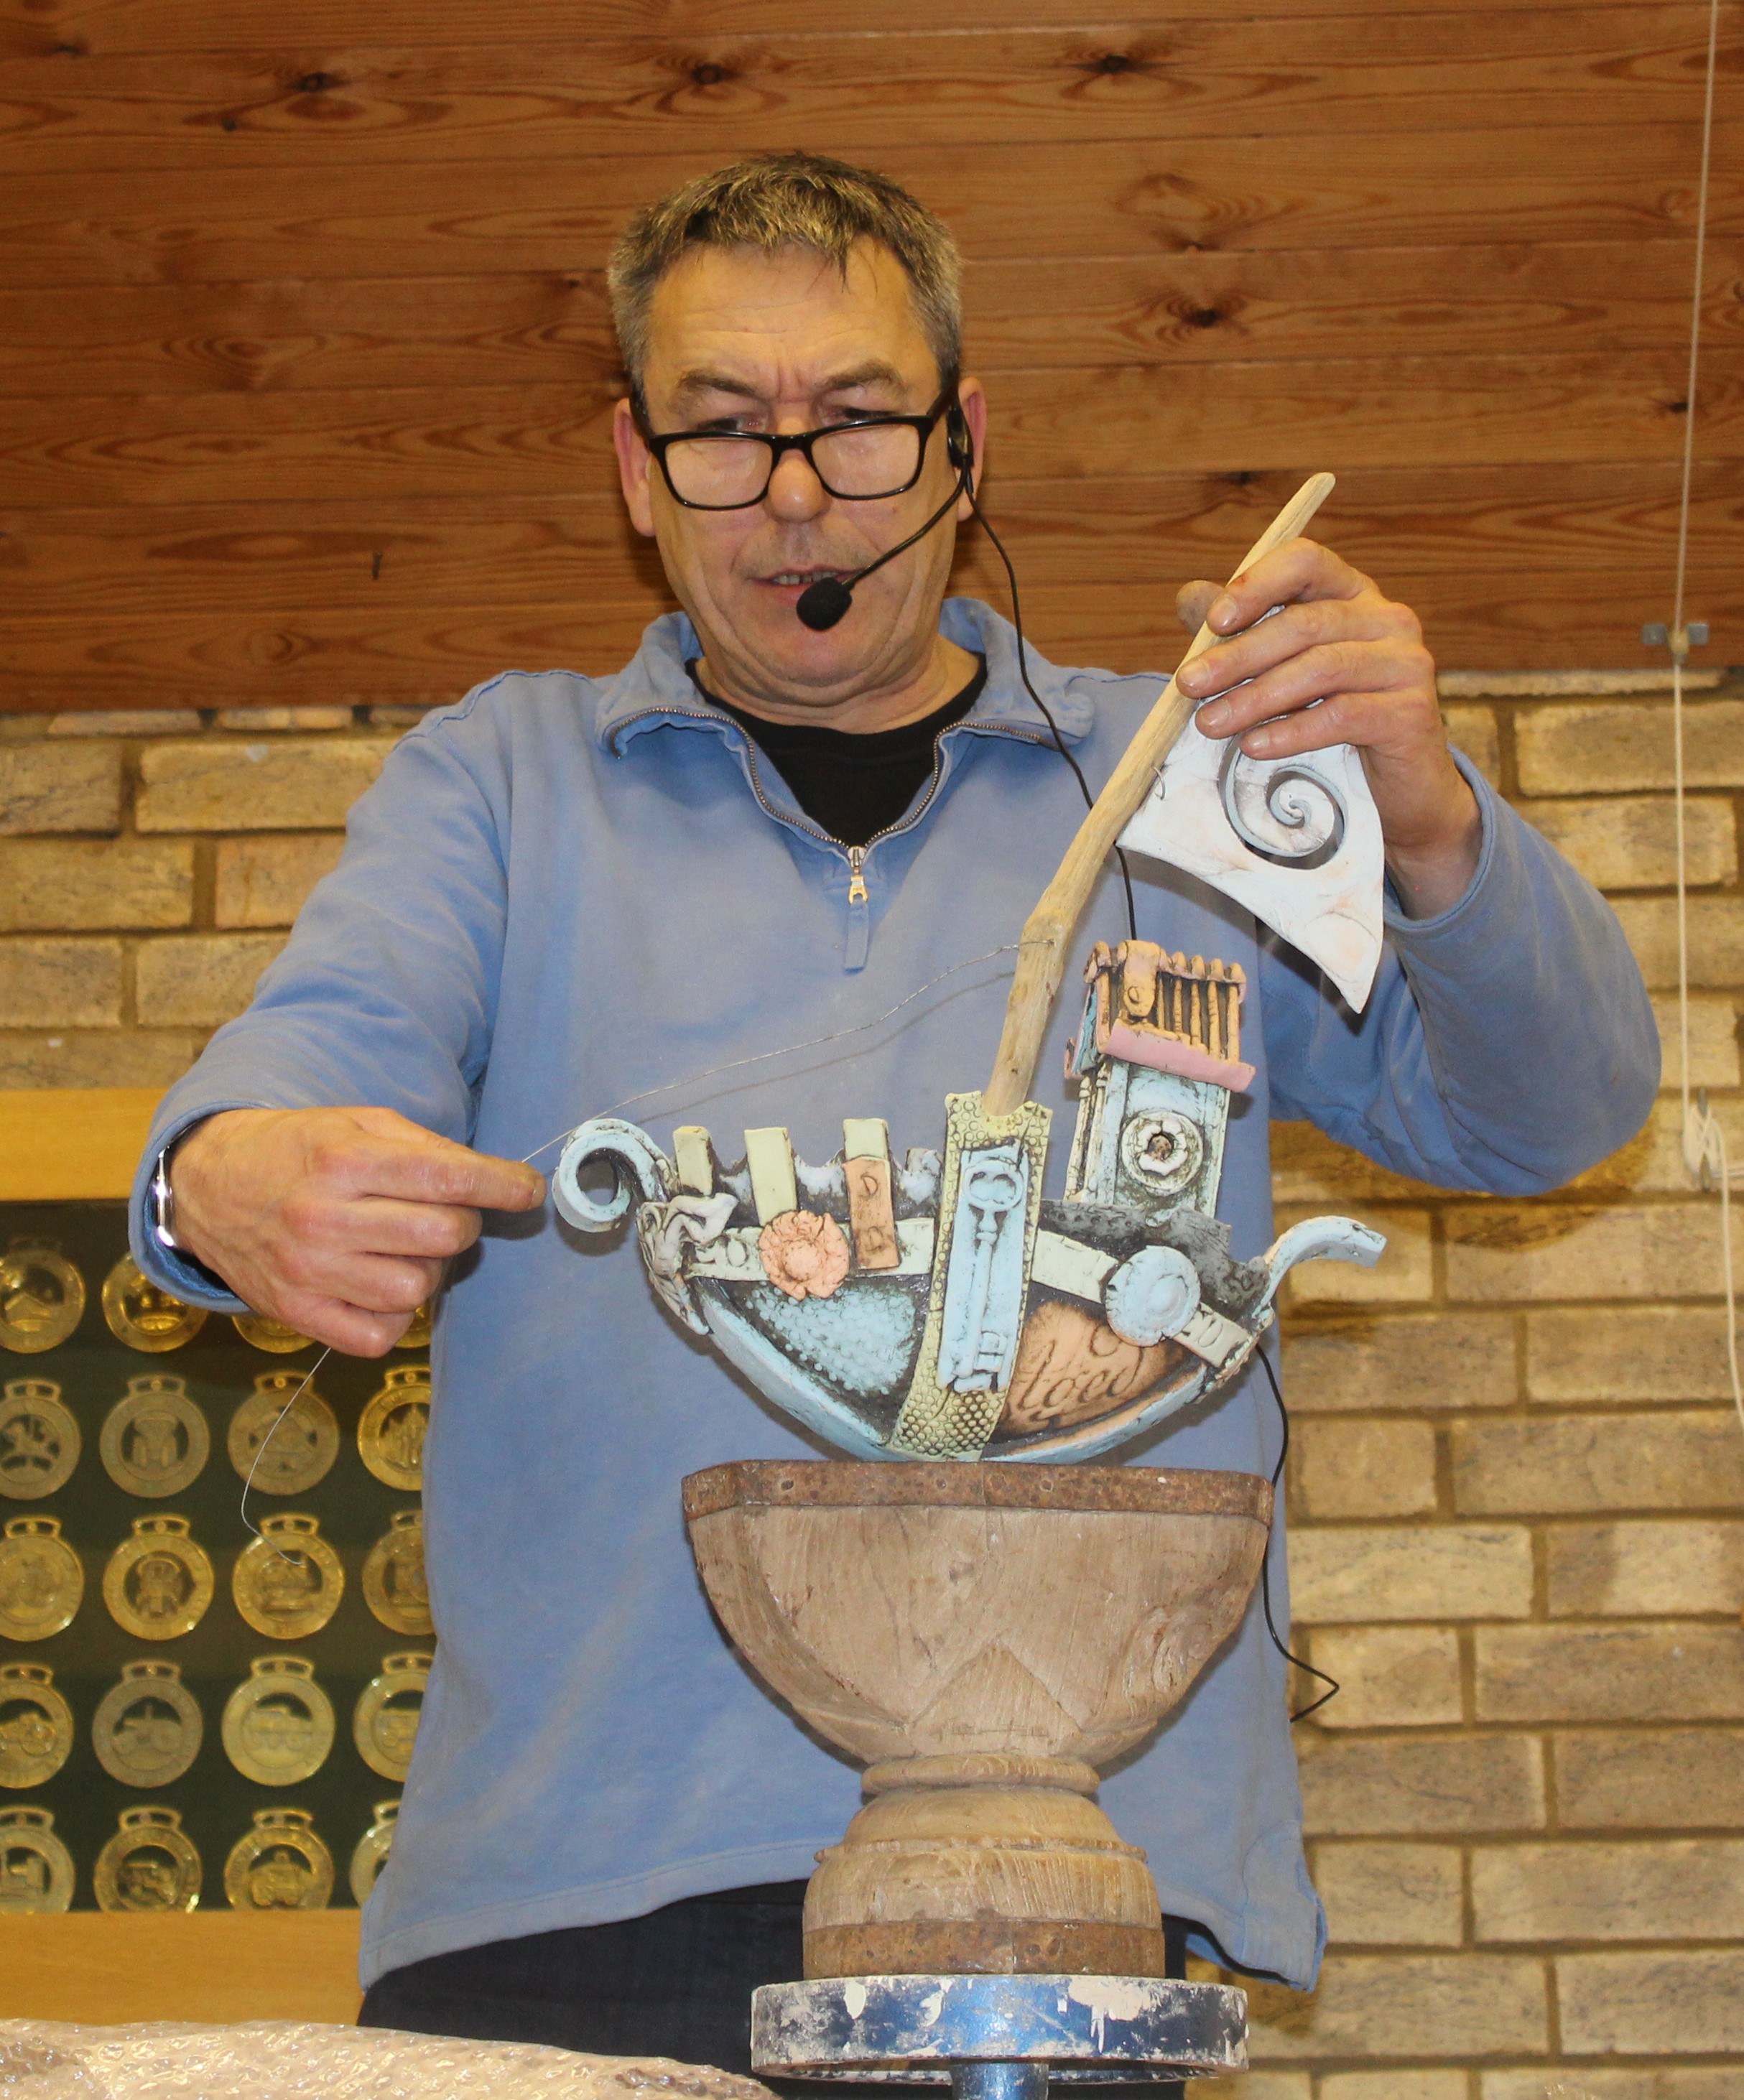
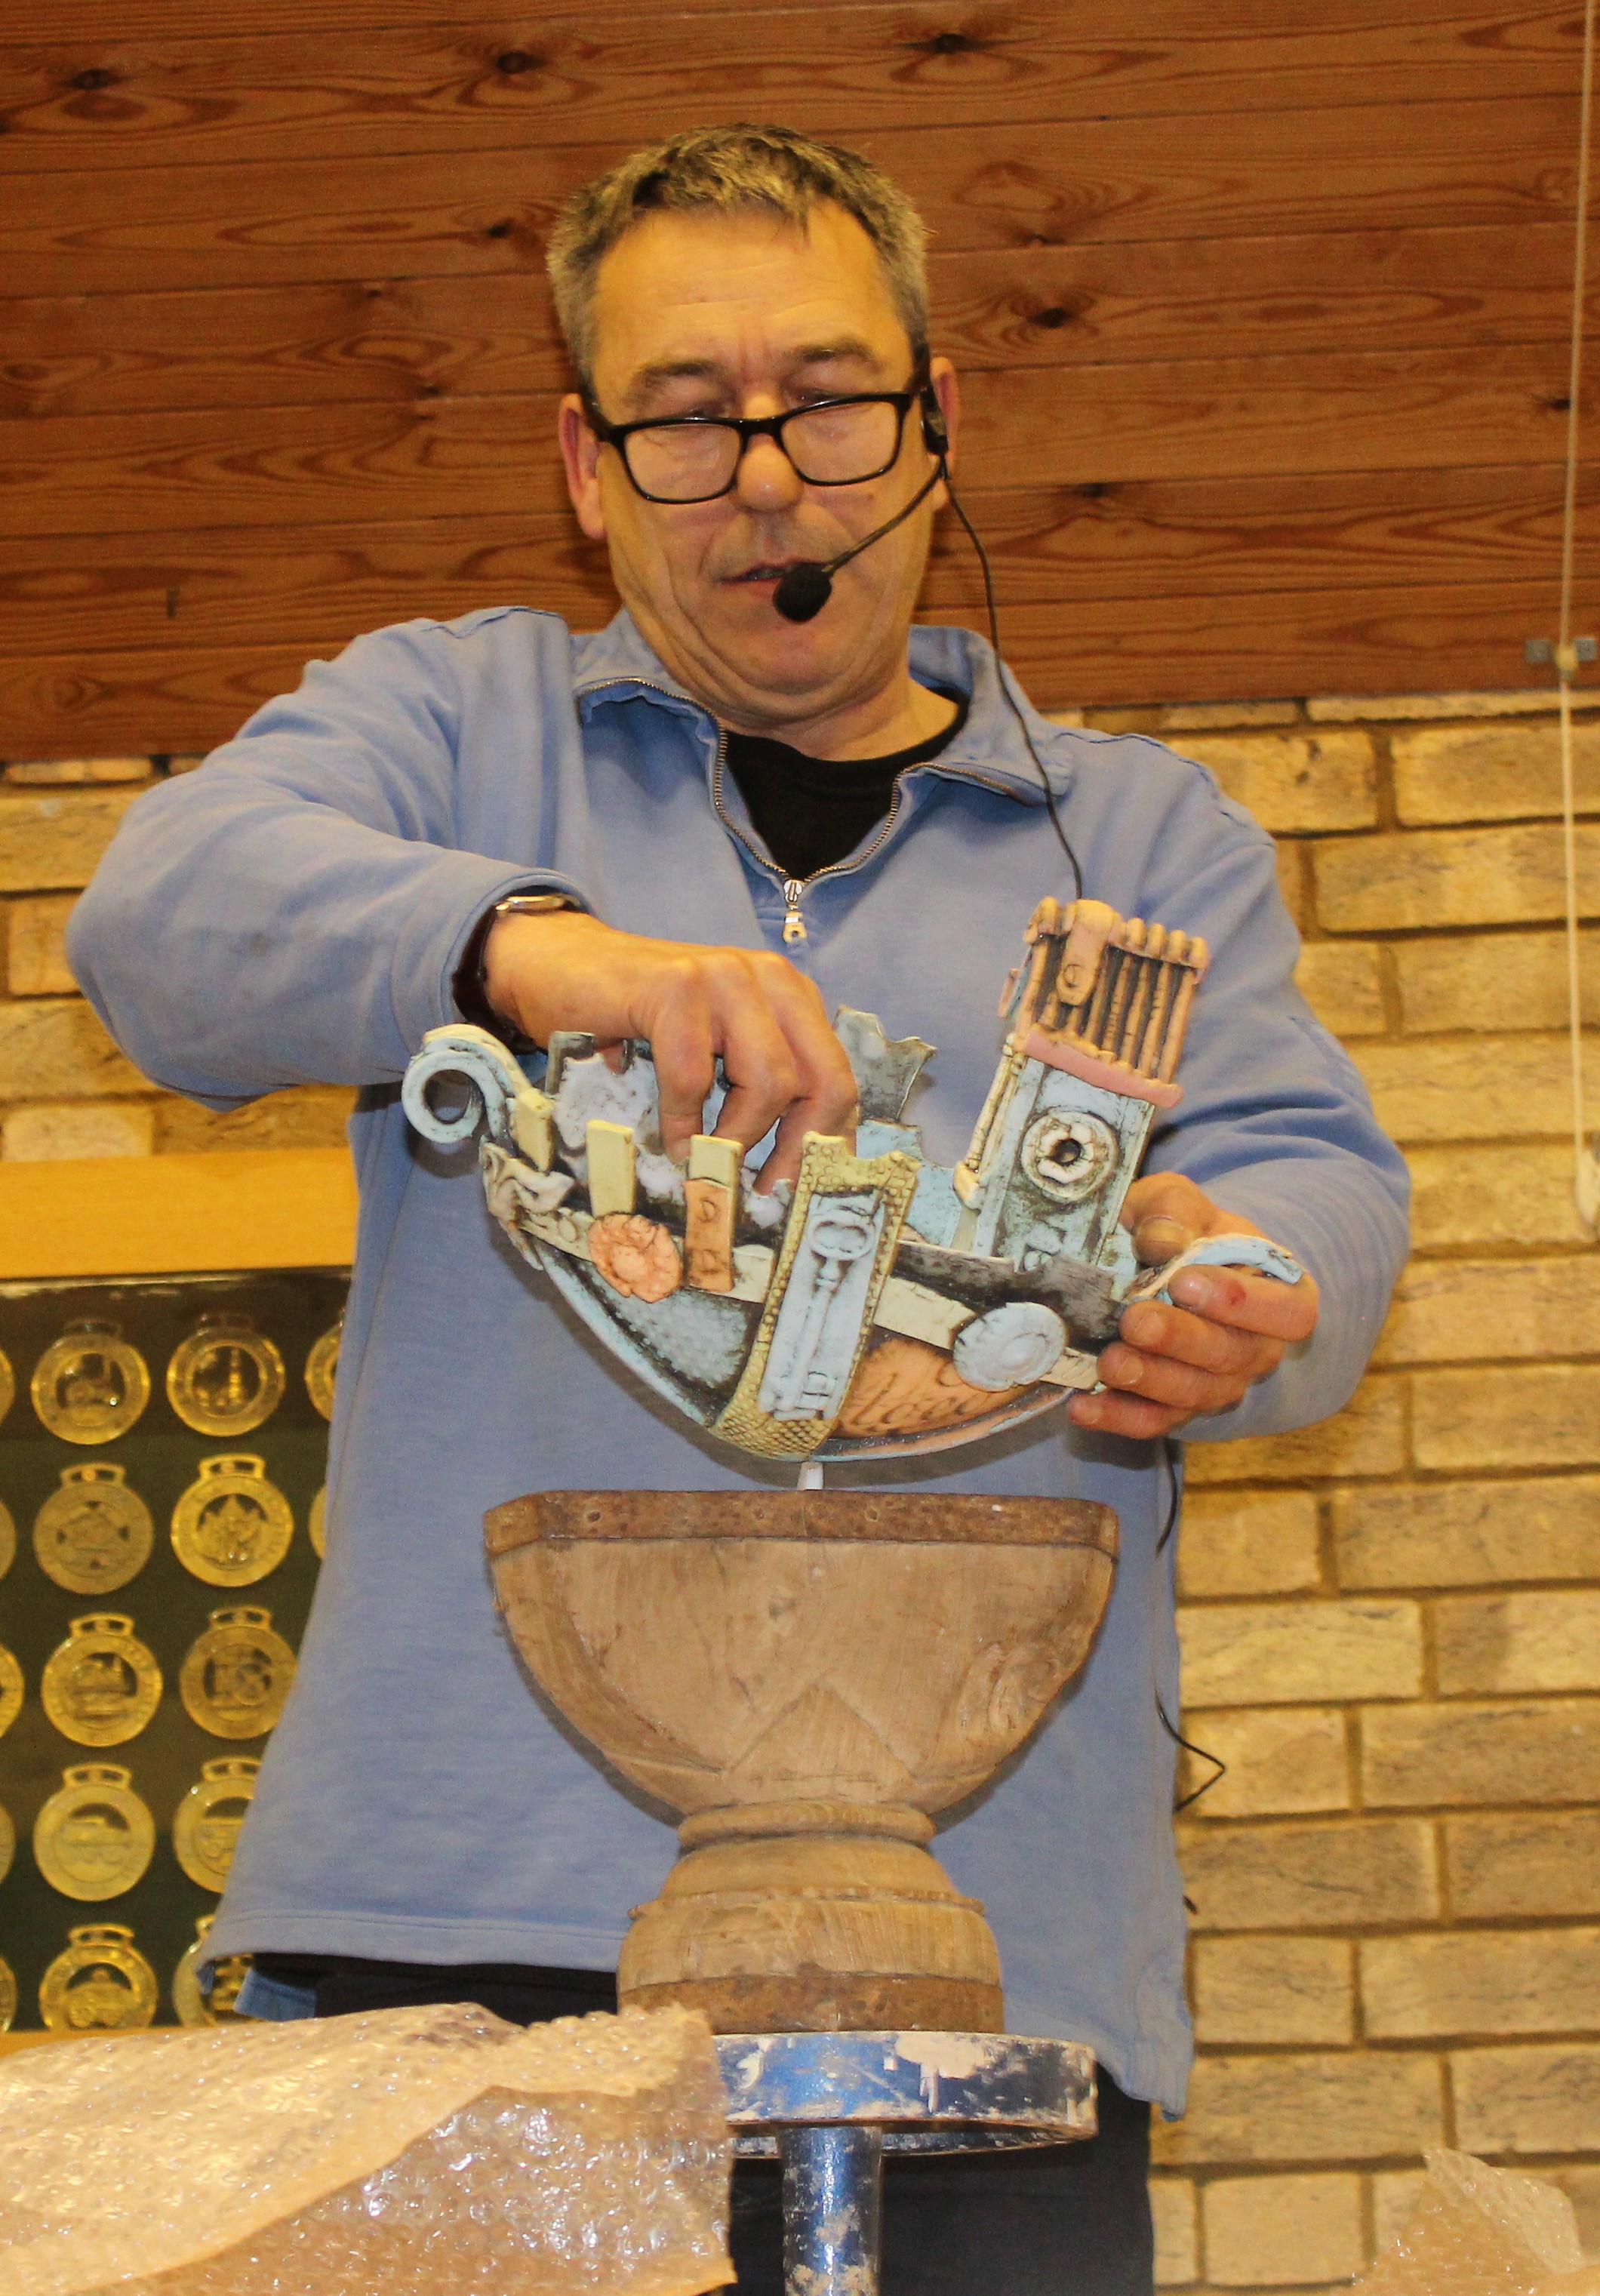
The first thing Mark demonstrated was attaching the sail, mast and base to a completed and fired large boat. First the wooden sail (made from reclaimed wood) is cut into a triangular shape with the spiral emblem cut out, is attached to the mast (a piece of slim driftwood) by reclaimed wire, a small drill being used to make the necessary holes in both. The driftwood mast then sits neatly in the clay collar in the boat’s deck – which has been fashioned around Mark’s finger, (much easier than fussy mathematical calculations) if the mast is slightly too fat the wood is belt sanded to fit. The wooden mount for this particular boat had been found in a reclamation yard (Mark liked the shape) and complimented the shape of the boat perfectly, a short wooden dowel pin with PVA glue is used to secure the boat to its host.
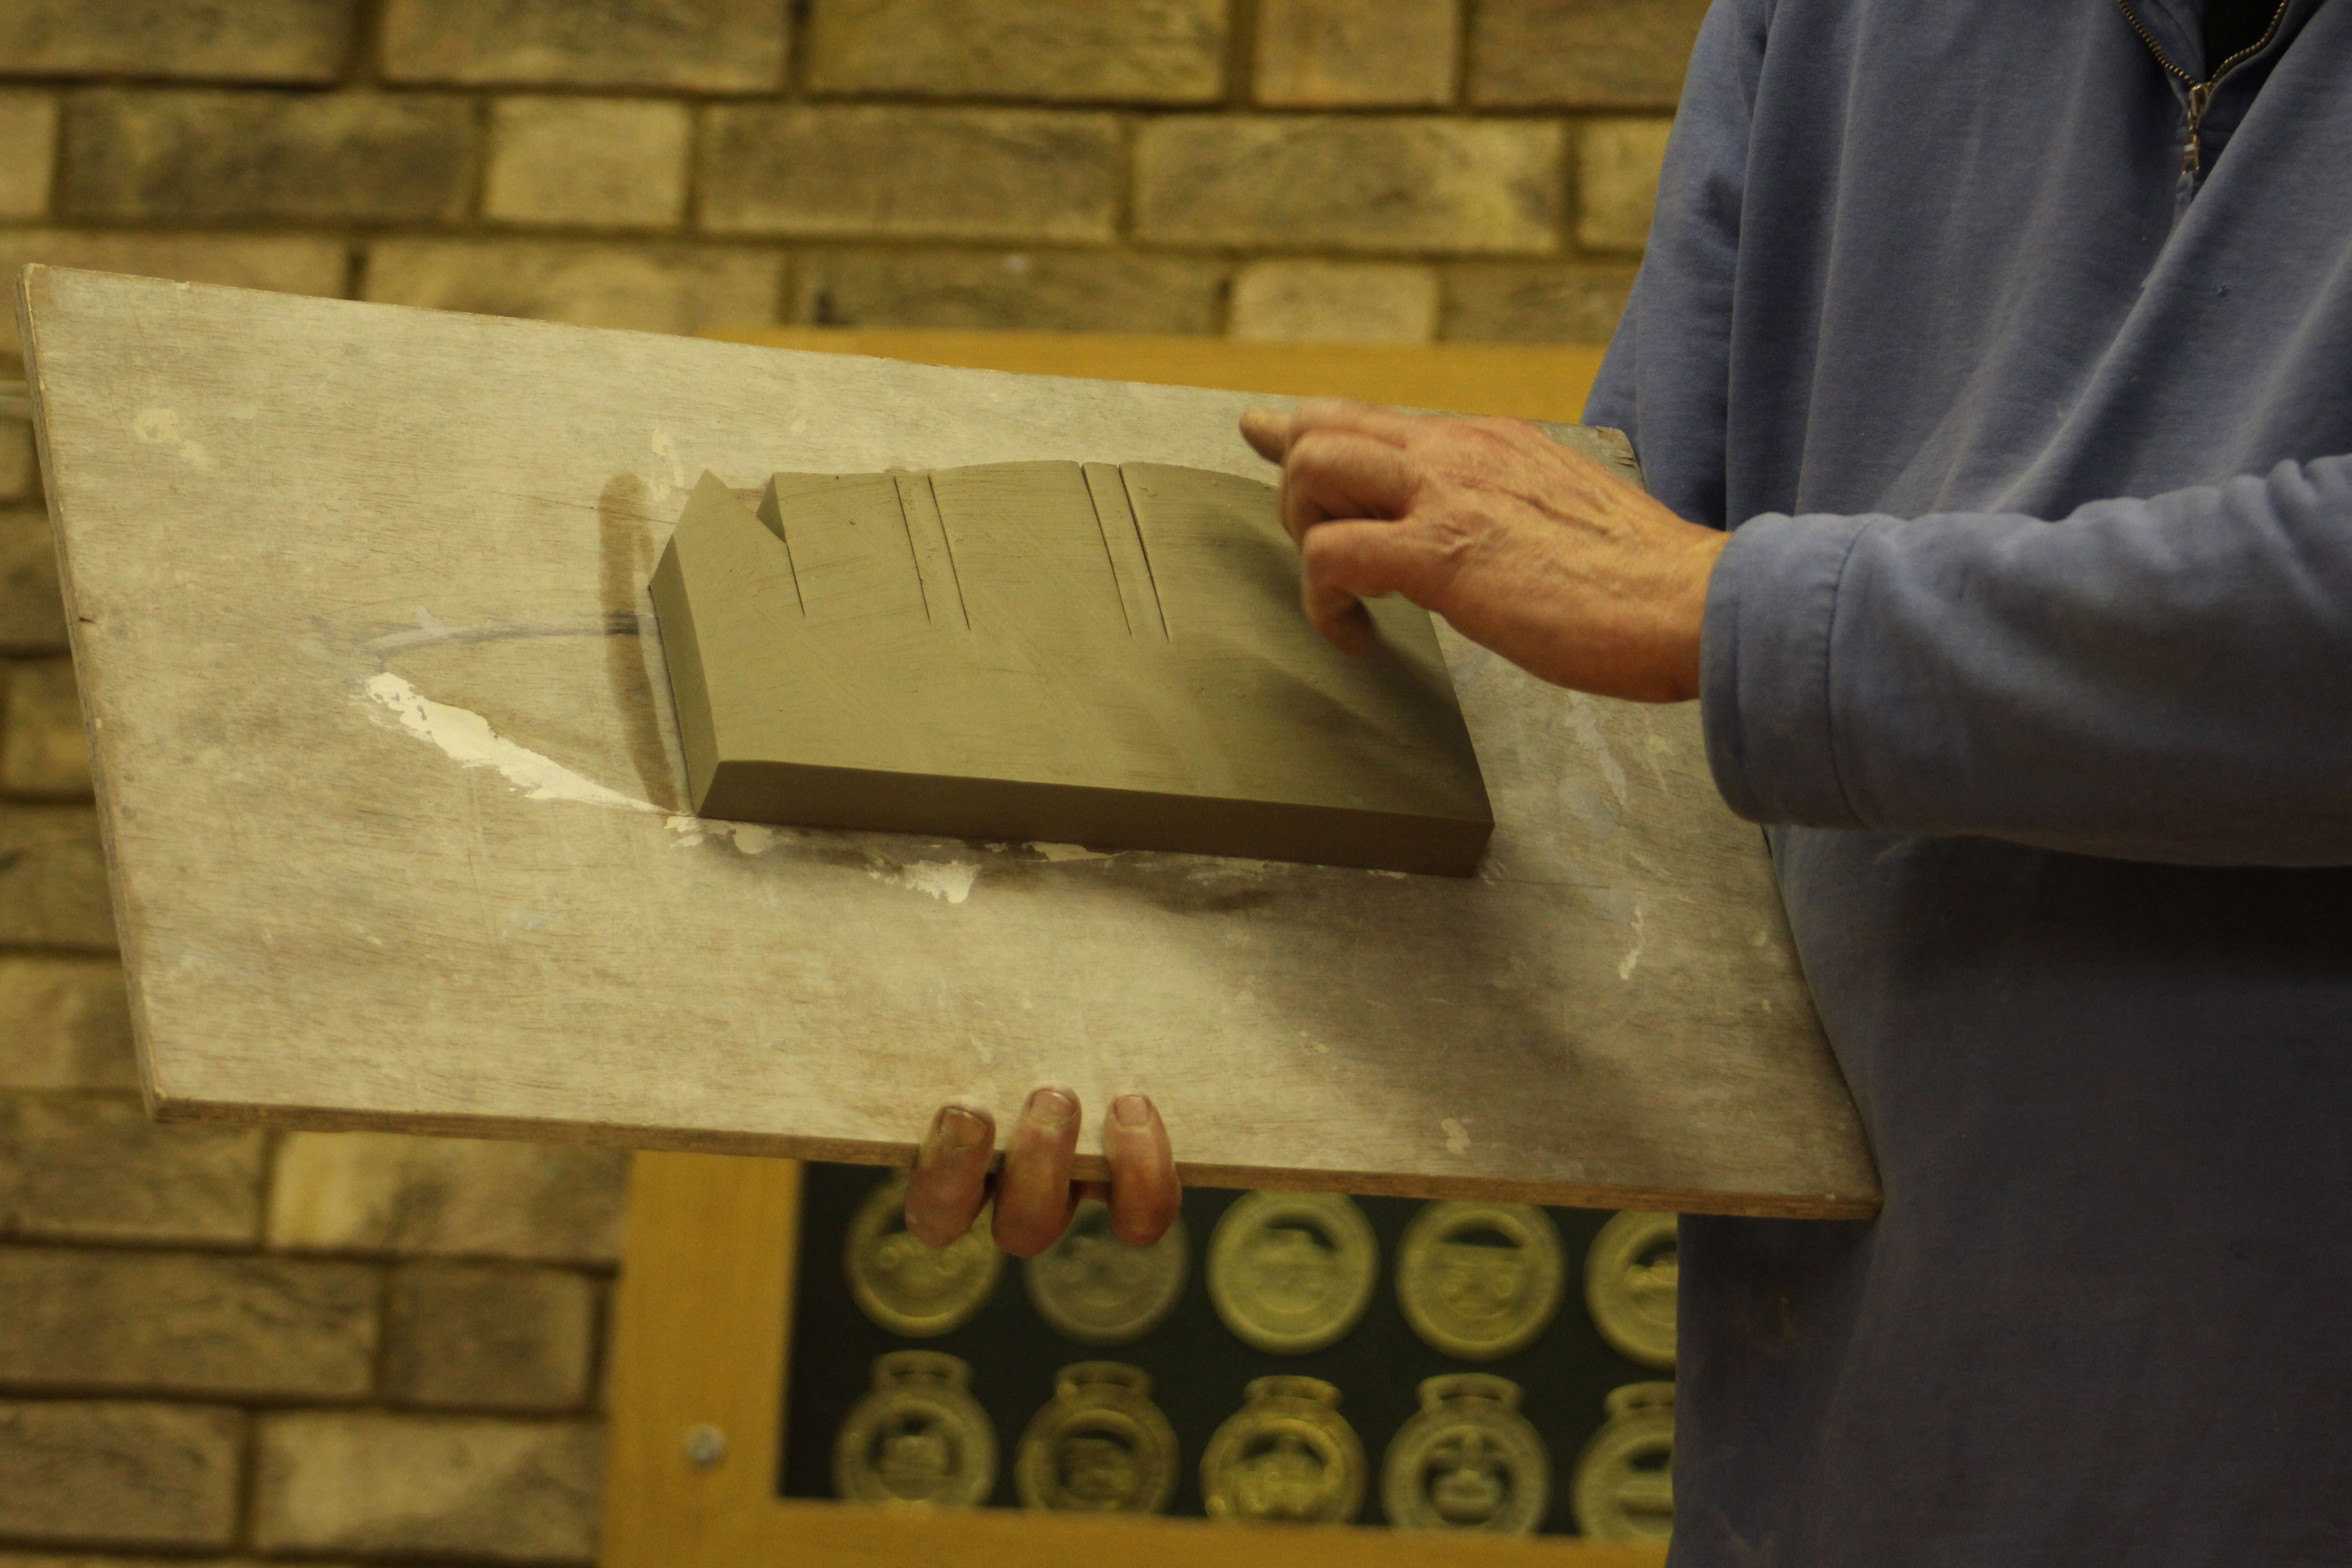
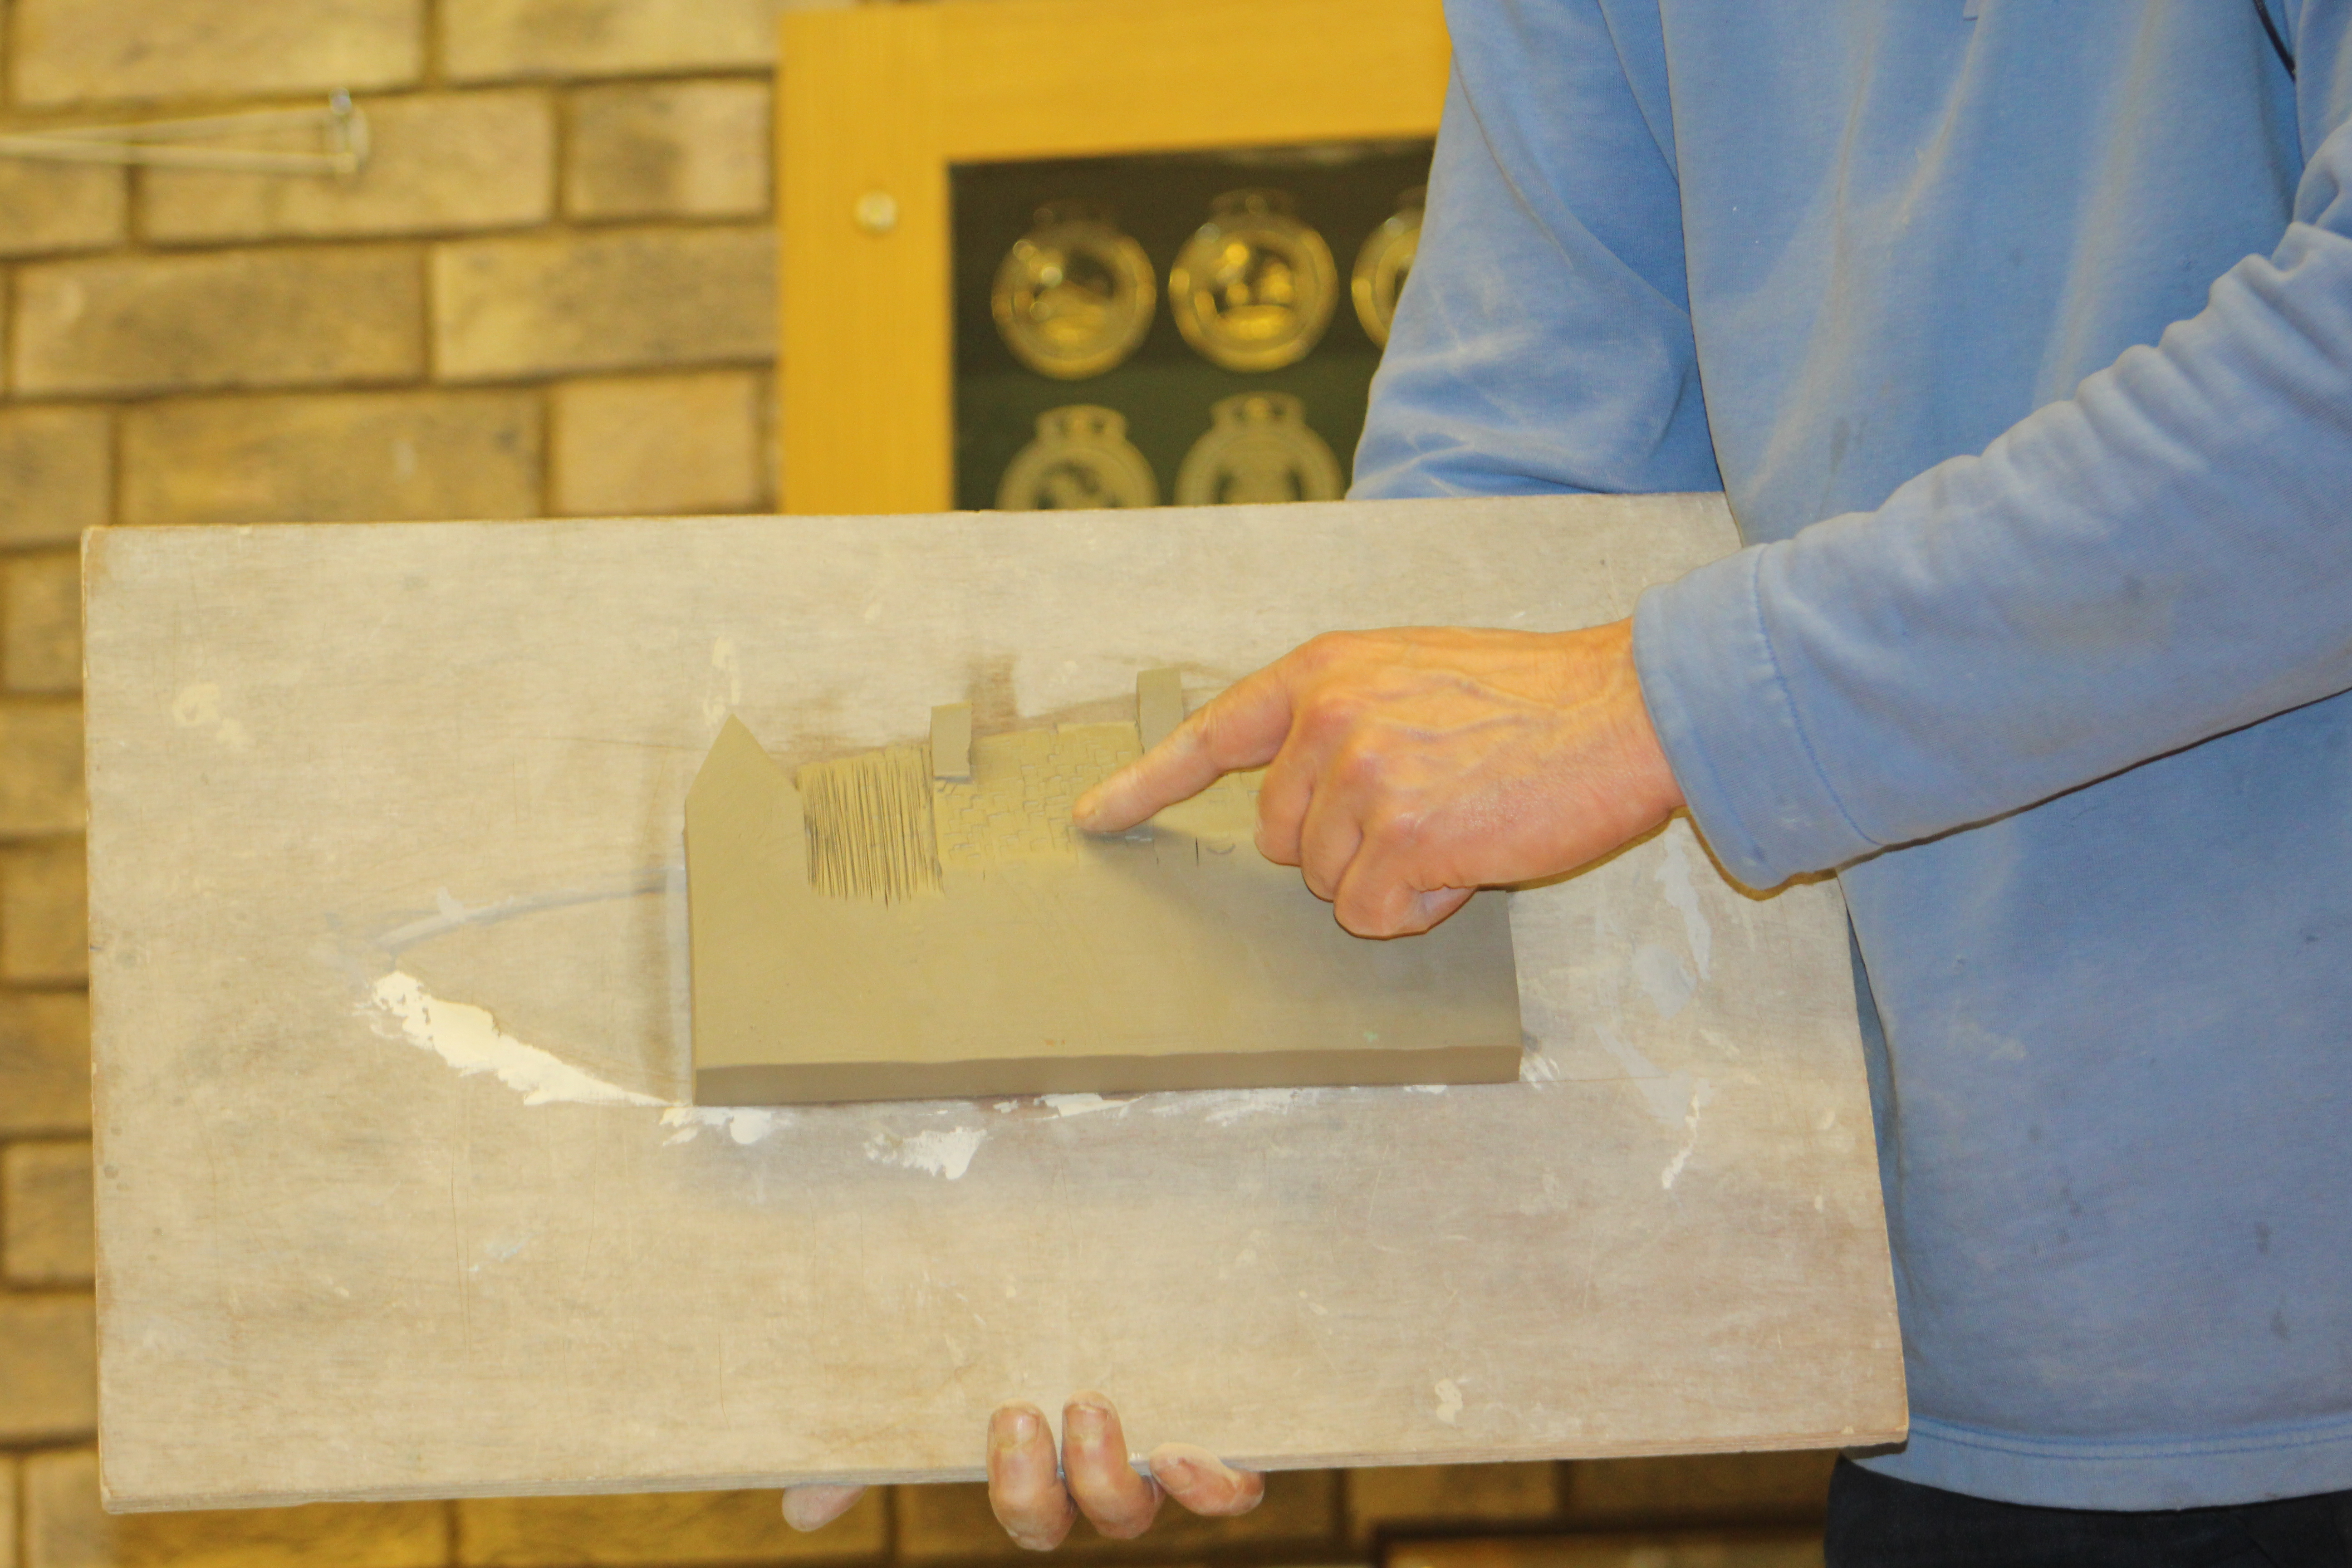
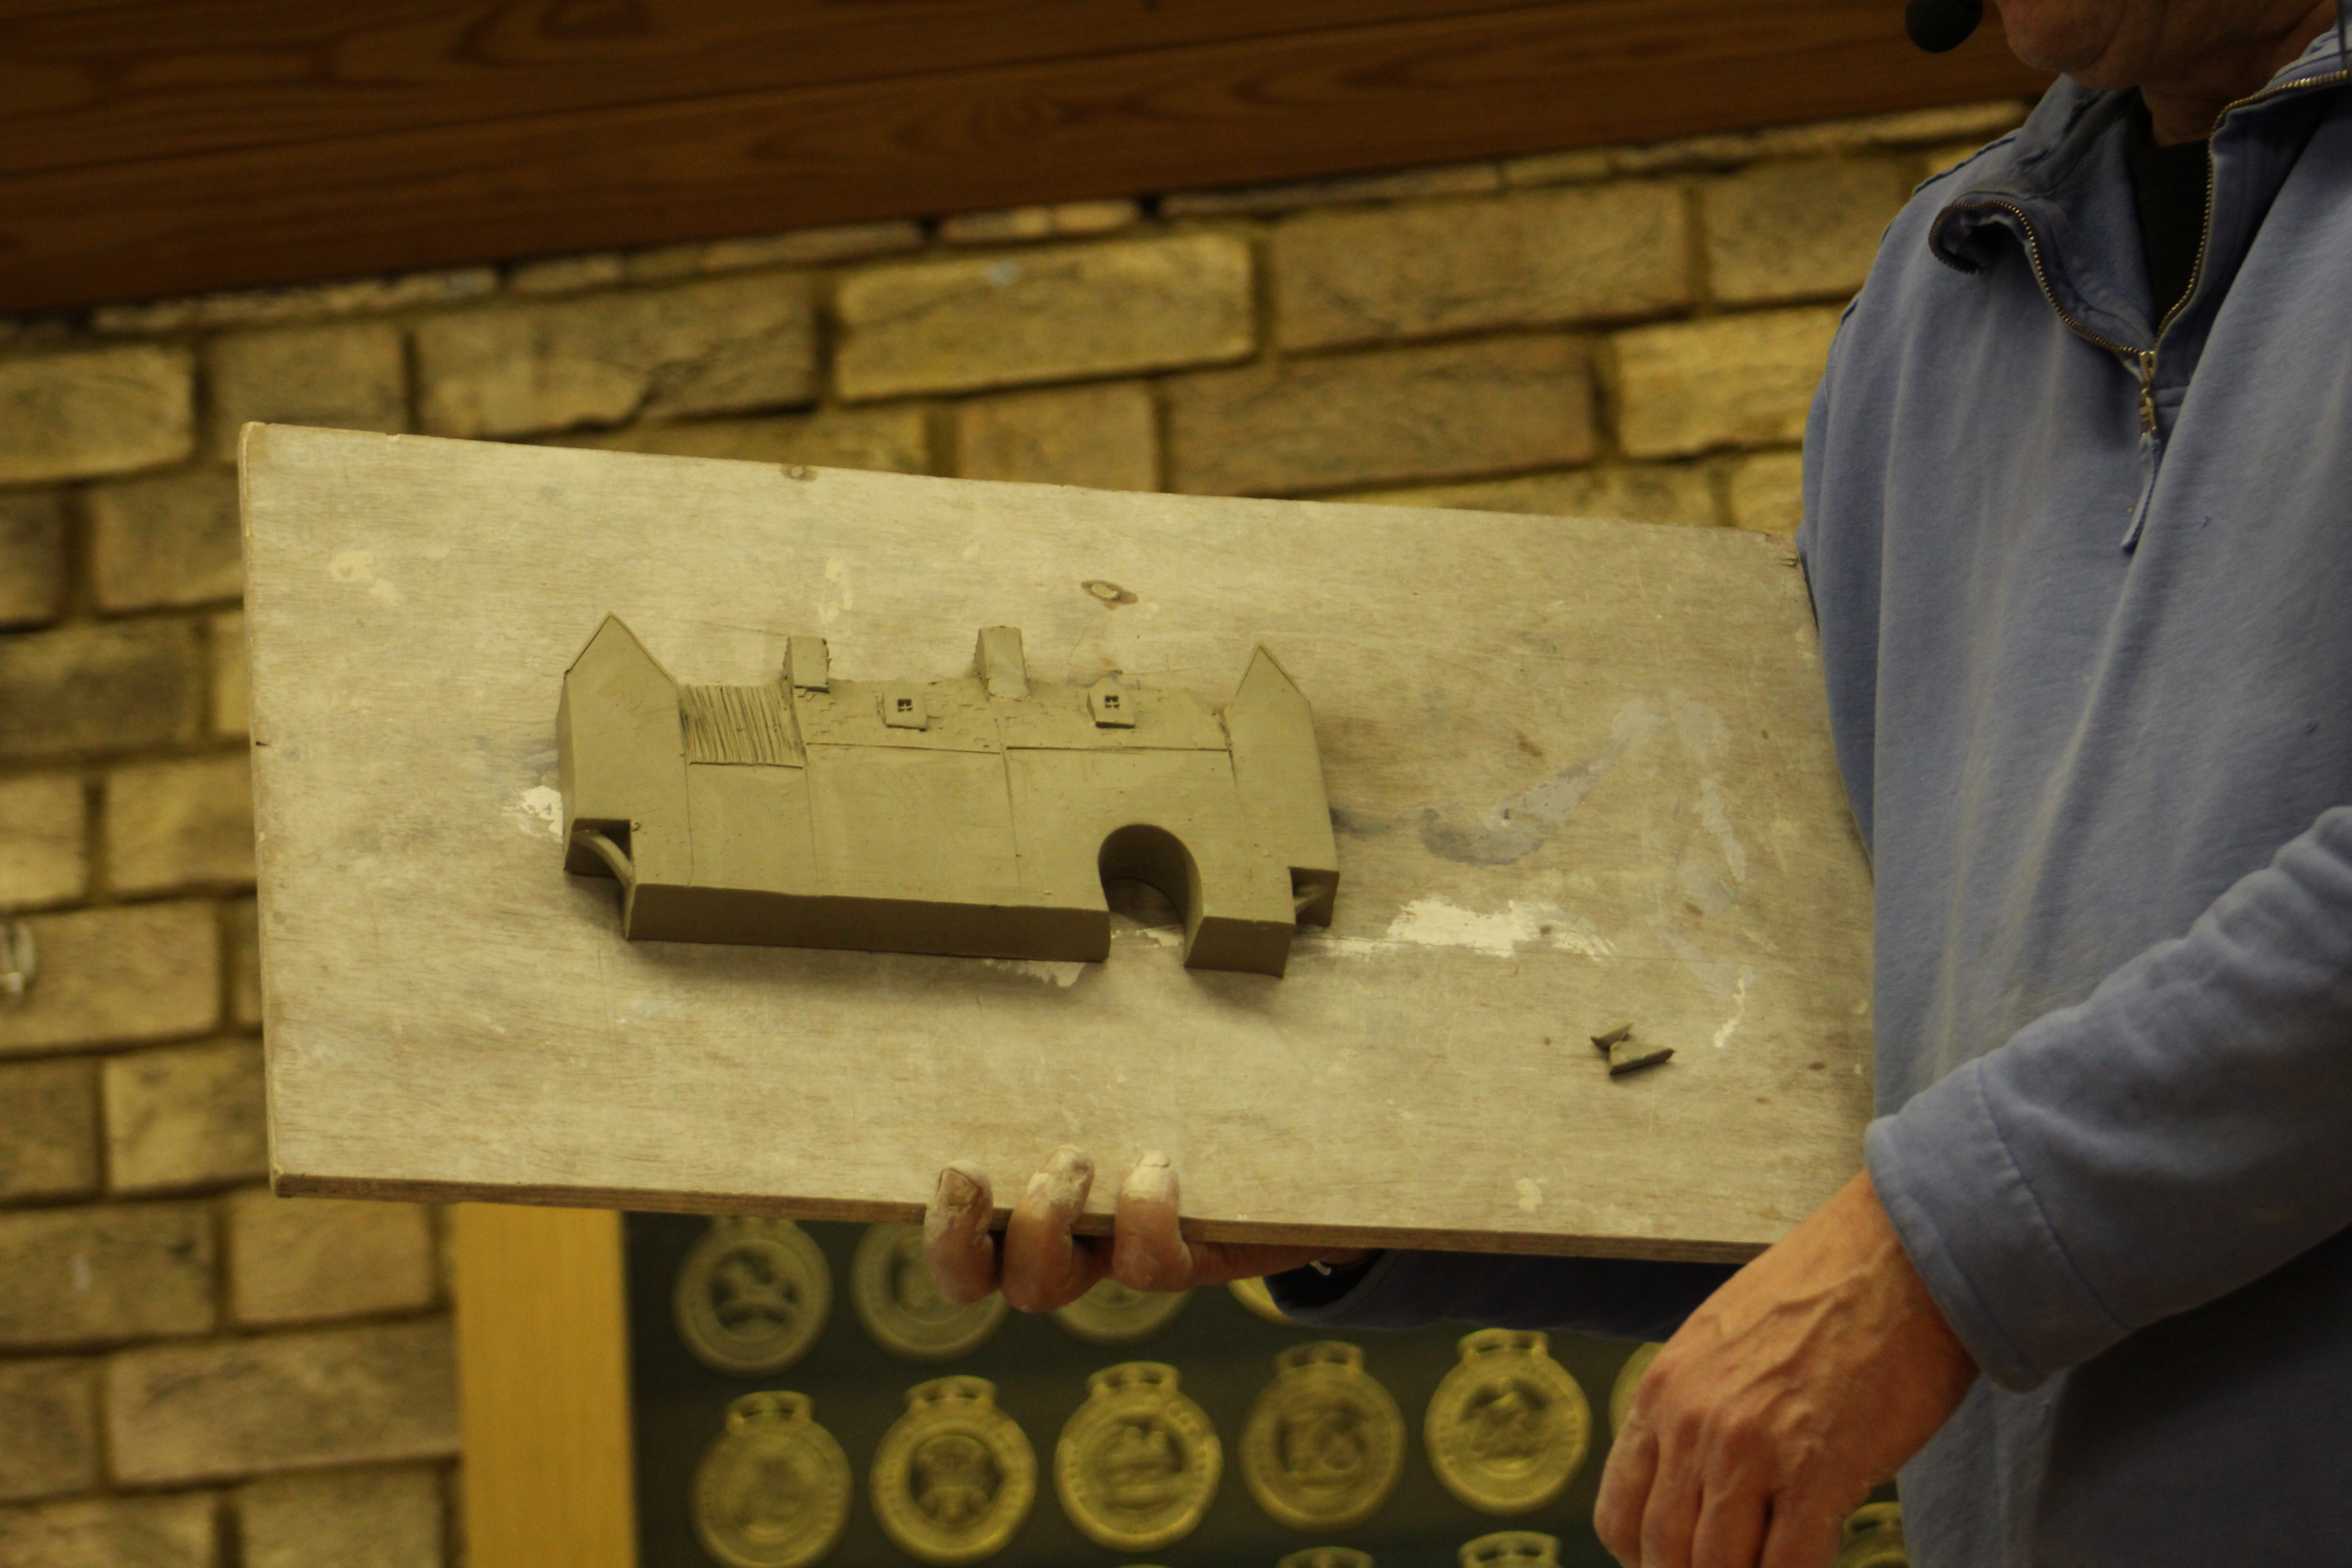
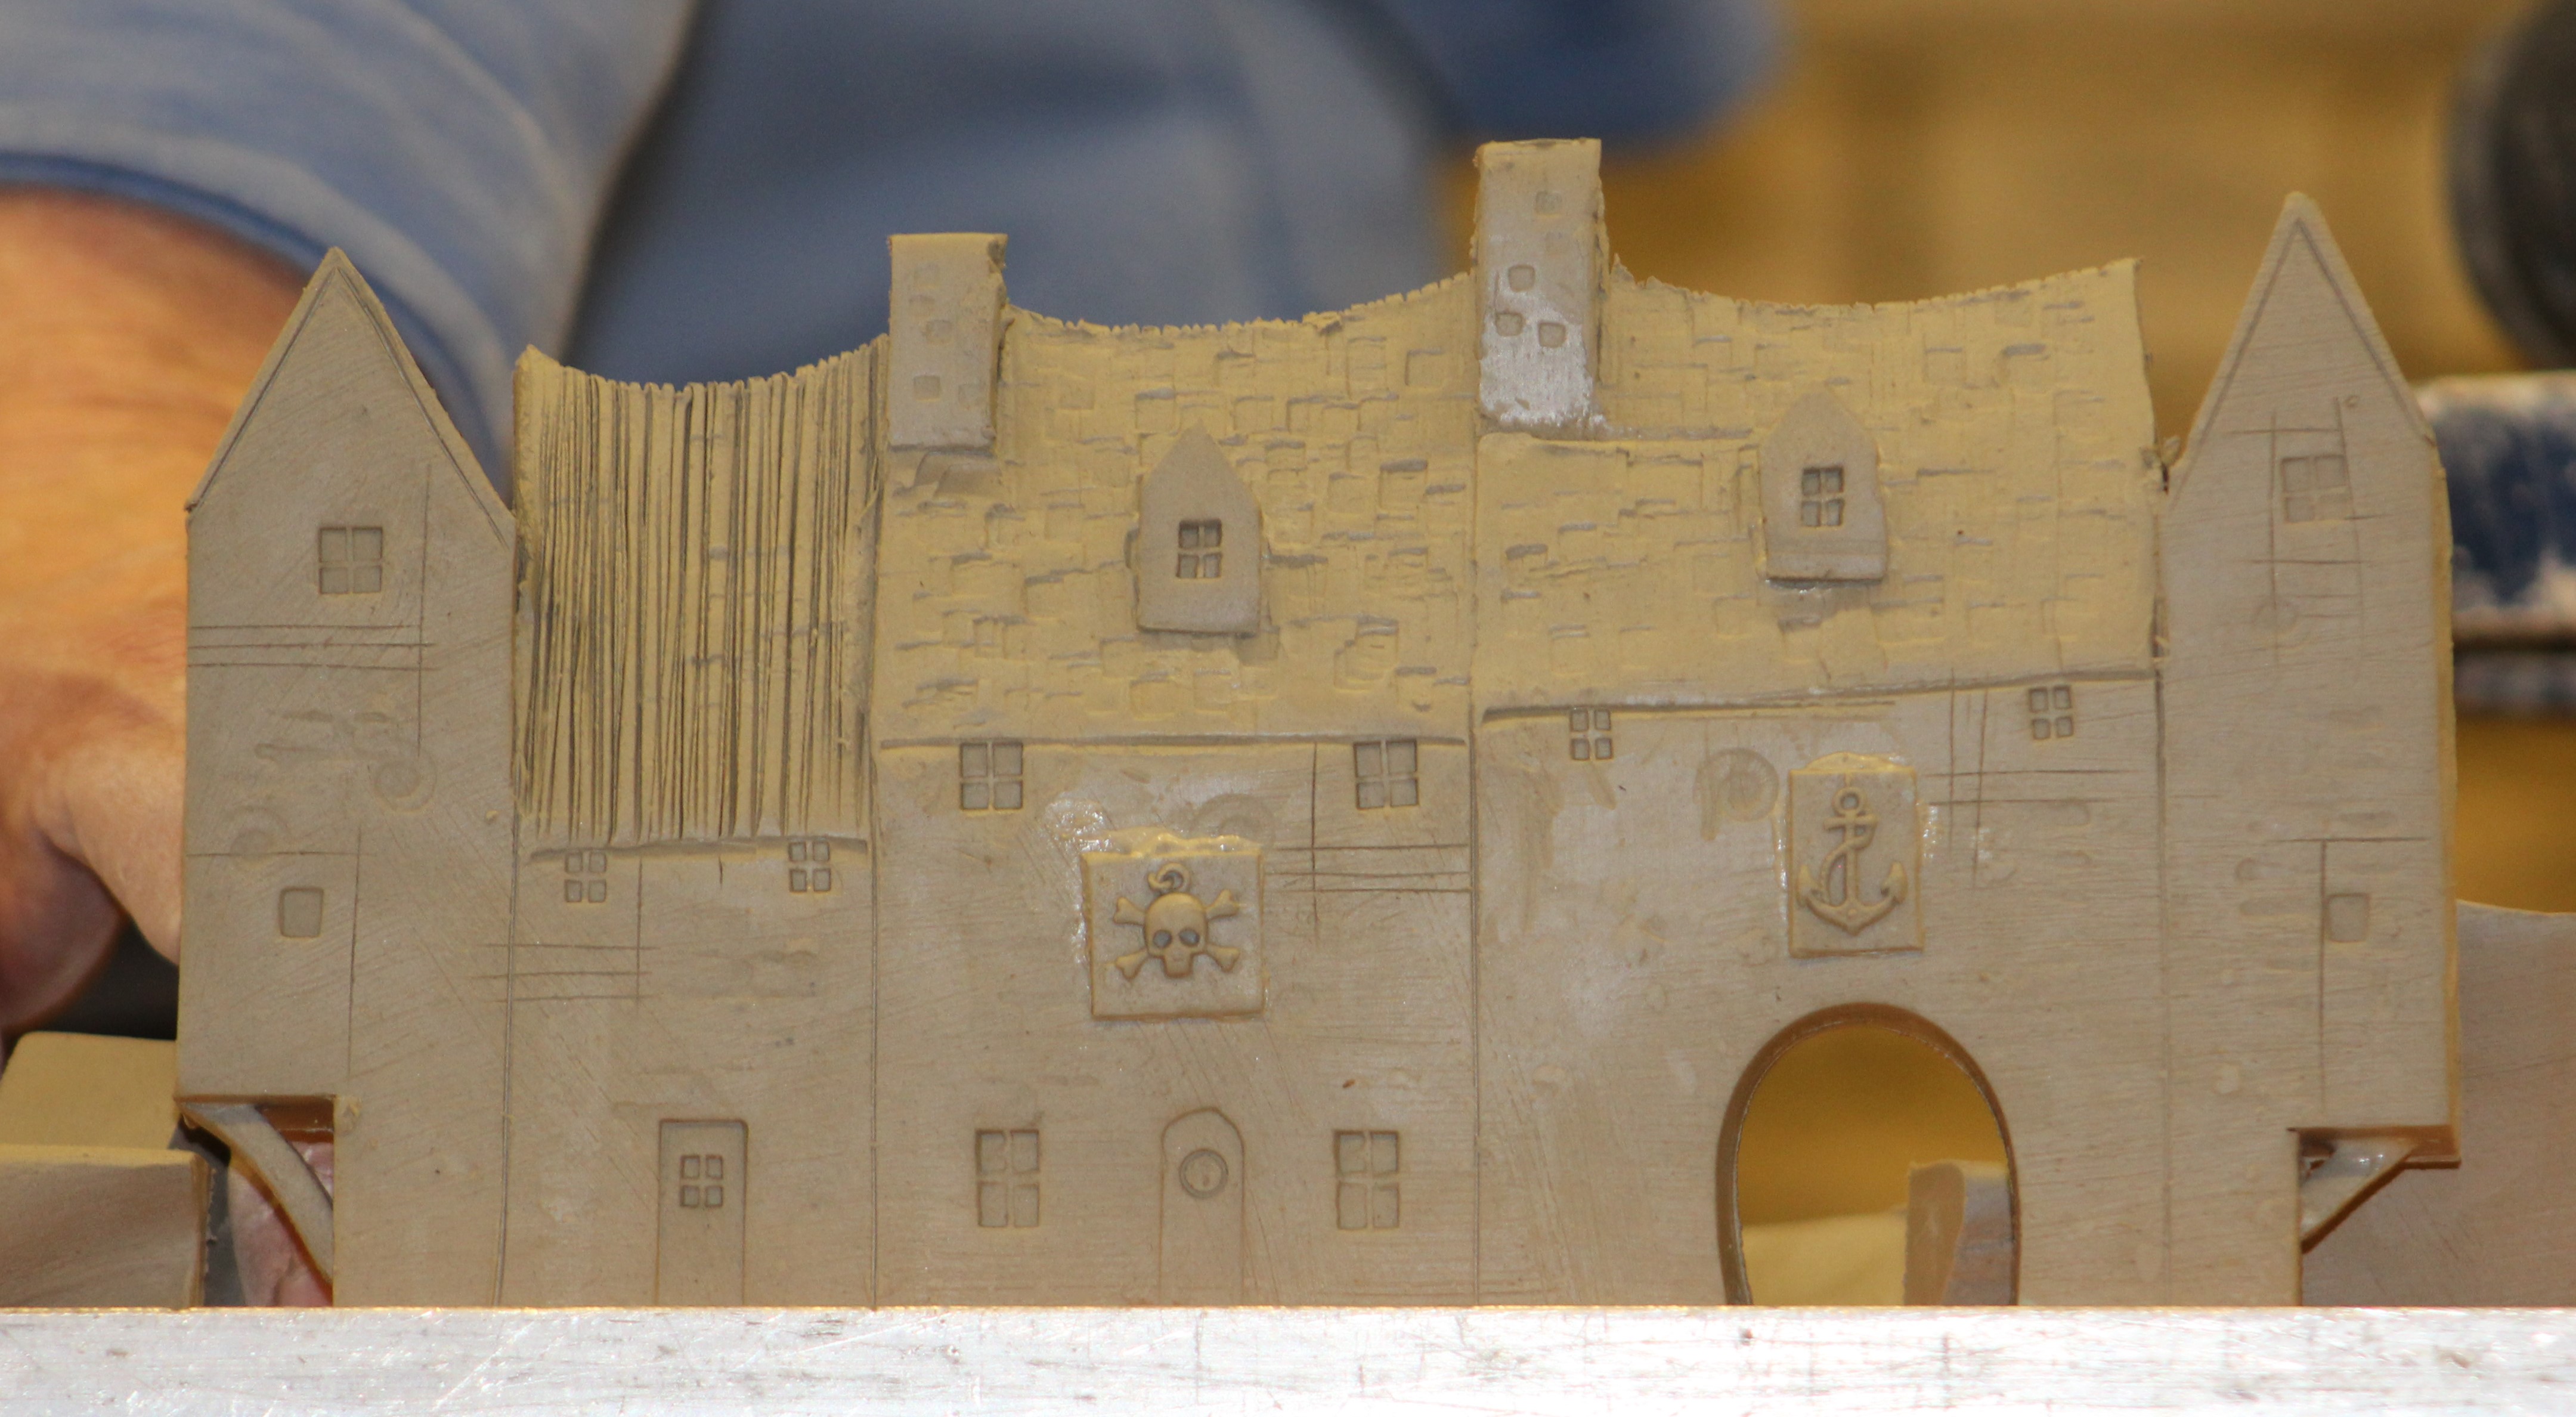
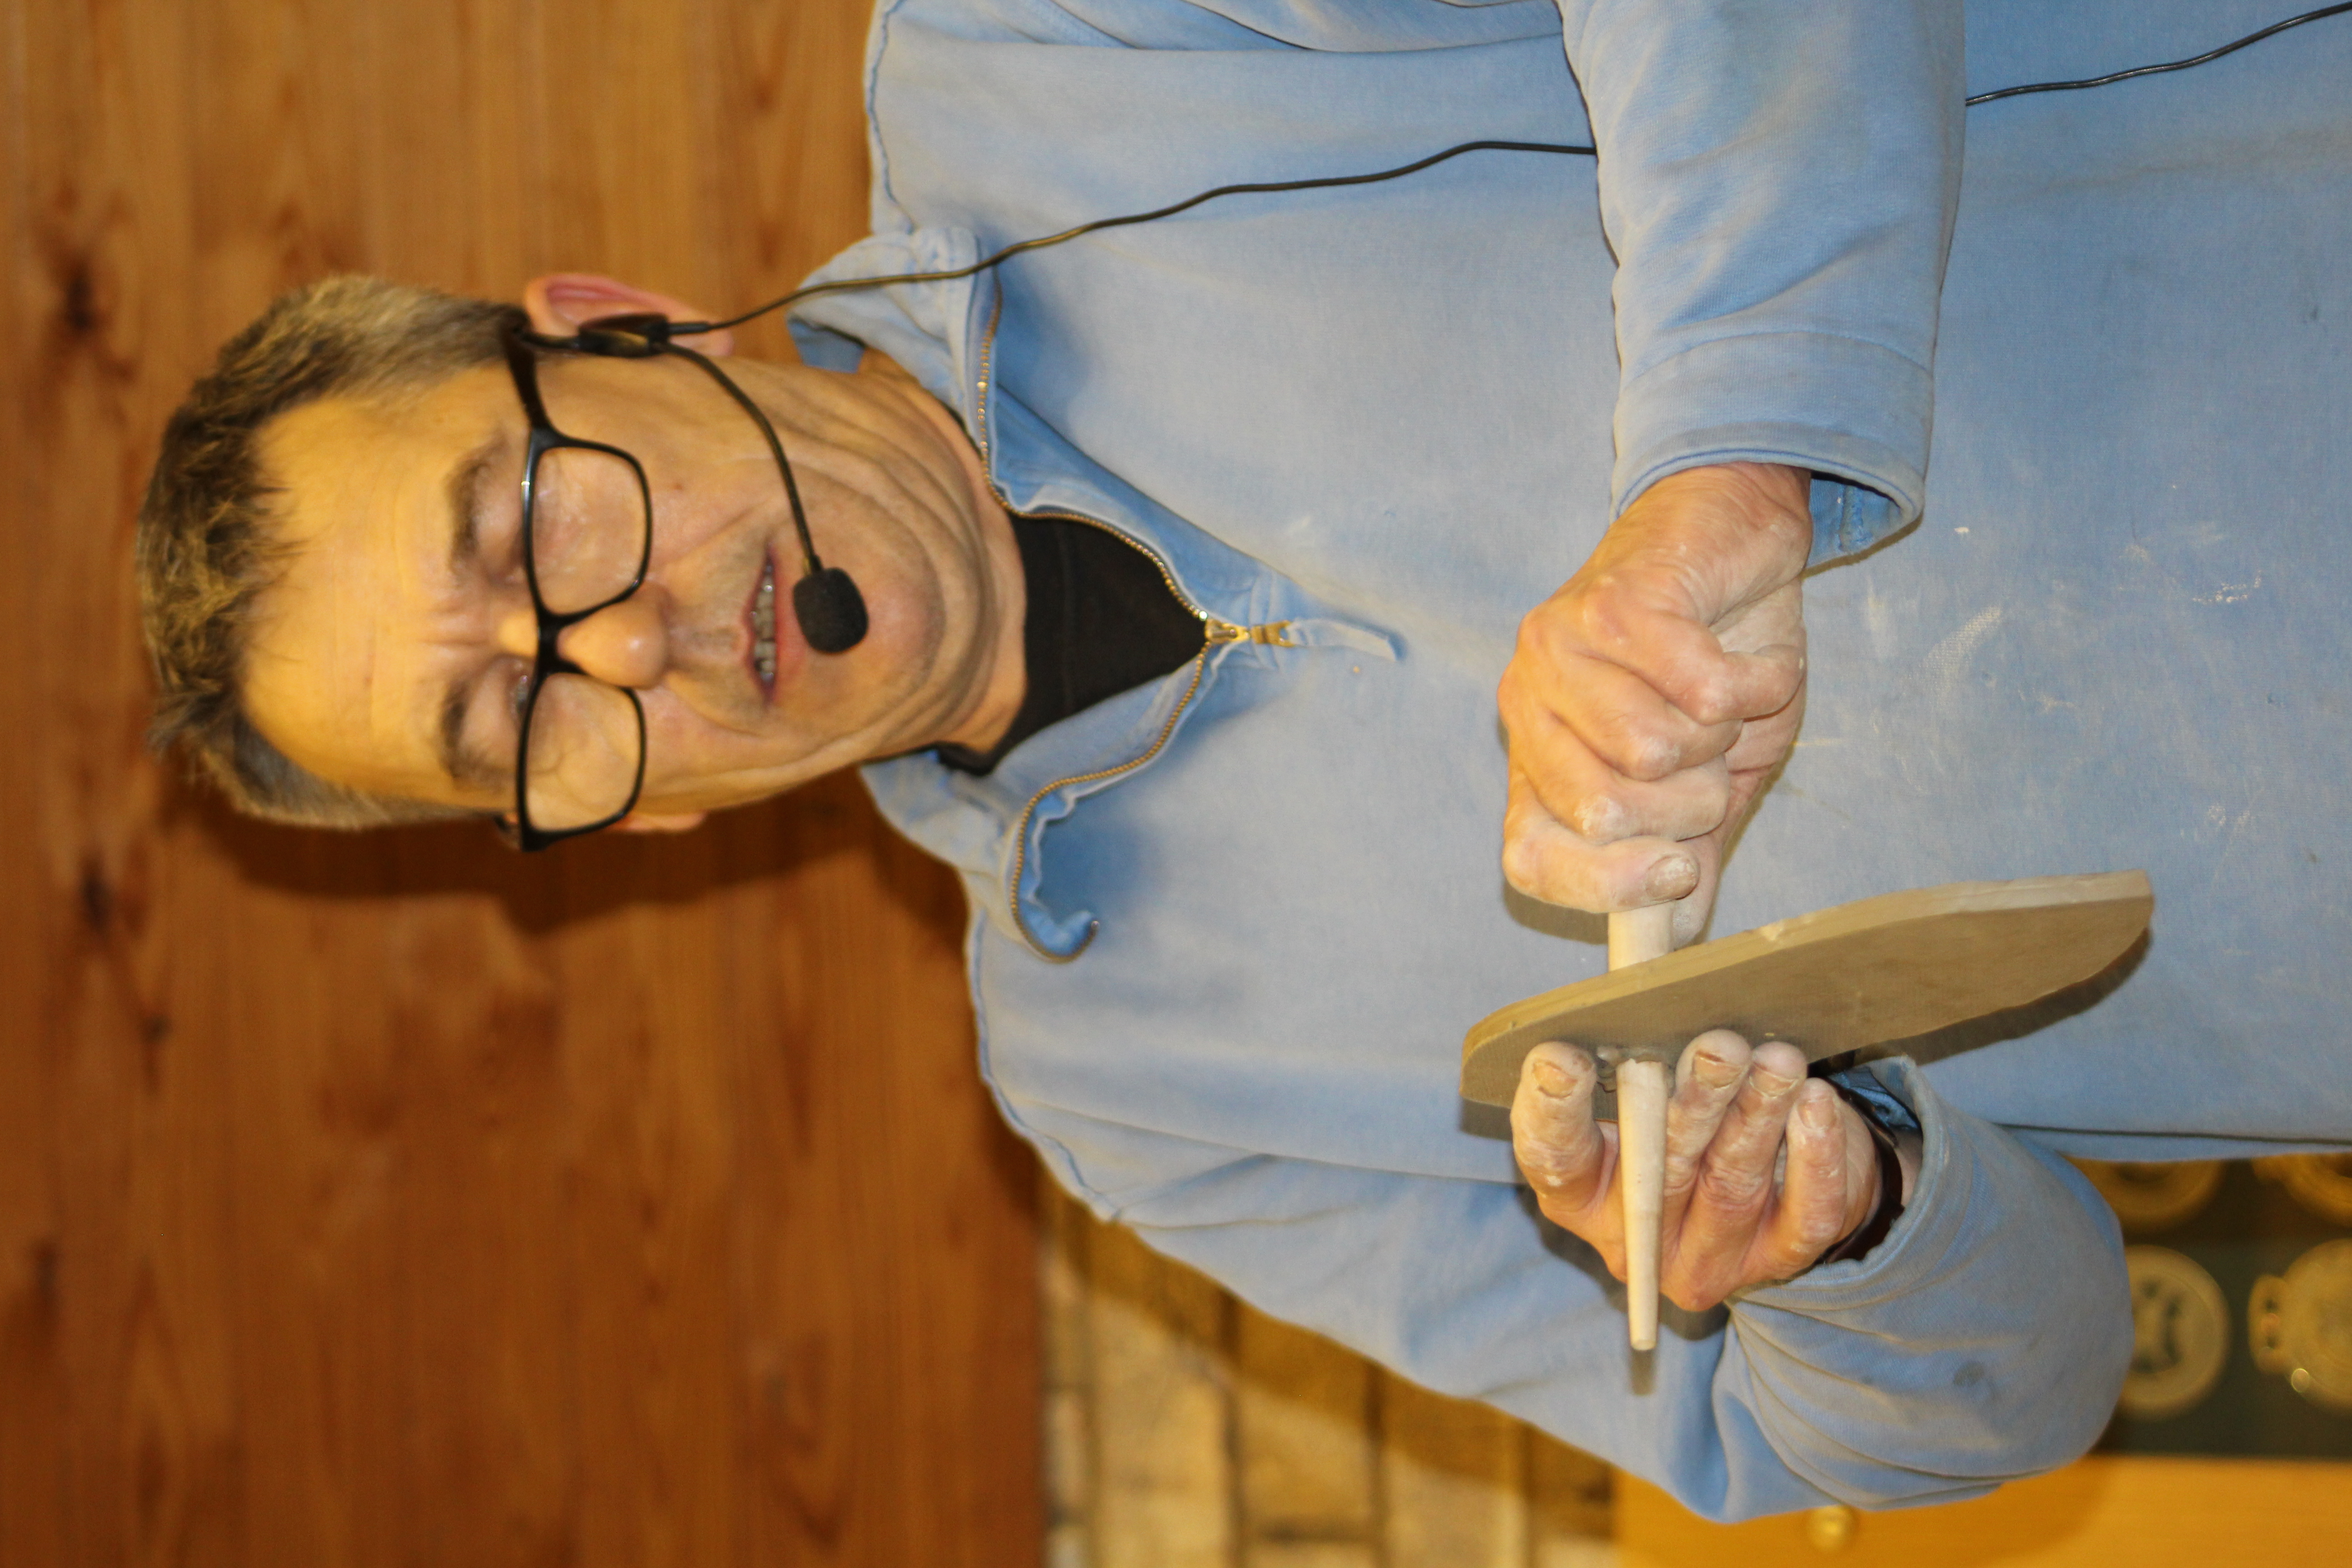
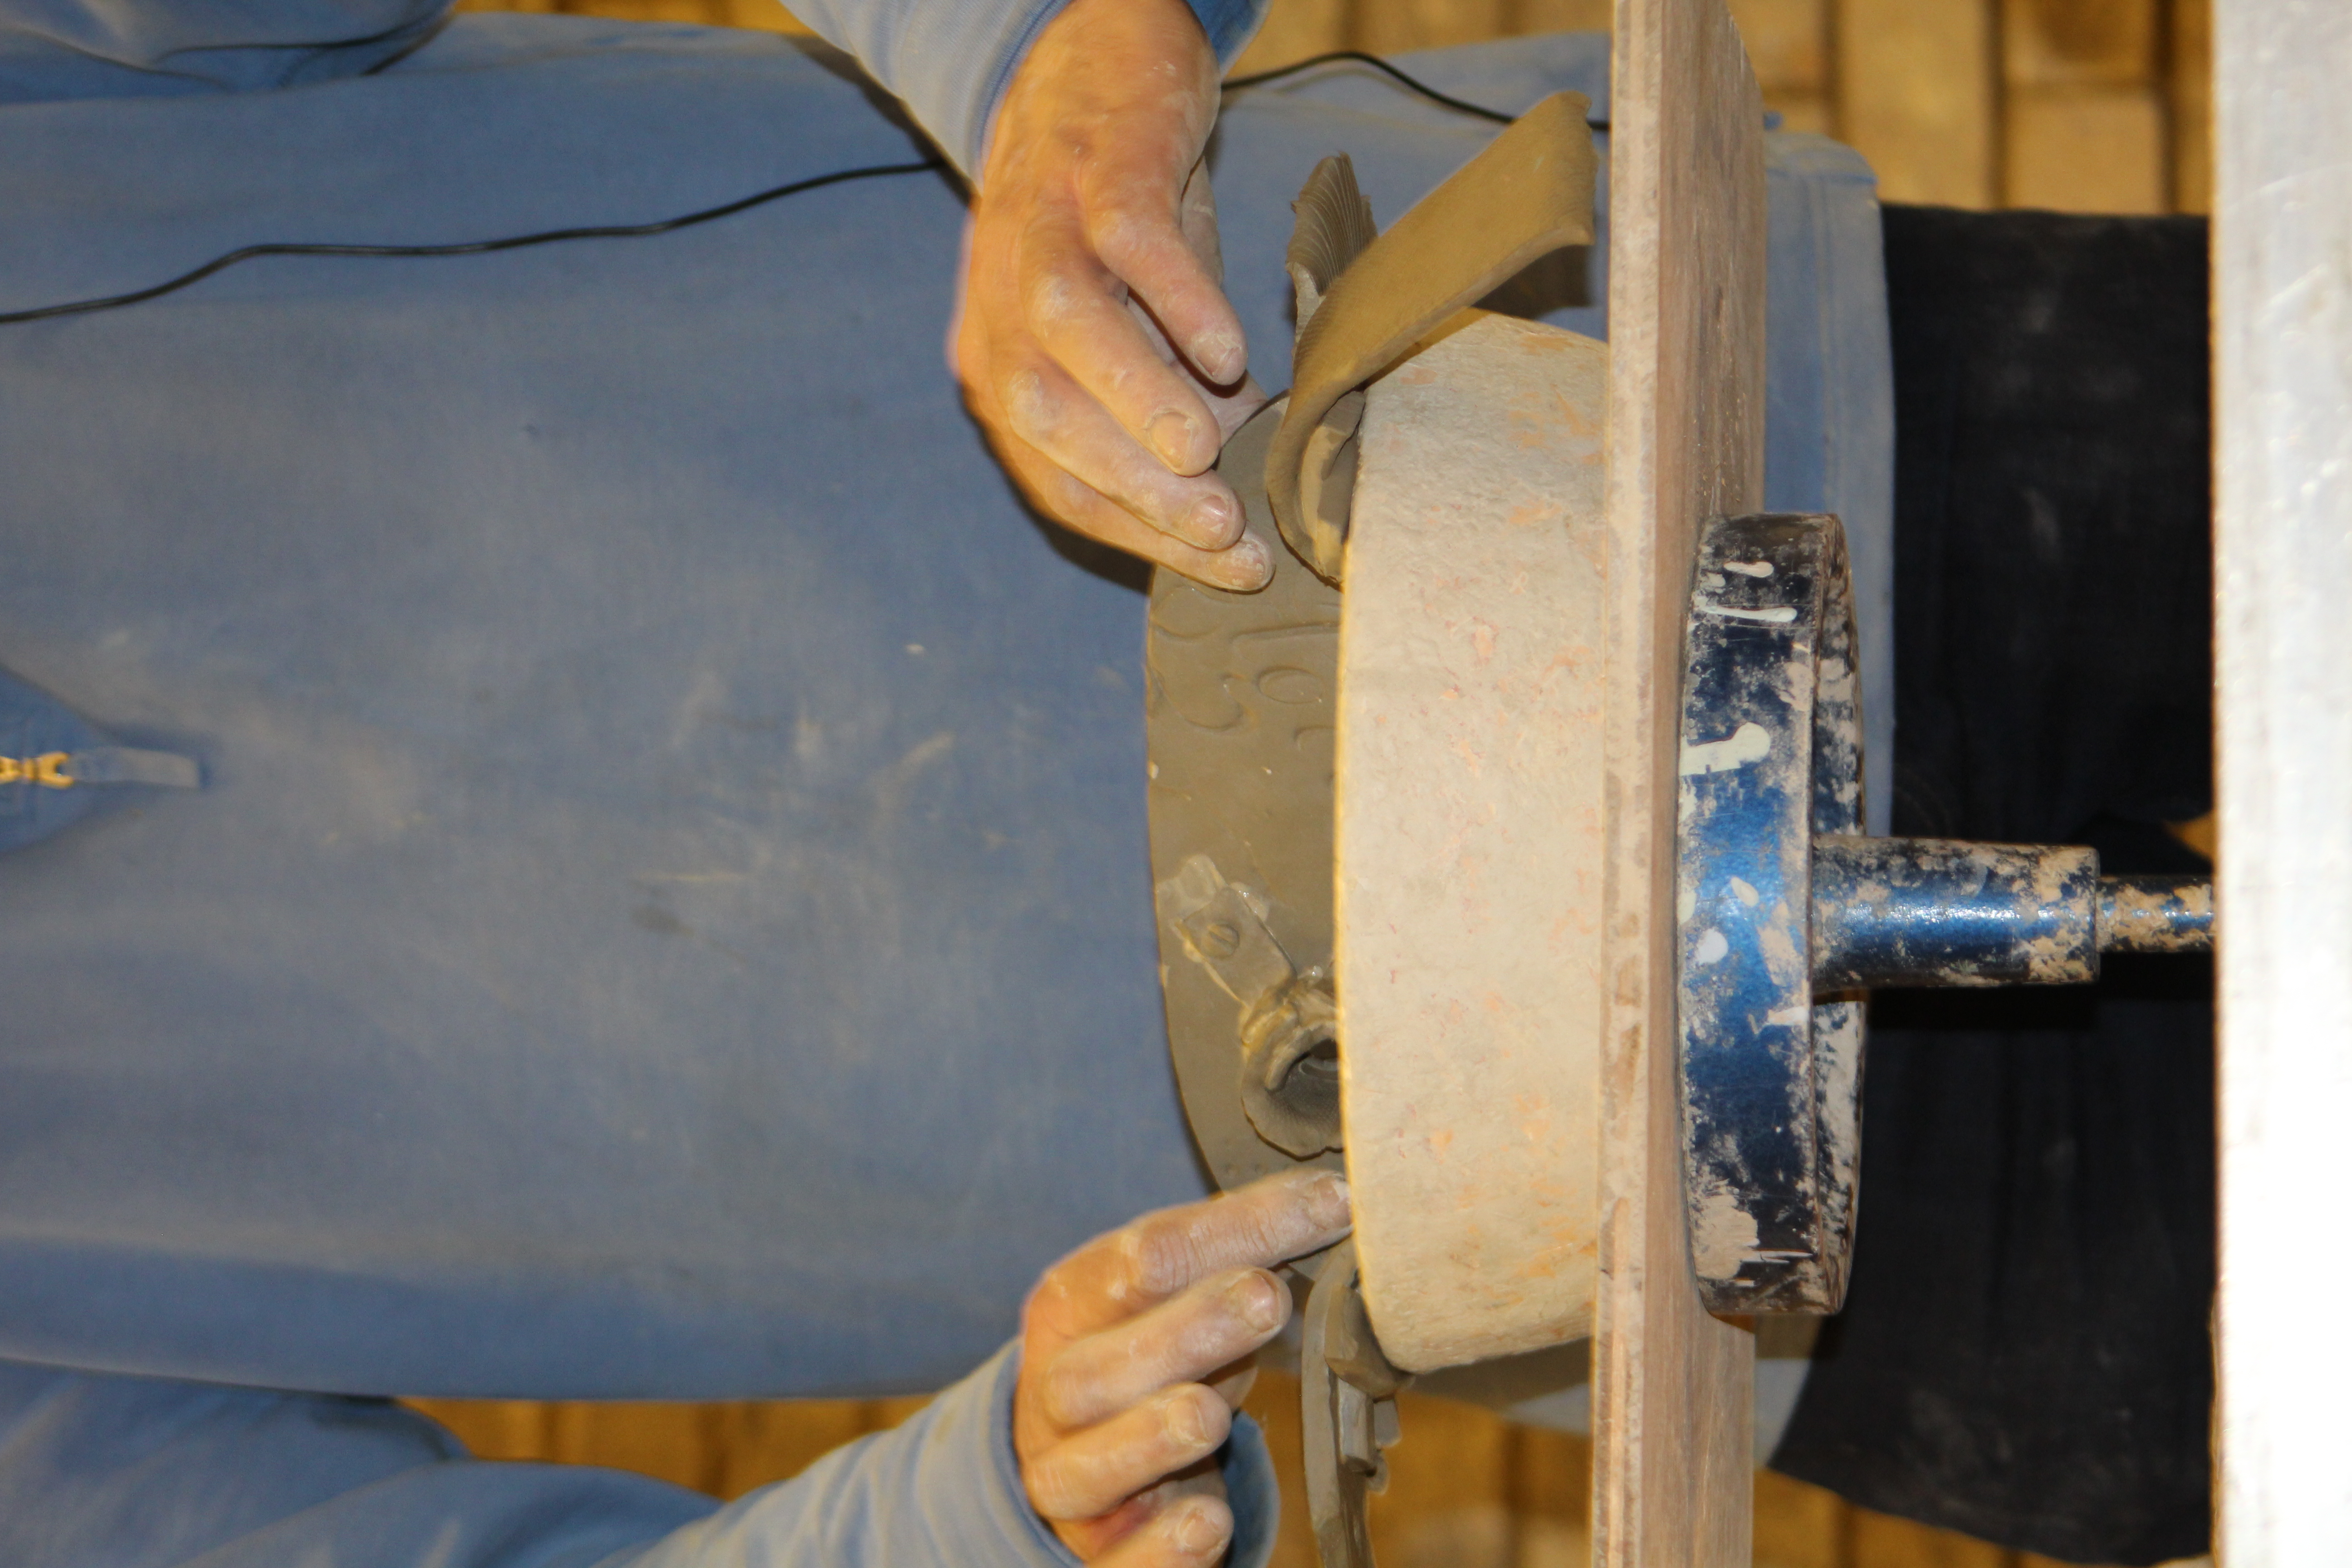
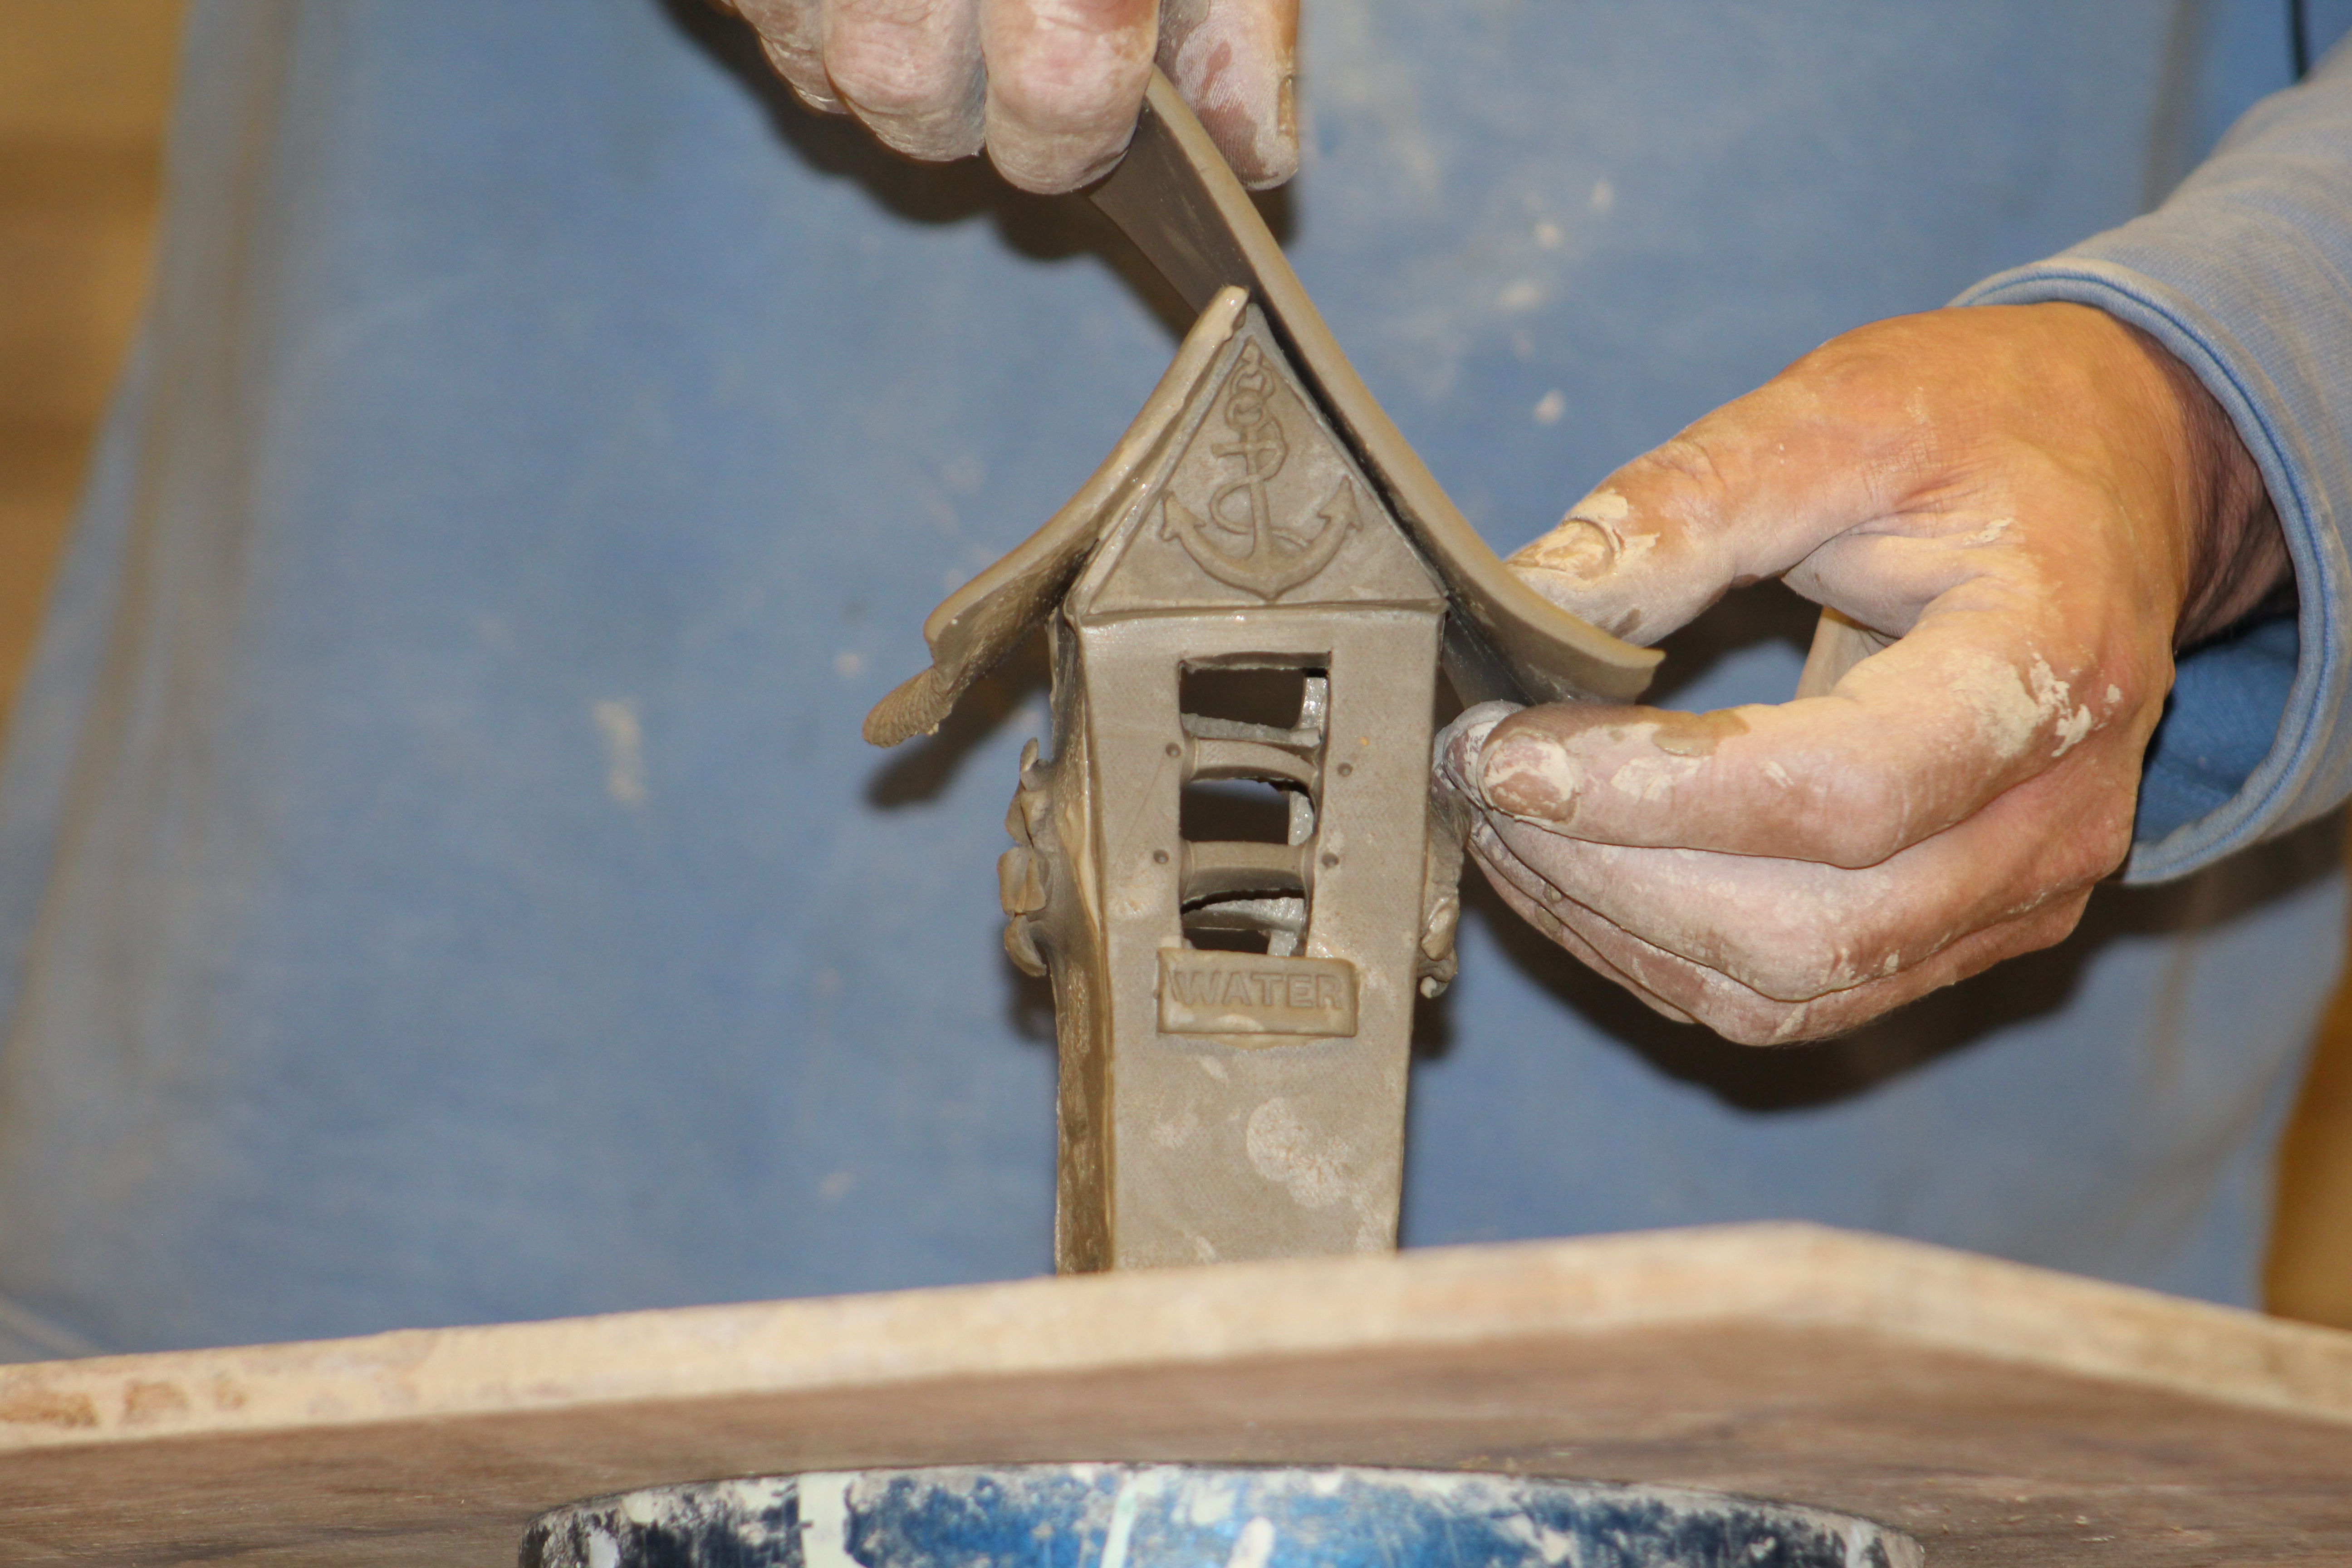
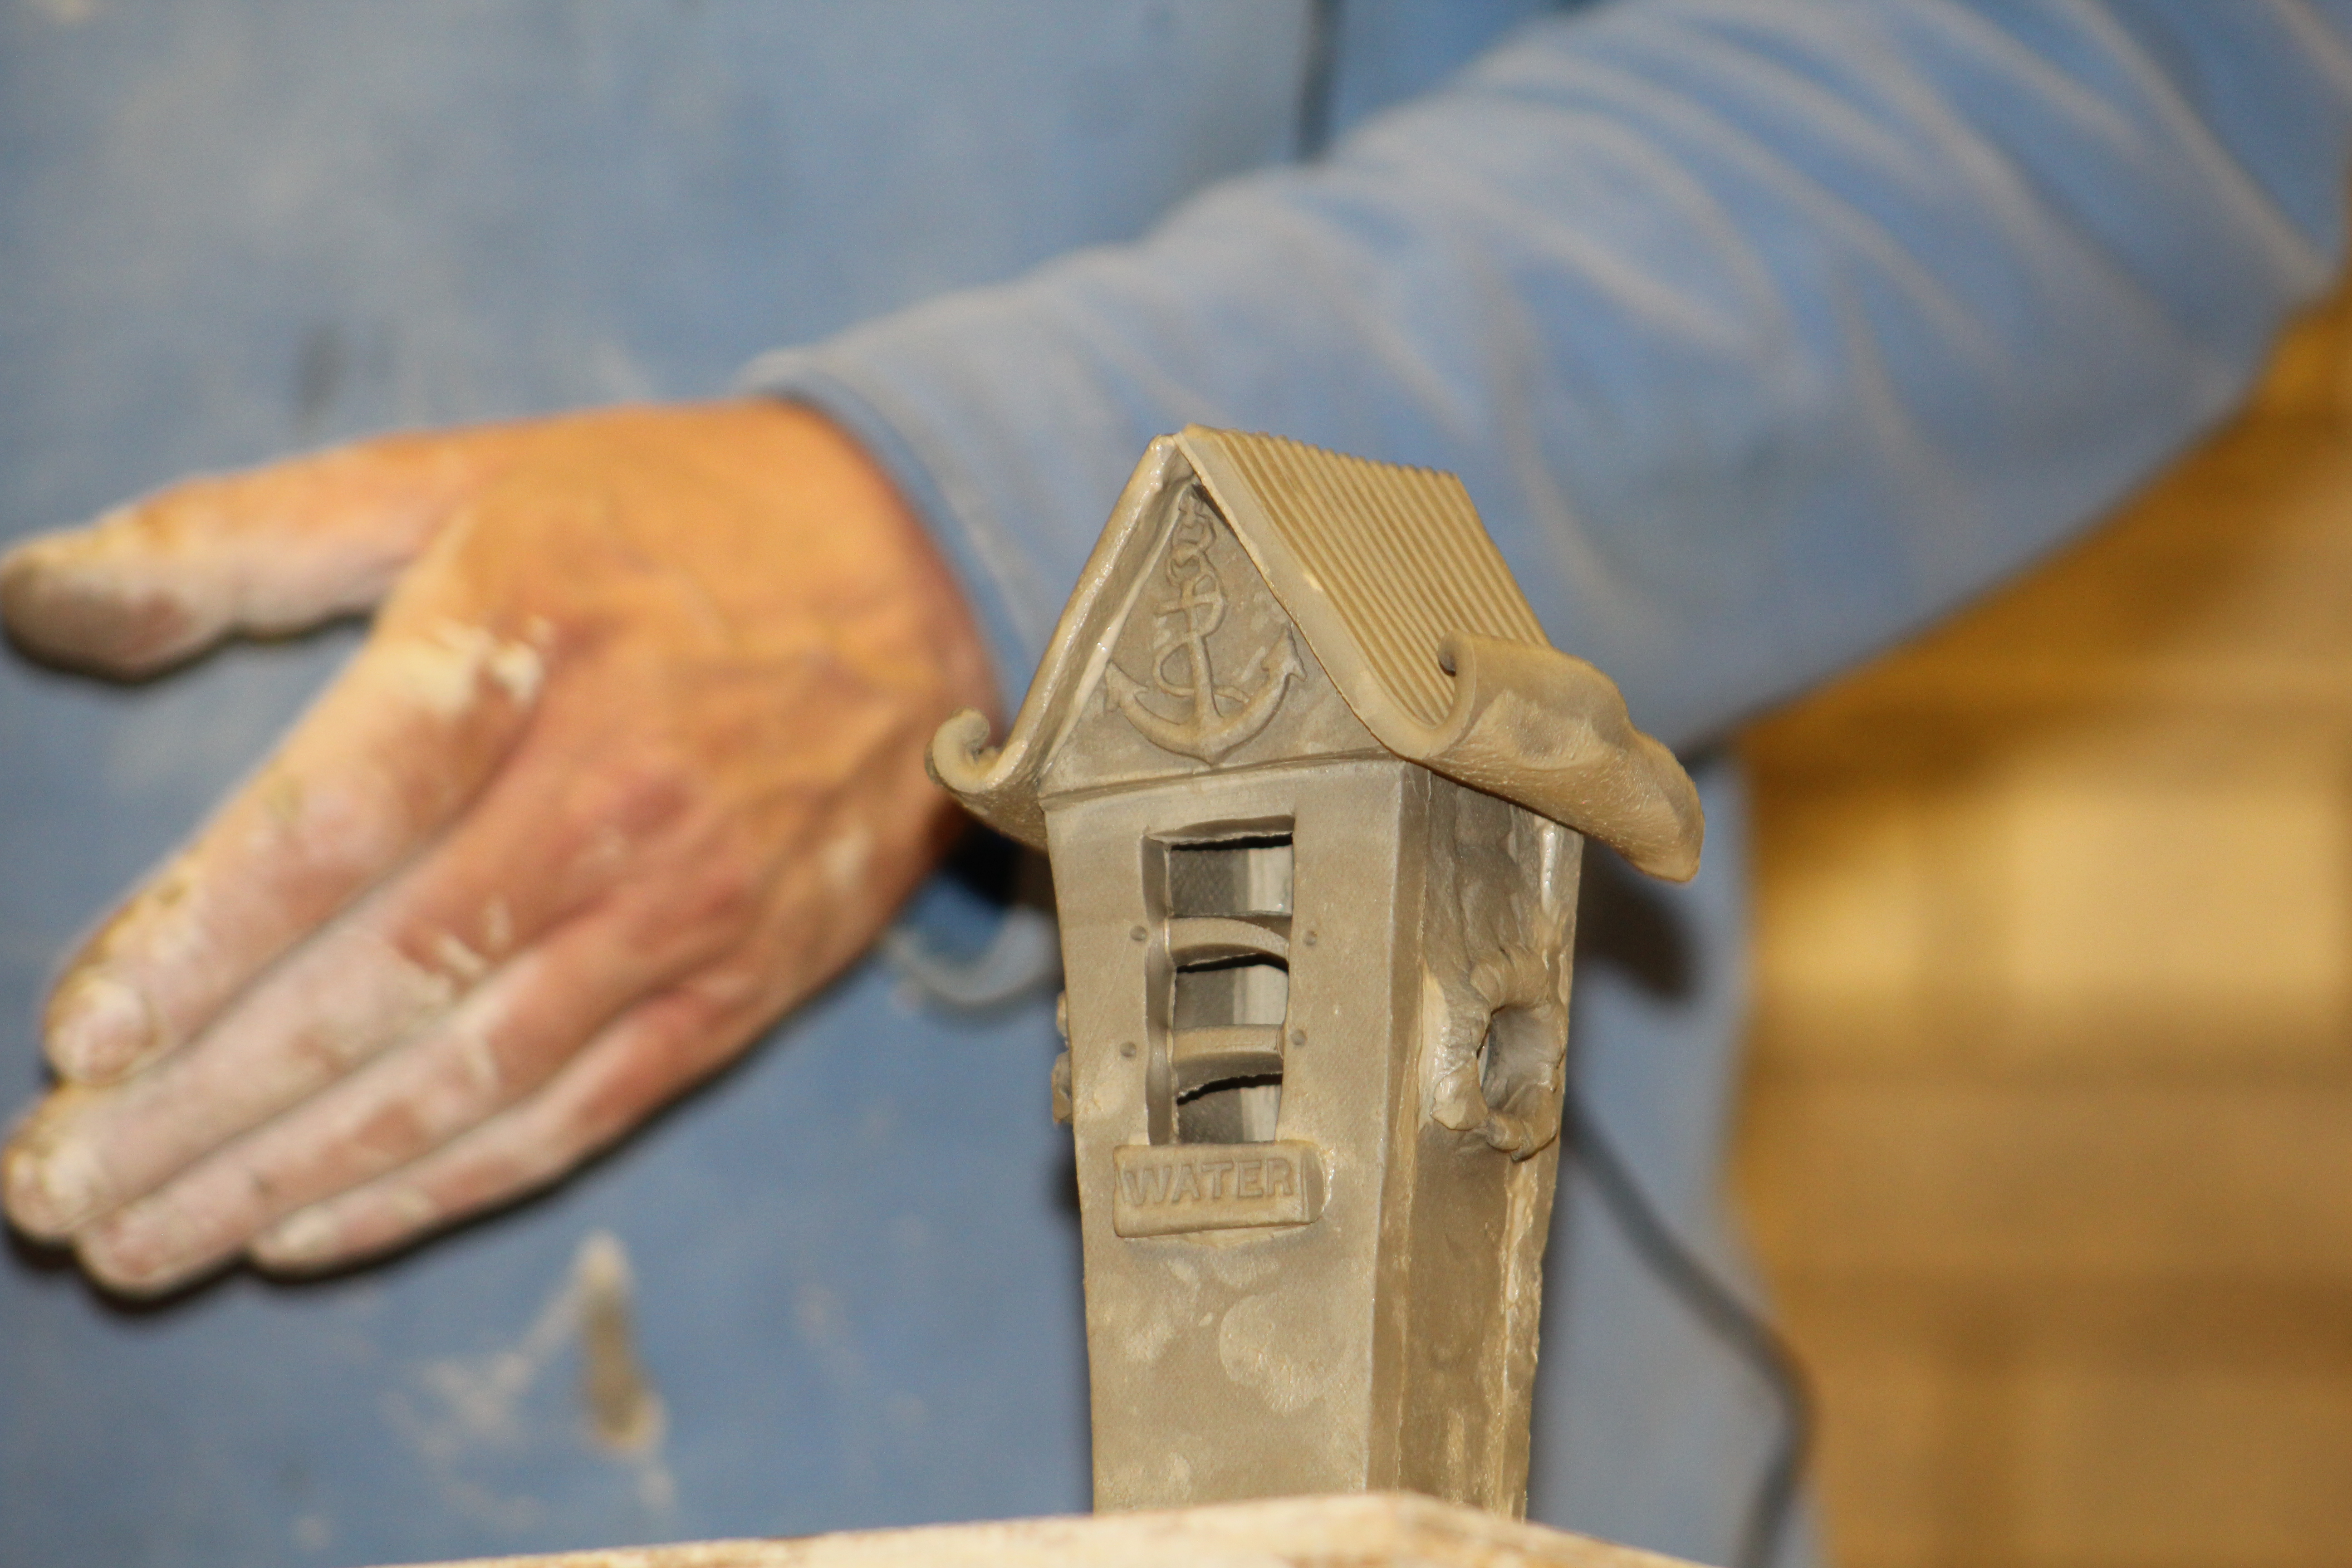
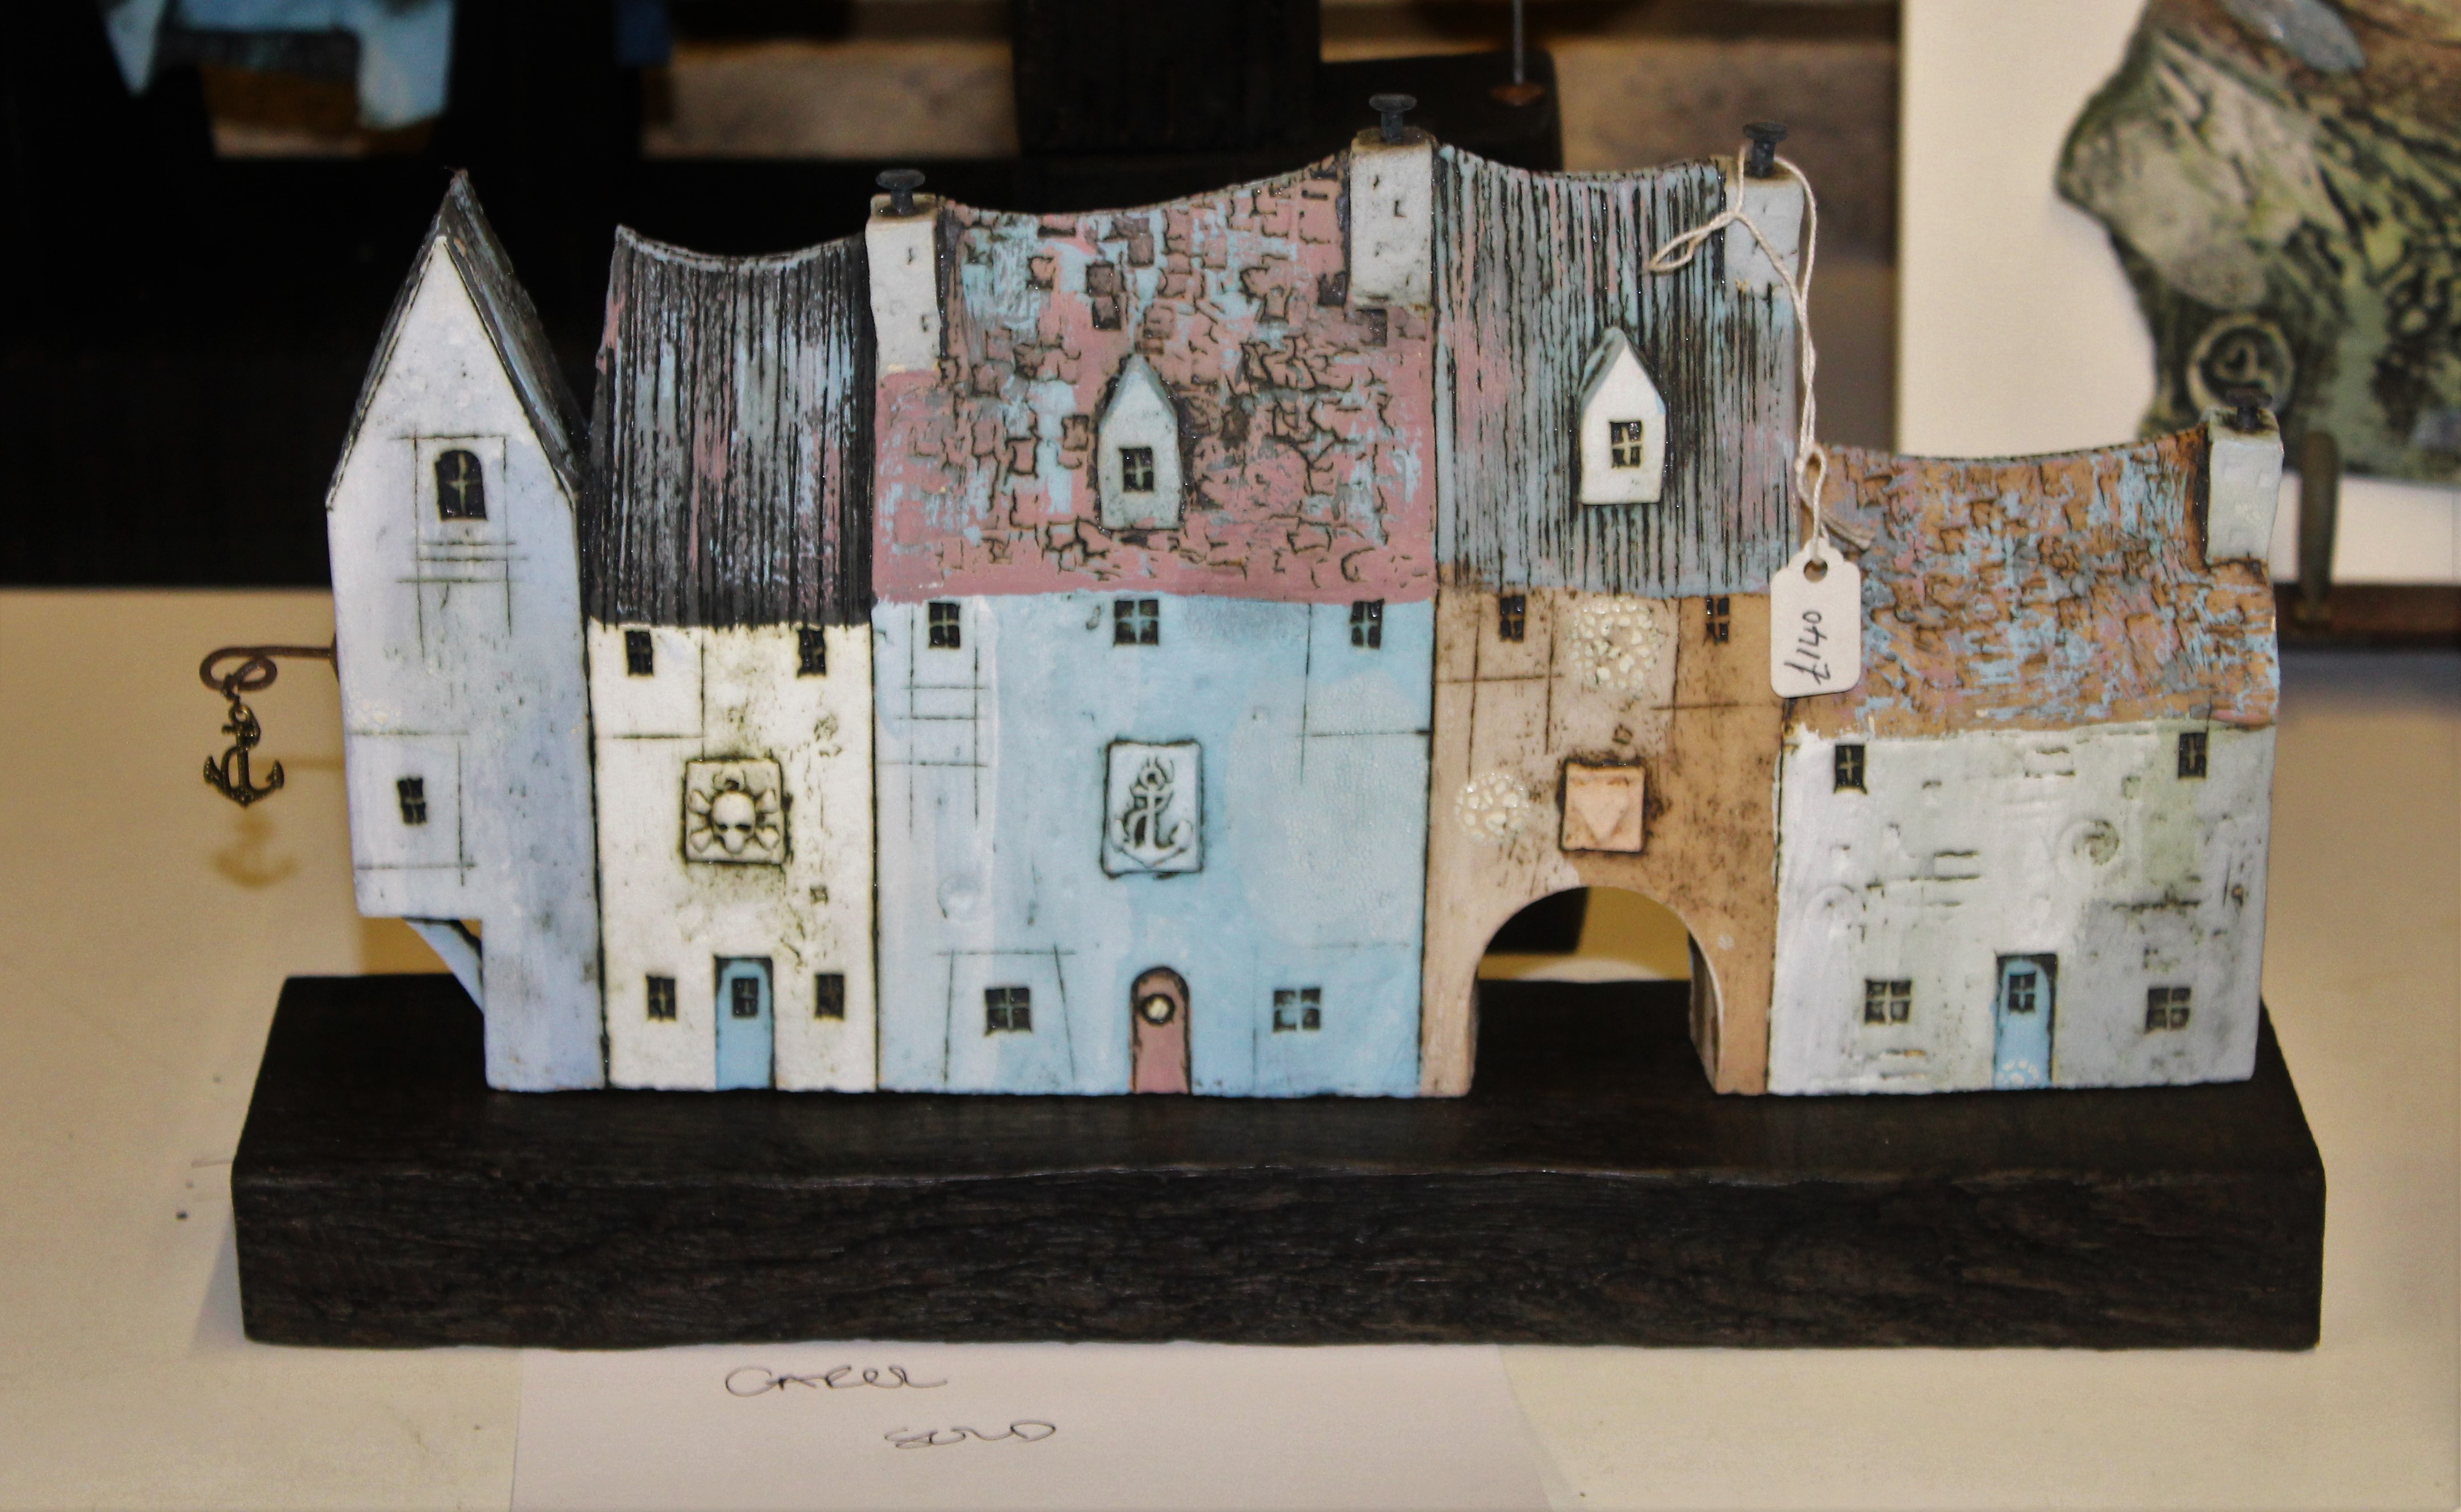
The next demonstration using a valentine’s stoneware was a row of cottages. Mark starts with a thick (approx. 1 inch) almost leatherhard slab from which he carves the cottages. When complete this is carefully dried and very slowly fired, to expel any residual moisture and avoid cracks and blowouts. He adds texture using a toothbrush and any small burrs are then rolled gently back in to the surface giving a weathered effect. He uses a chisel to cut the roof line, (he suggests to cut in then draw back with the chisel) two metal rectangular kidneys, one very flexible the other fairly stiff for cutting the archway and detailing, these again were both found items not potters tools. Any cut outs are re-used for detail elsewhere – Mark hates having to recycle clay! He has a range of wooden handmade tools that he uses to add texture on the roof line plus a multitude of press moulds made in clay from his many found objects and other objects such as drain covers and gravestones (for text). It made me make a mental note to always carry a lump of soft clay or plastercine on my texture collecting forays. Everything is joined using his special sticky slip so no scoring necessary helping to keep the shape he has cut. A hole to fit a dowel peg is made in the bottom so the cottages can be mounted on wood. More detail is added when the piece is almost dry, then the colours are added when bone dry. The ladders are made from old rusty fencing wire.
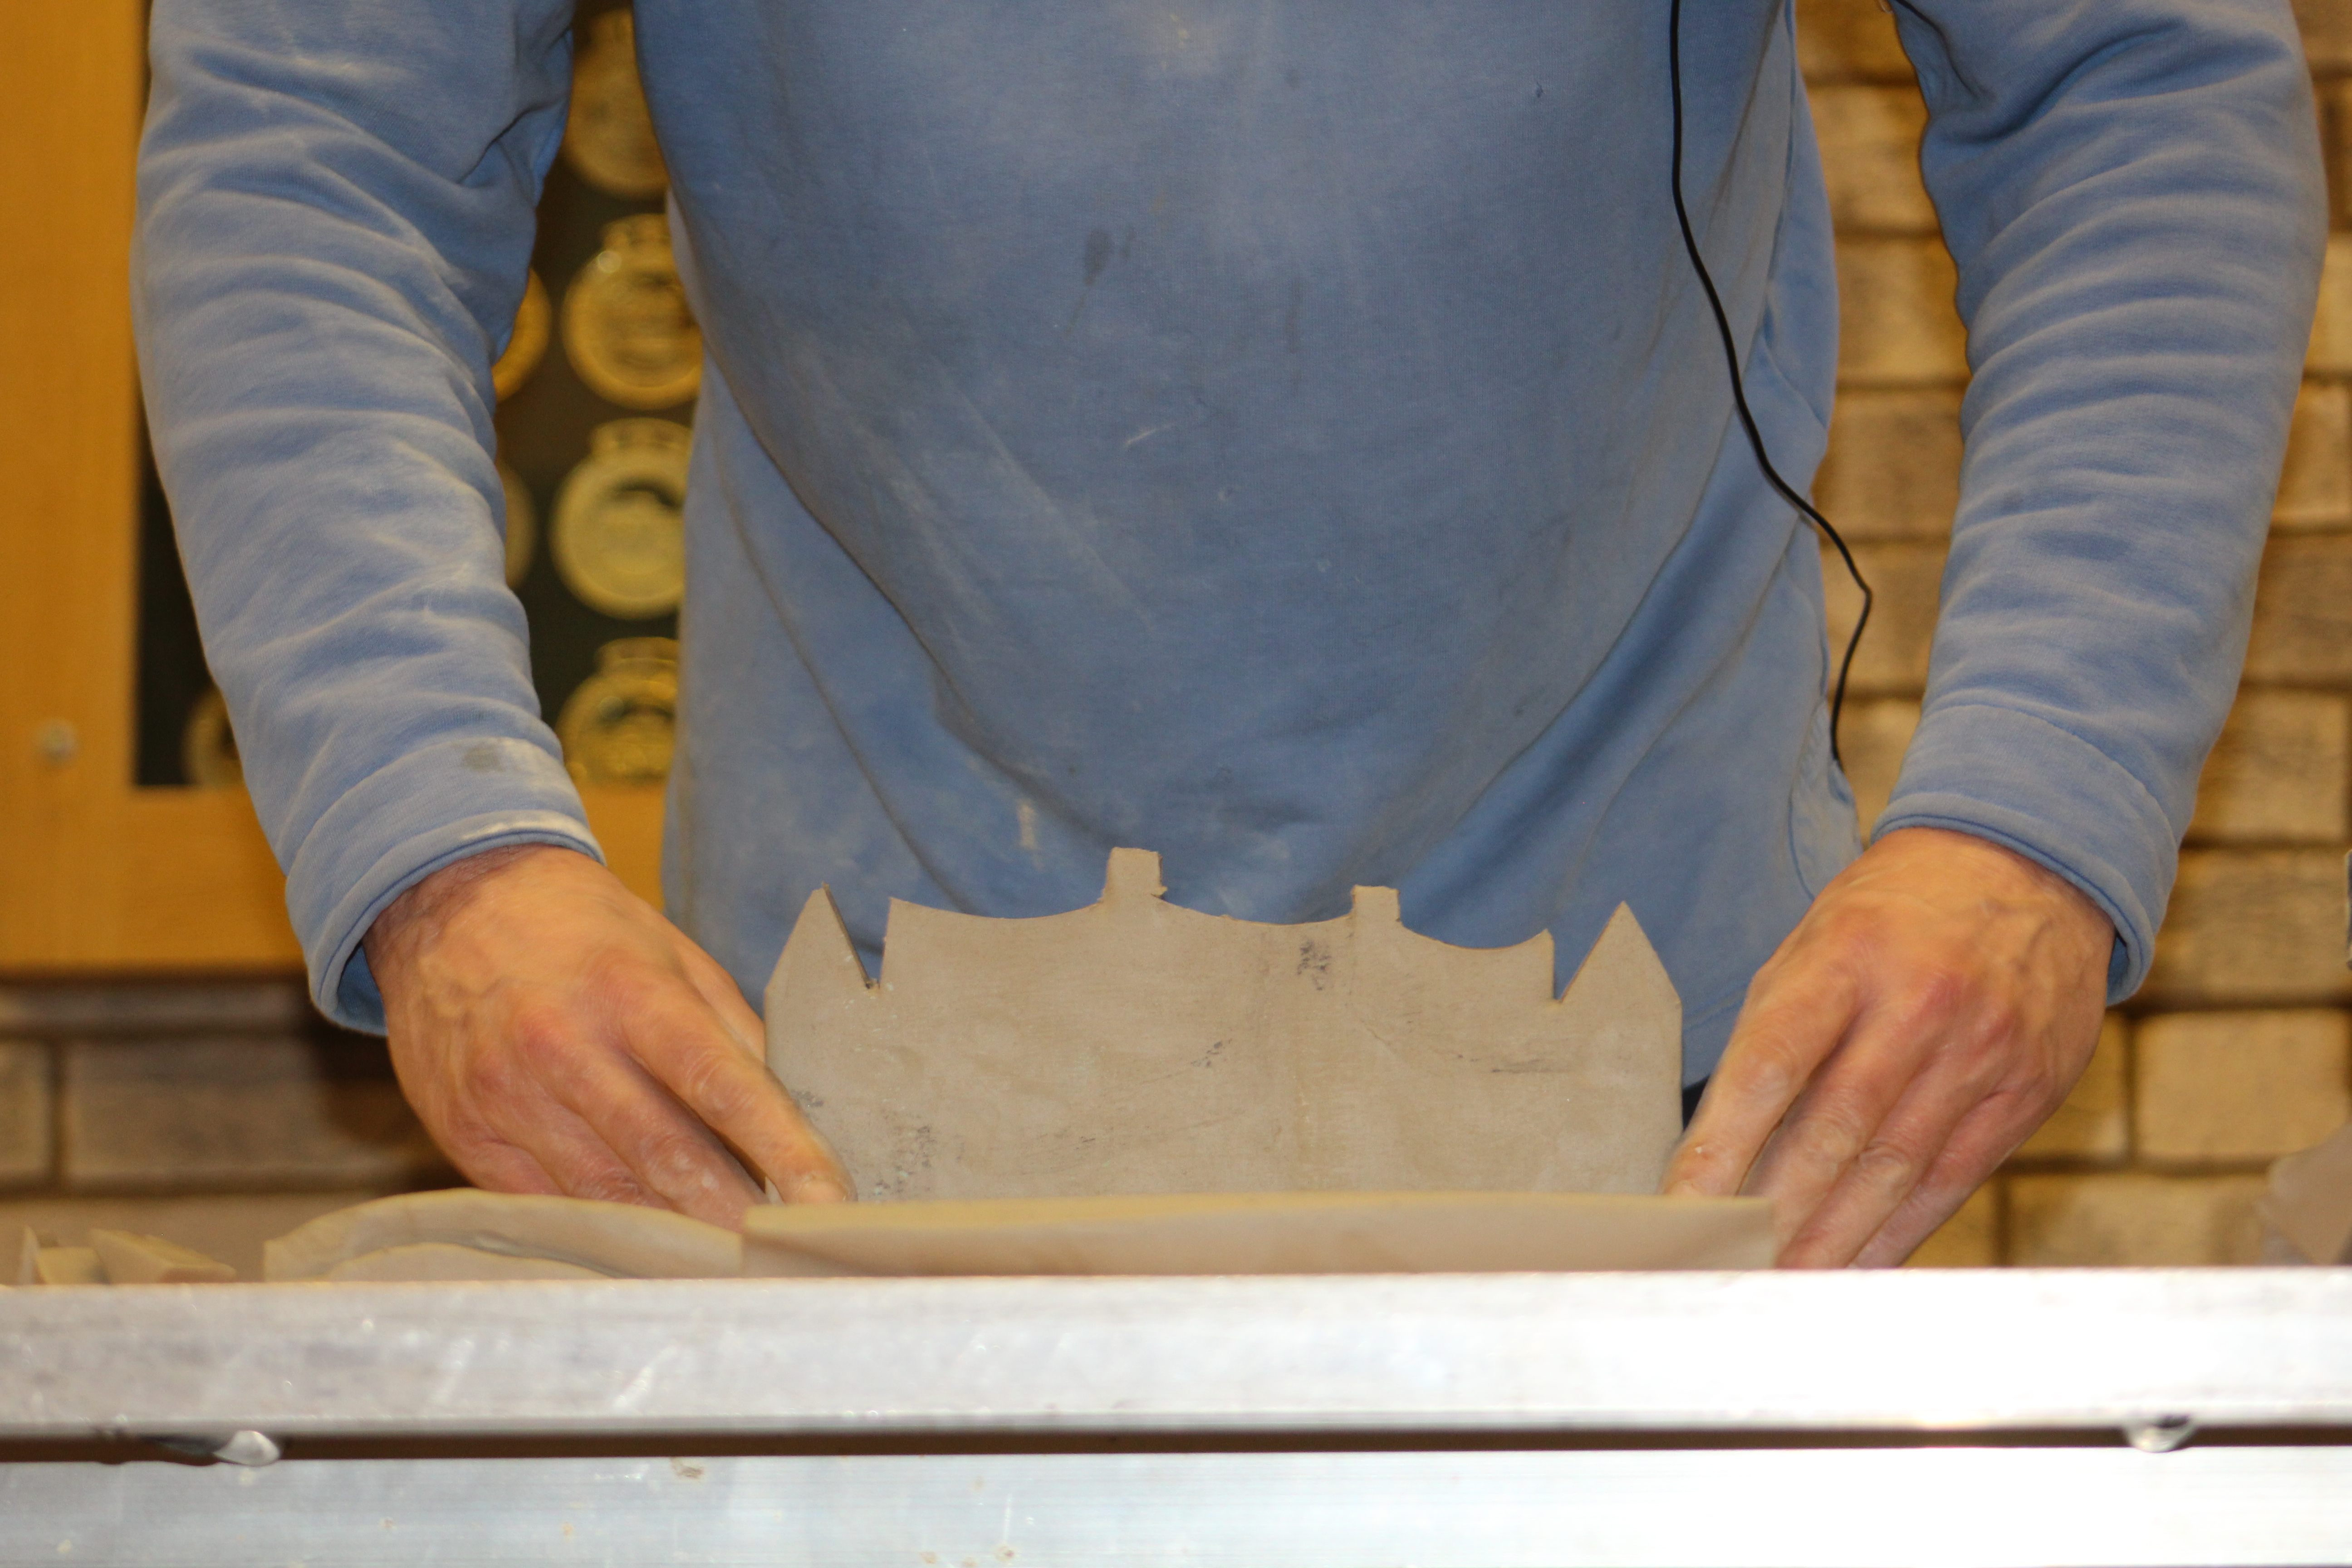
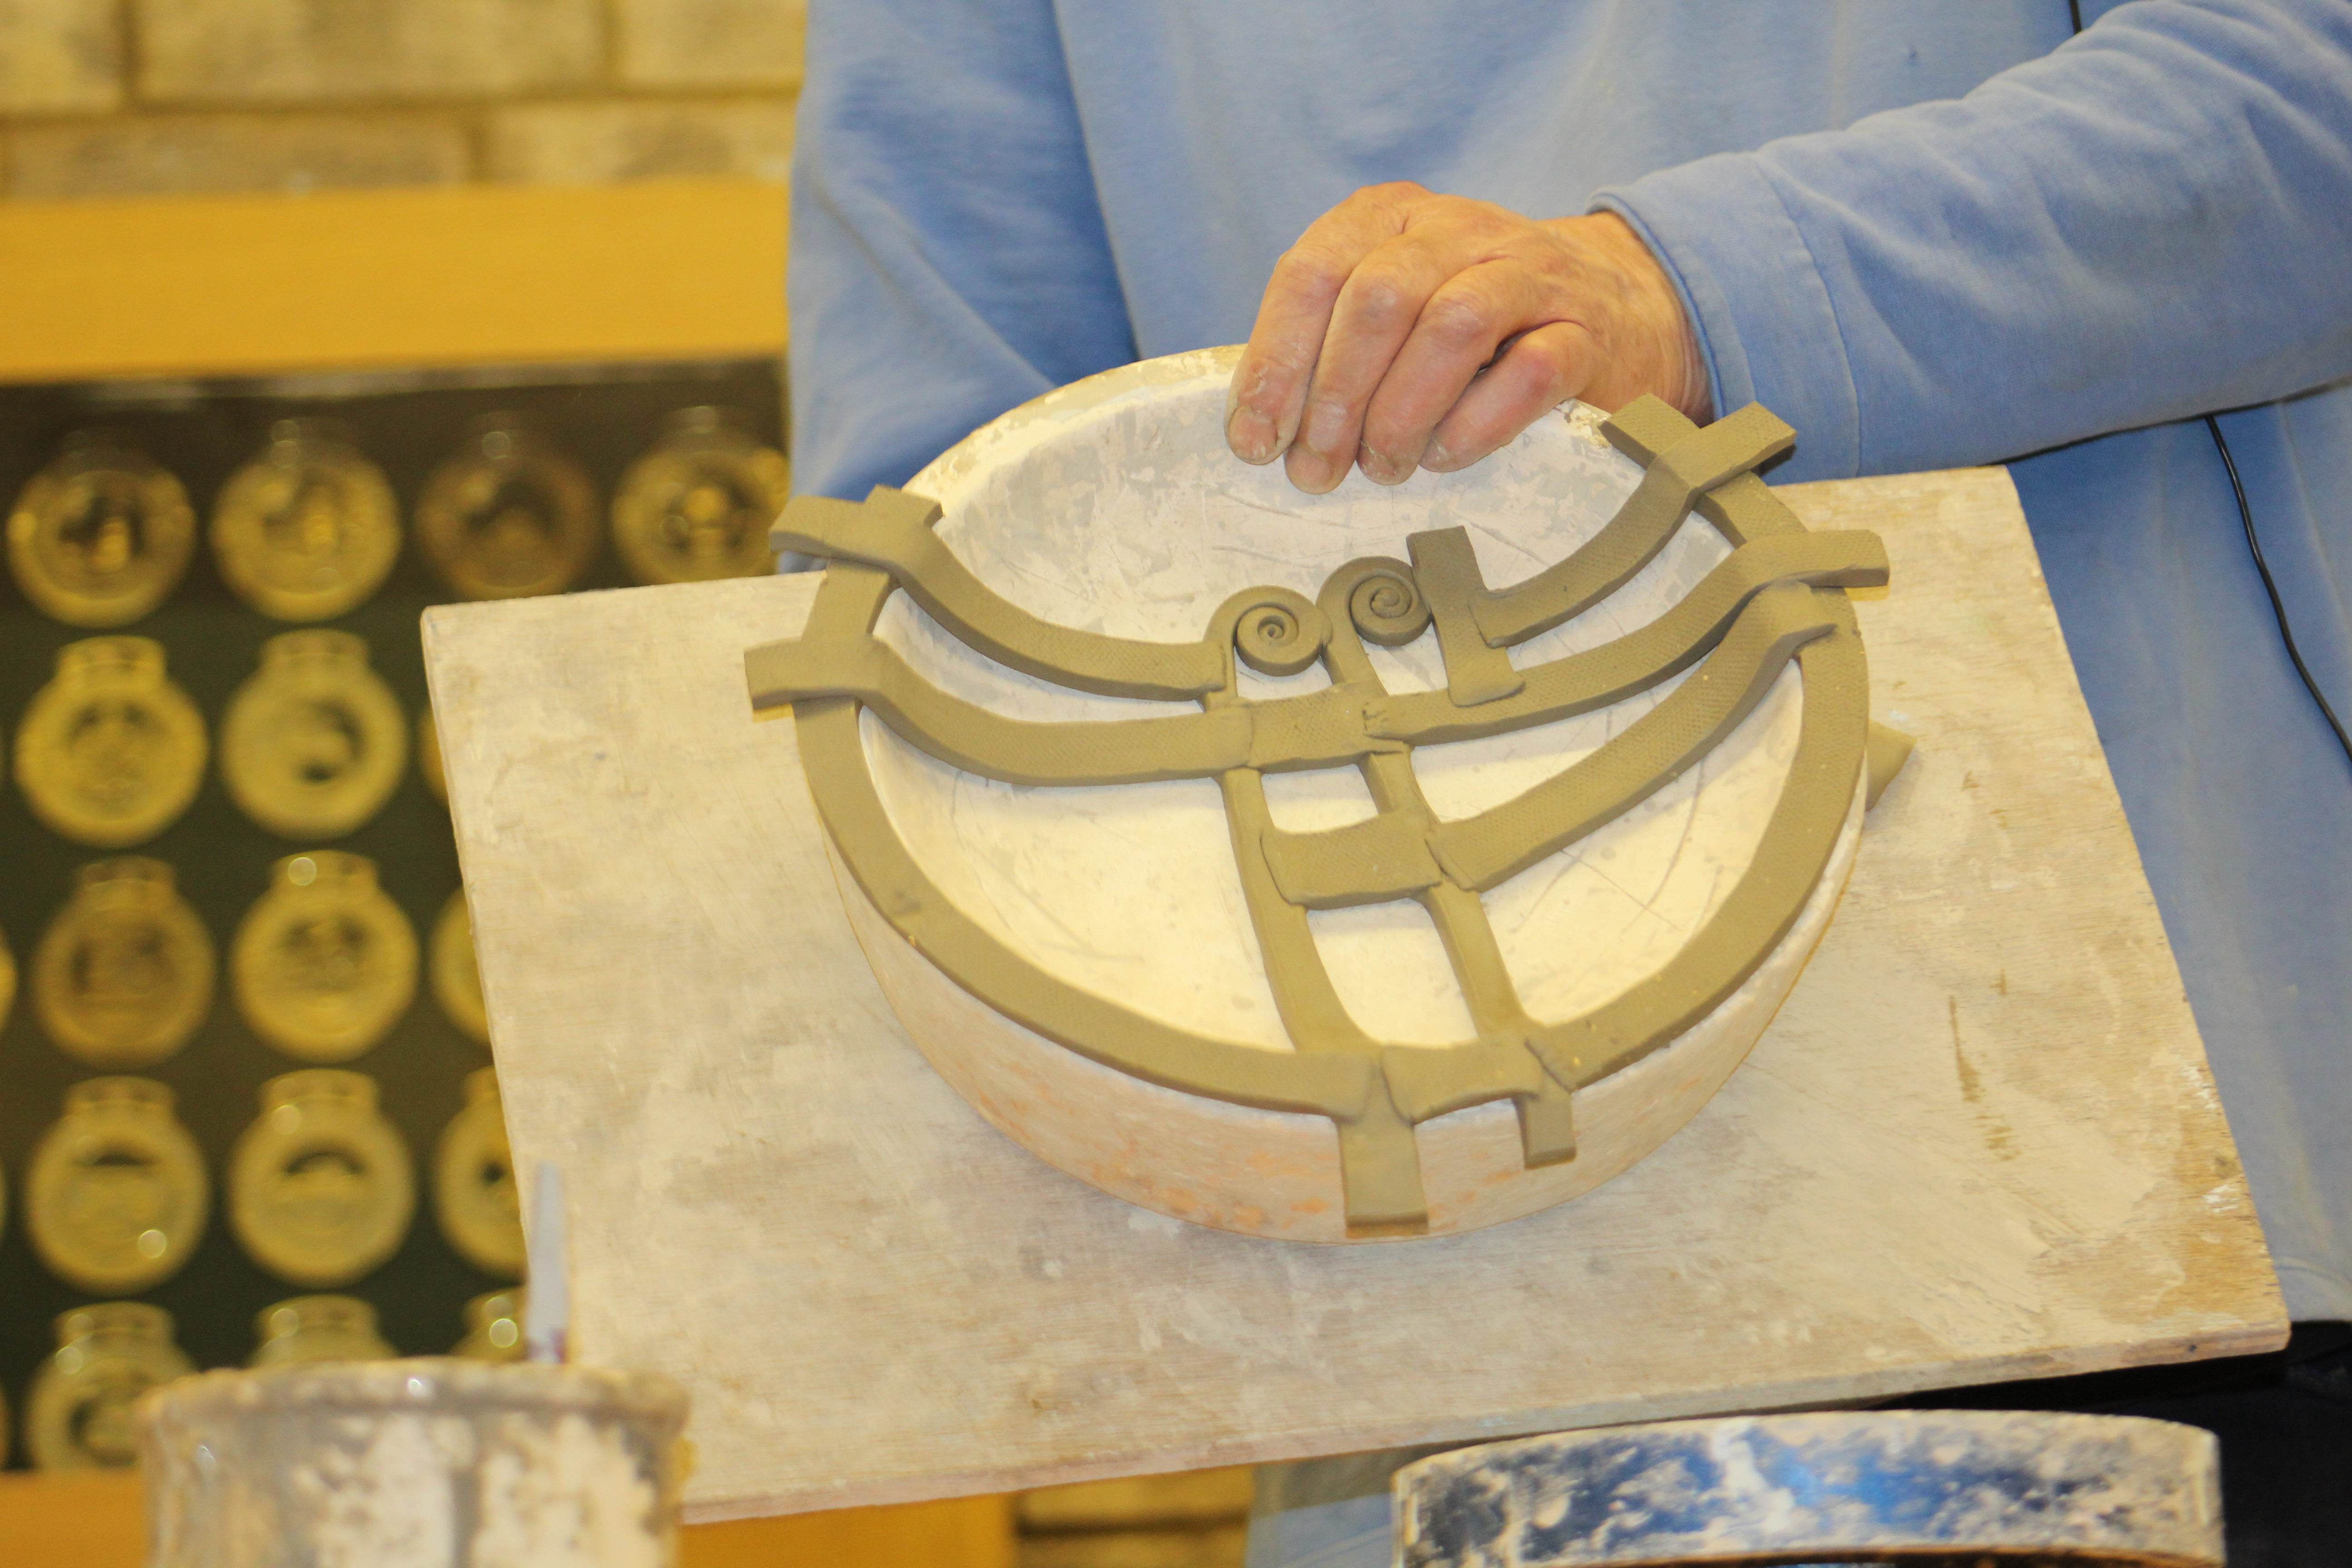
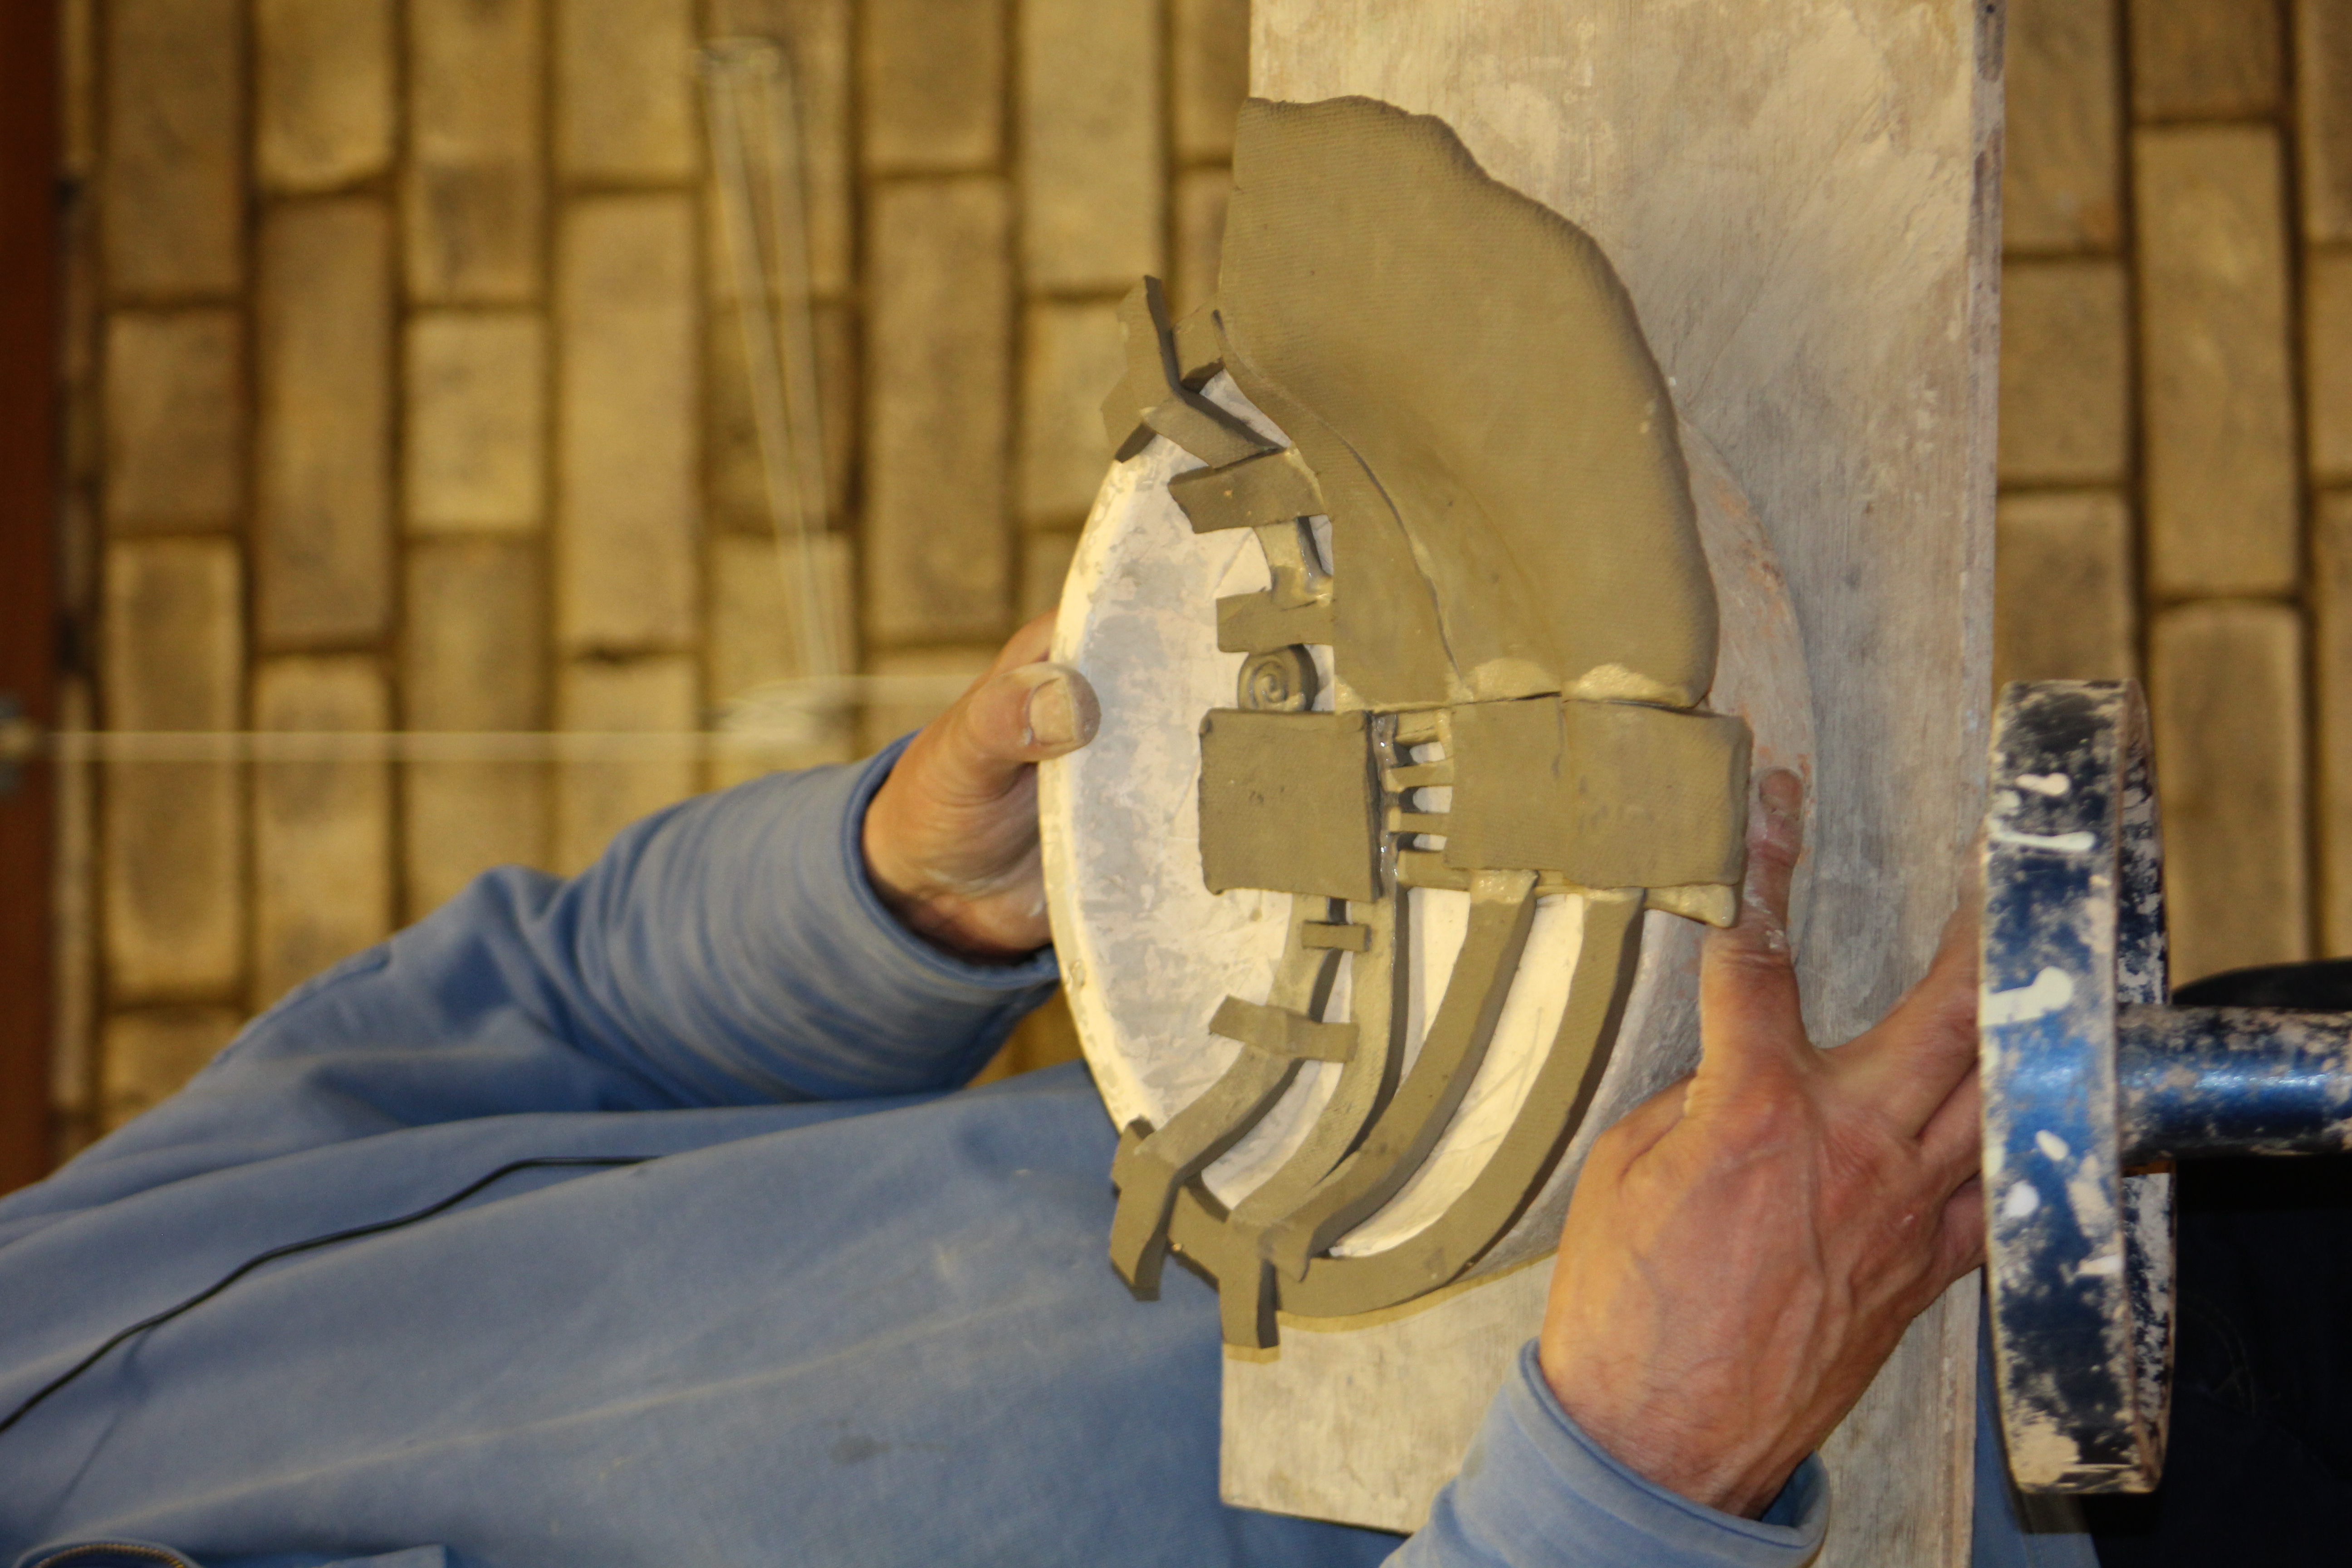
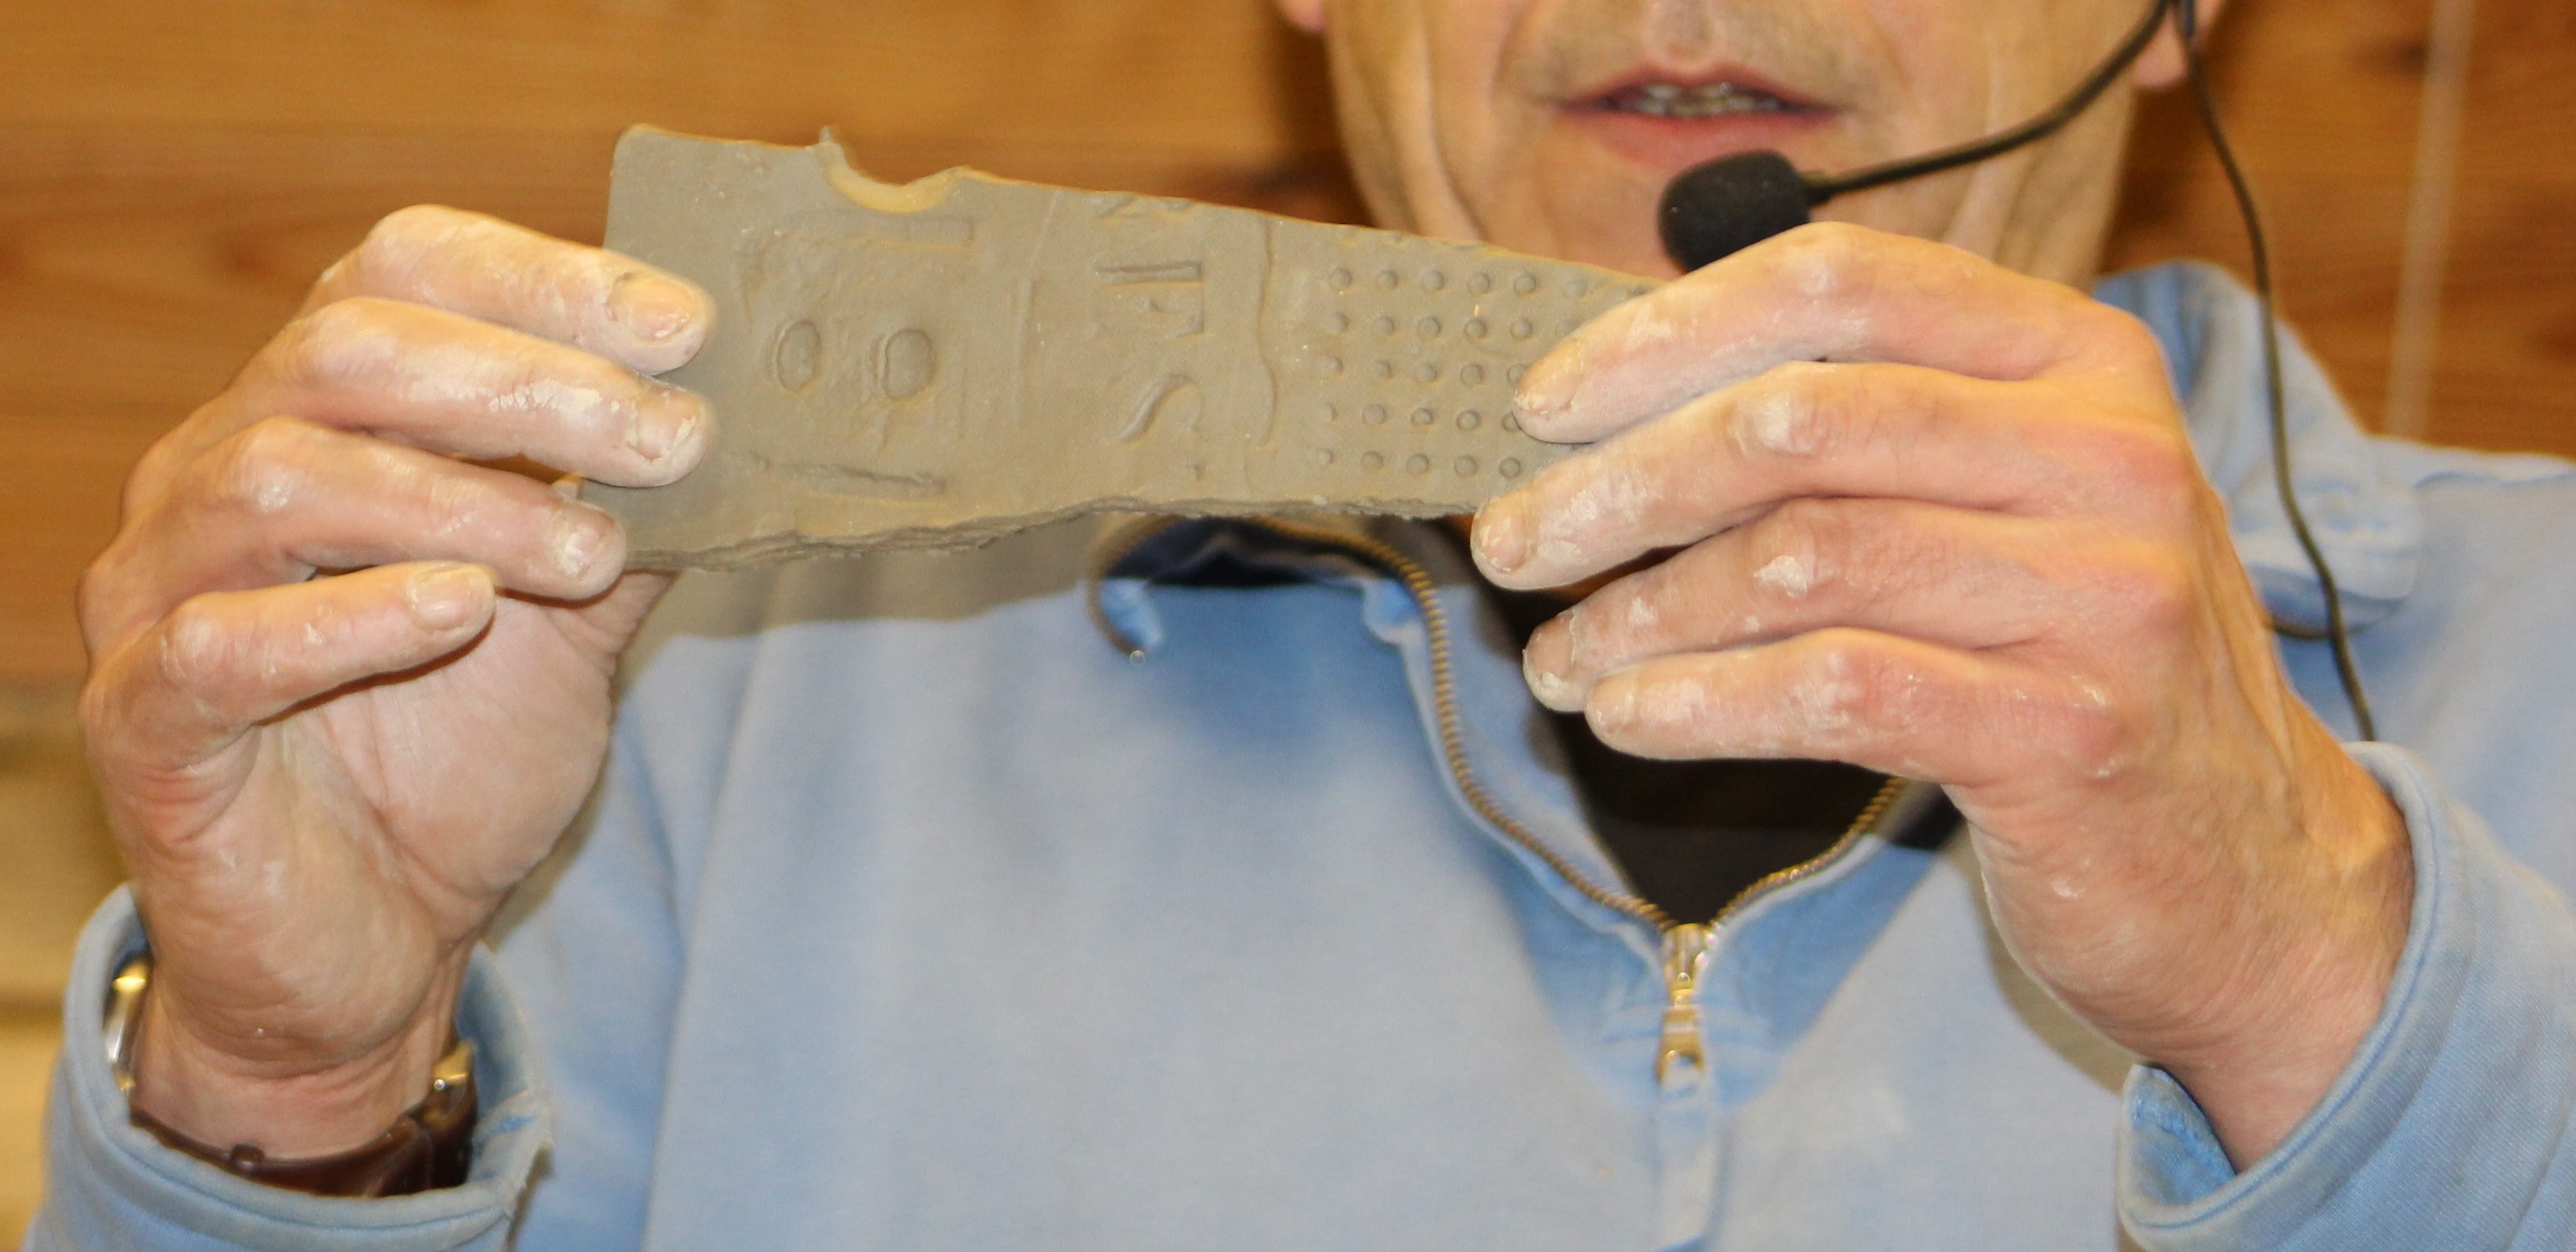
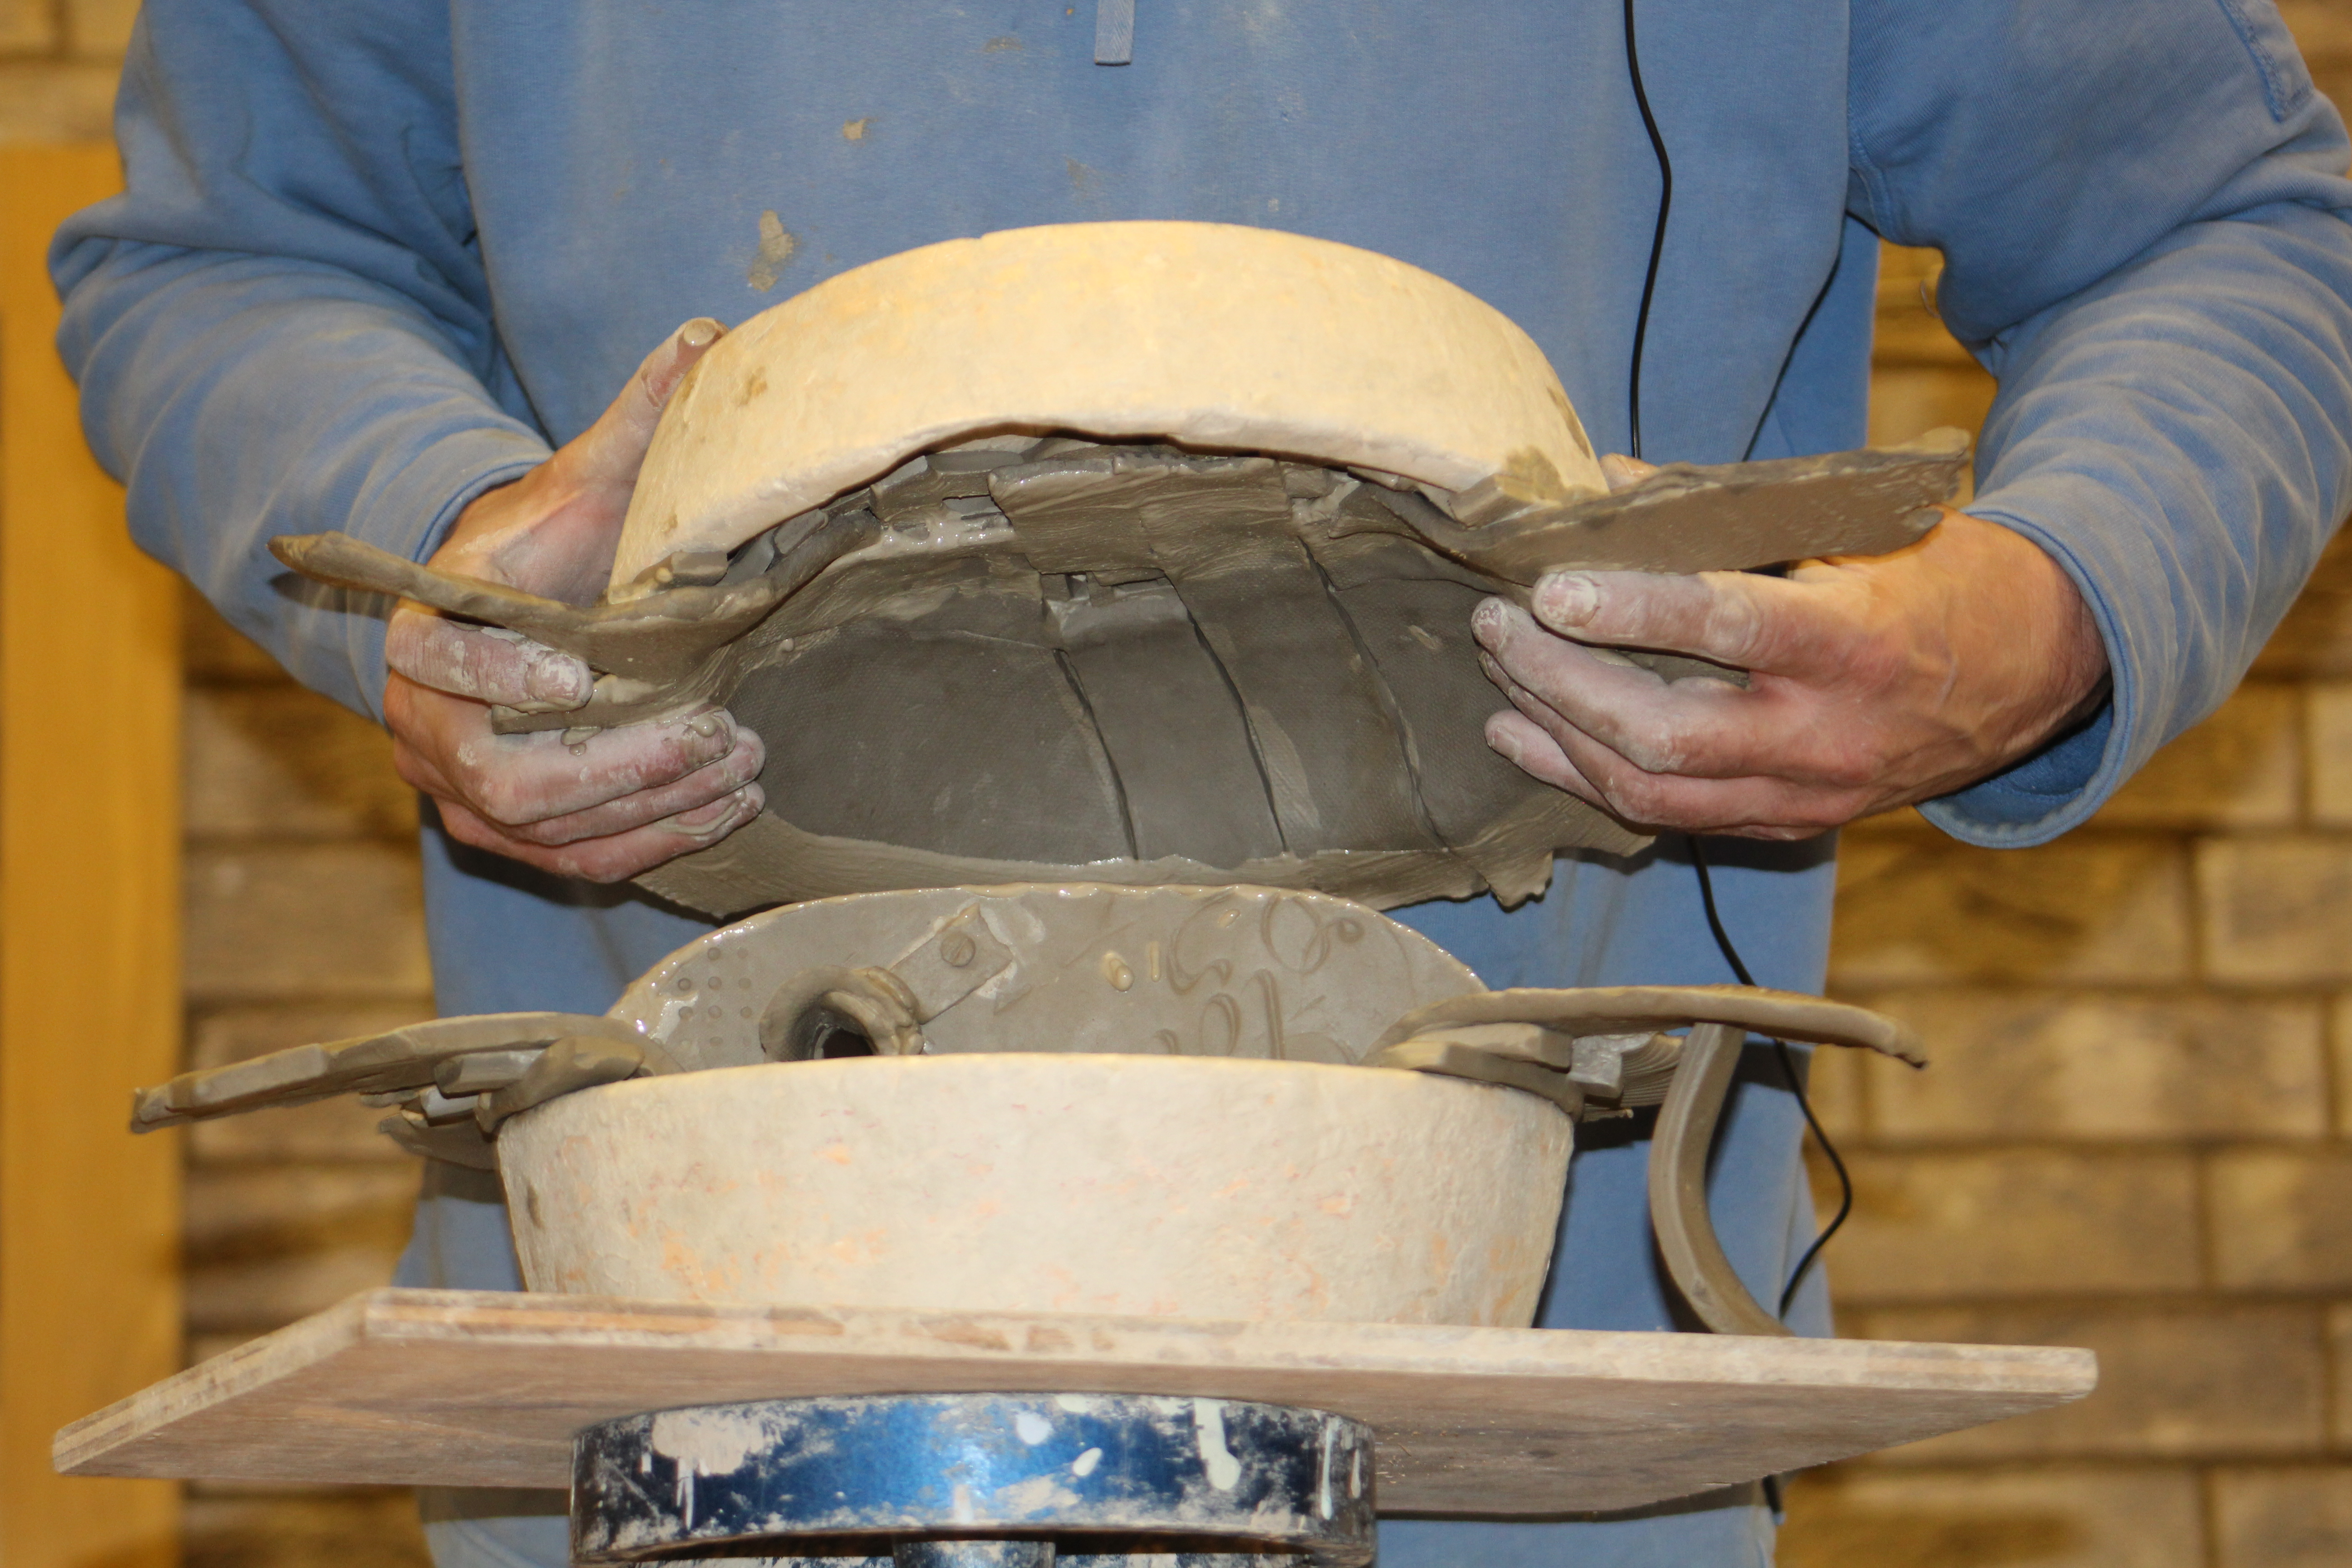
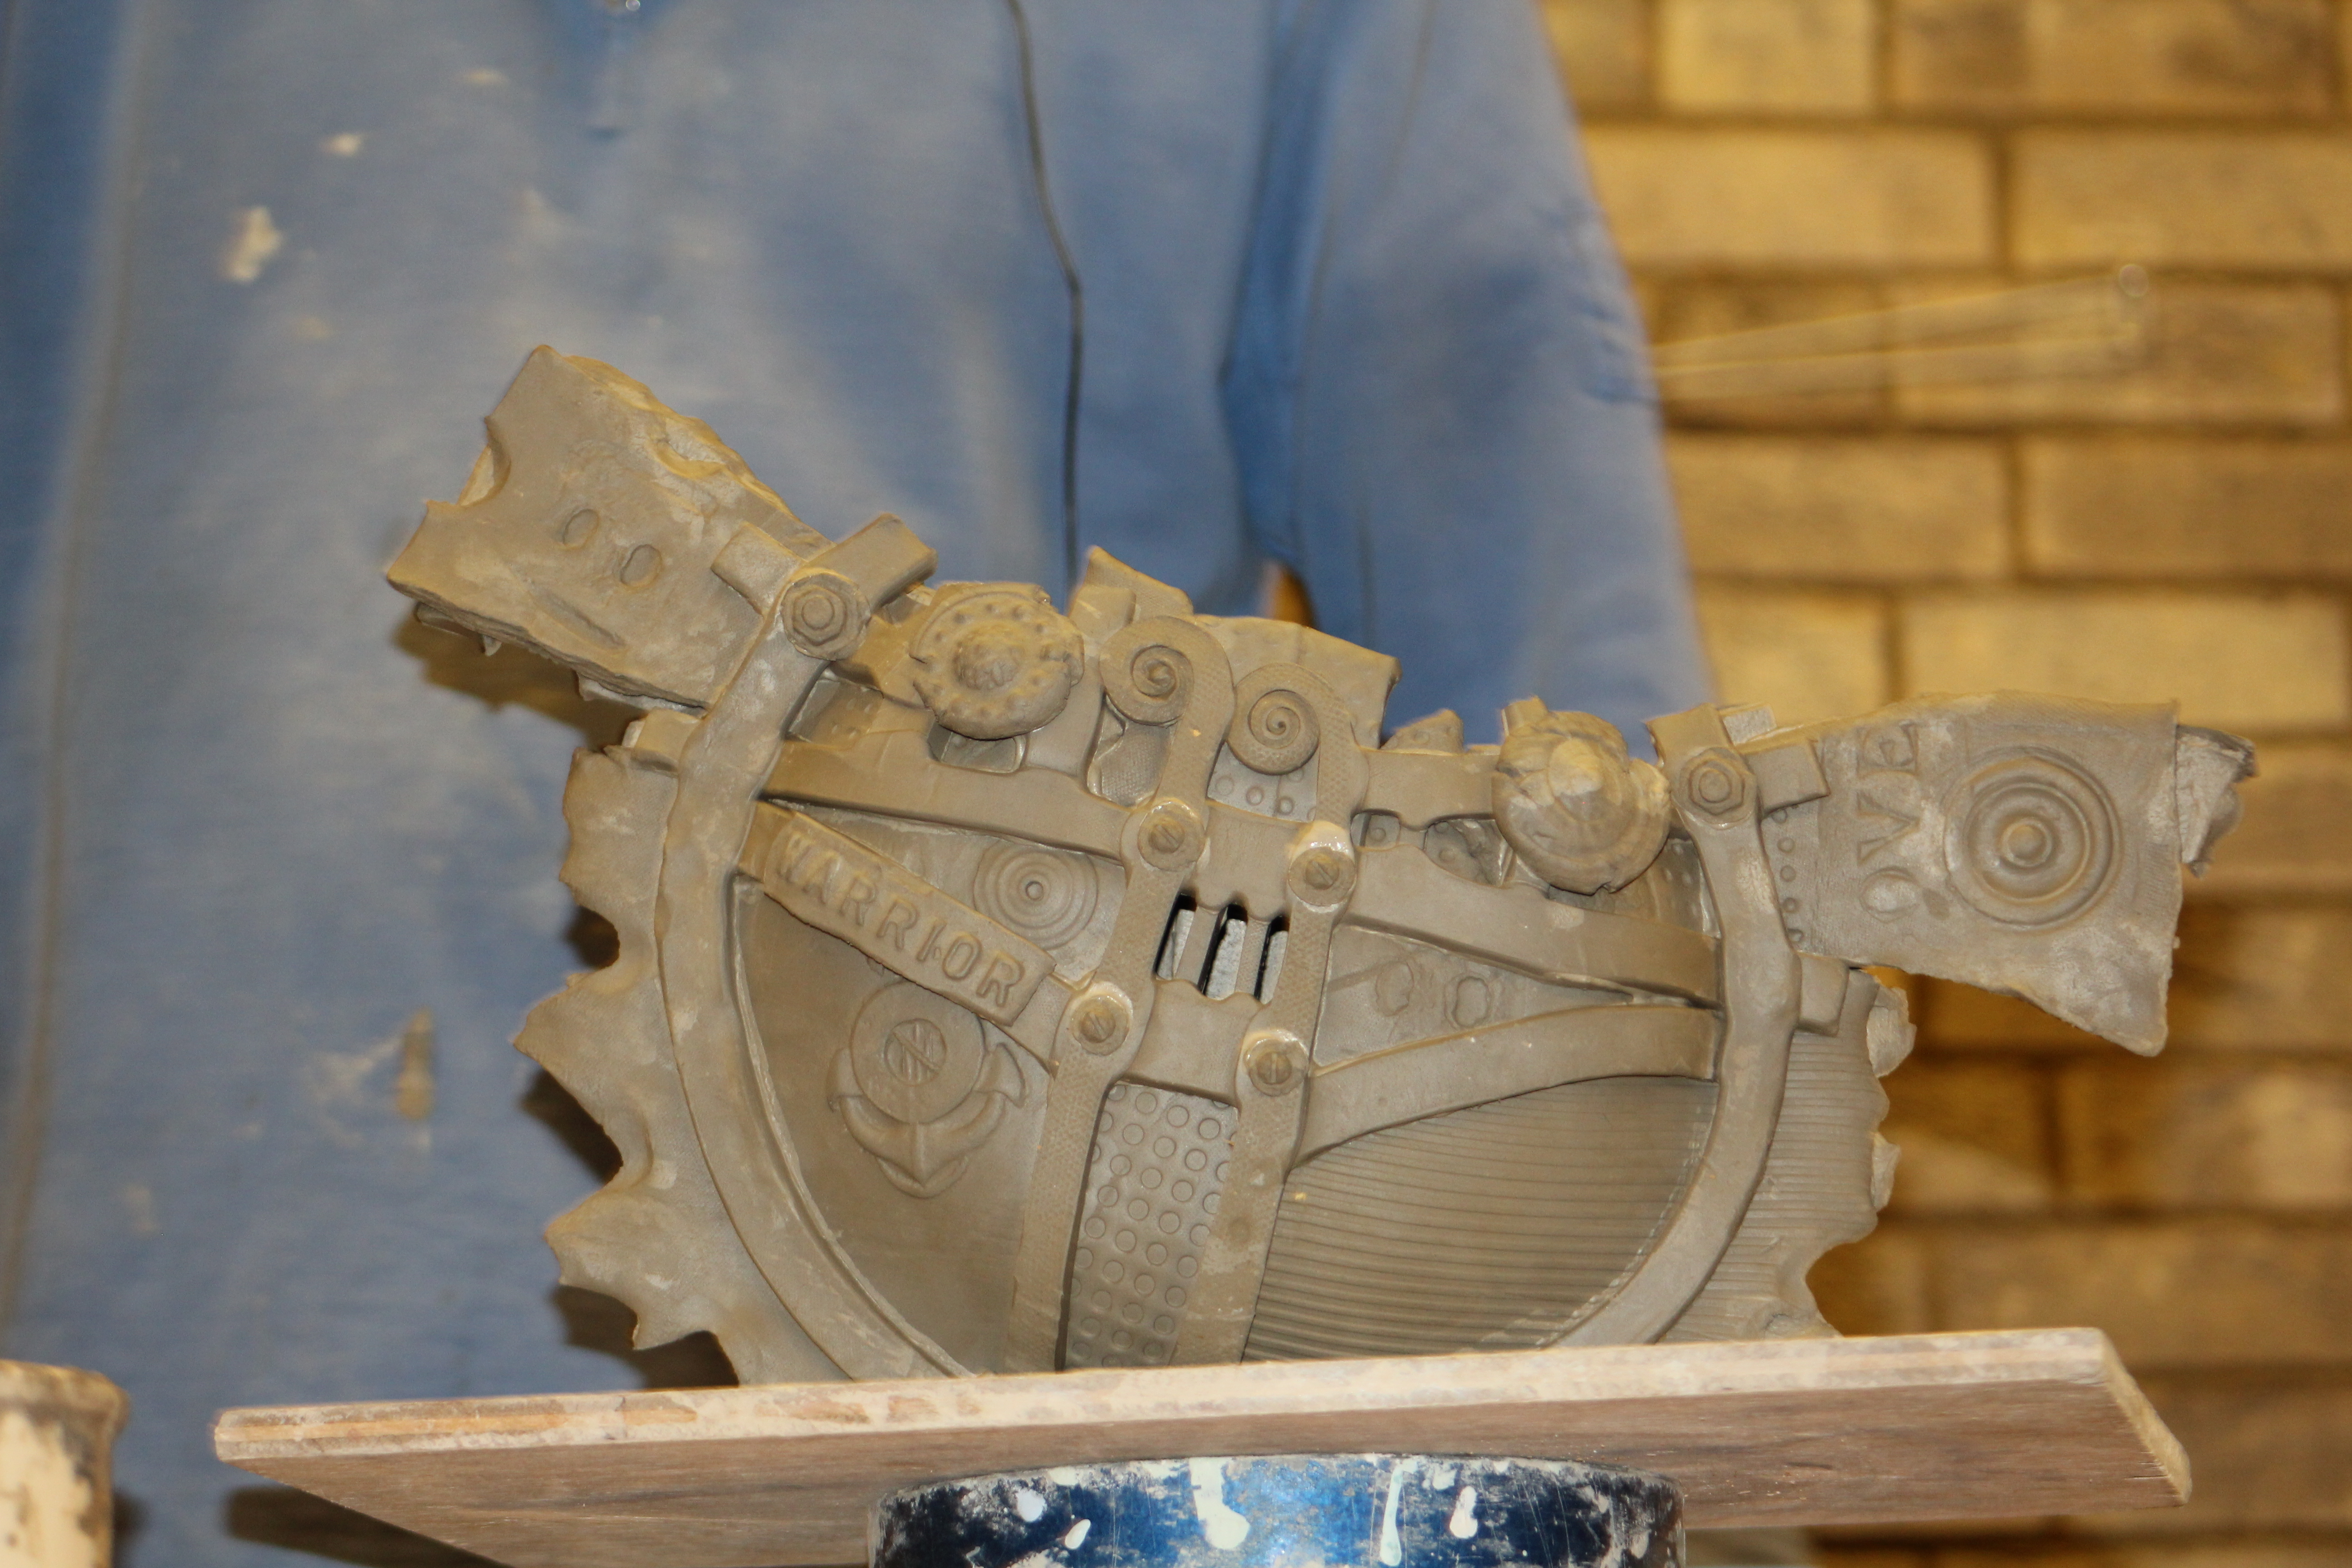
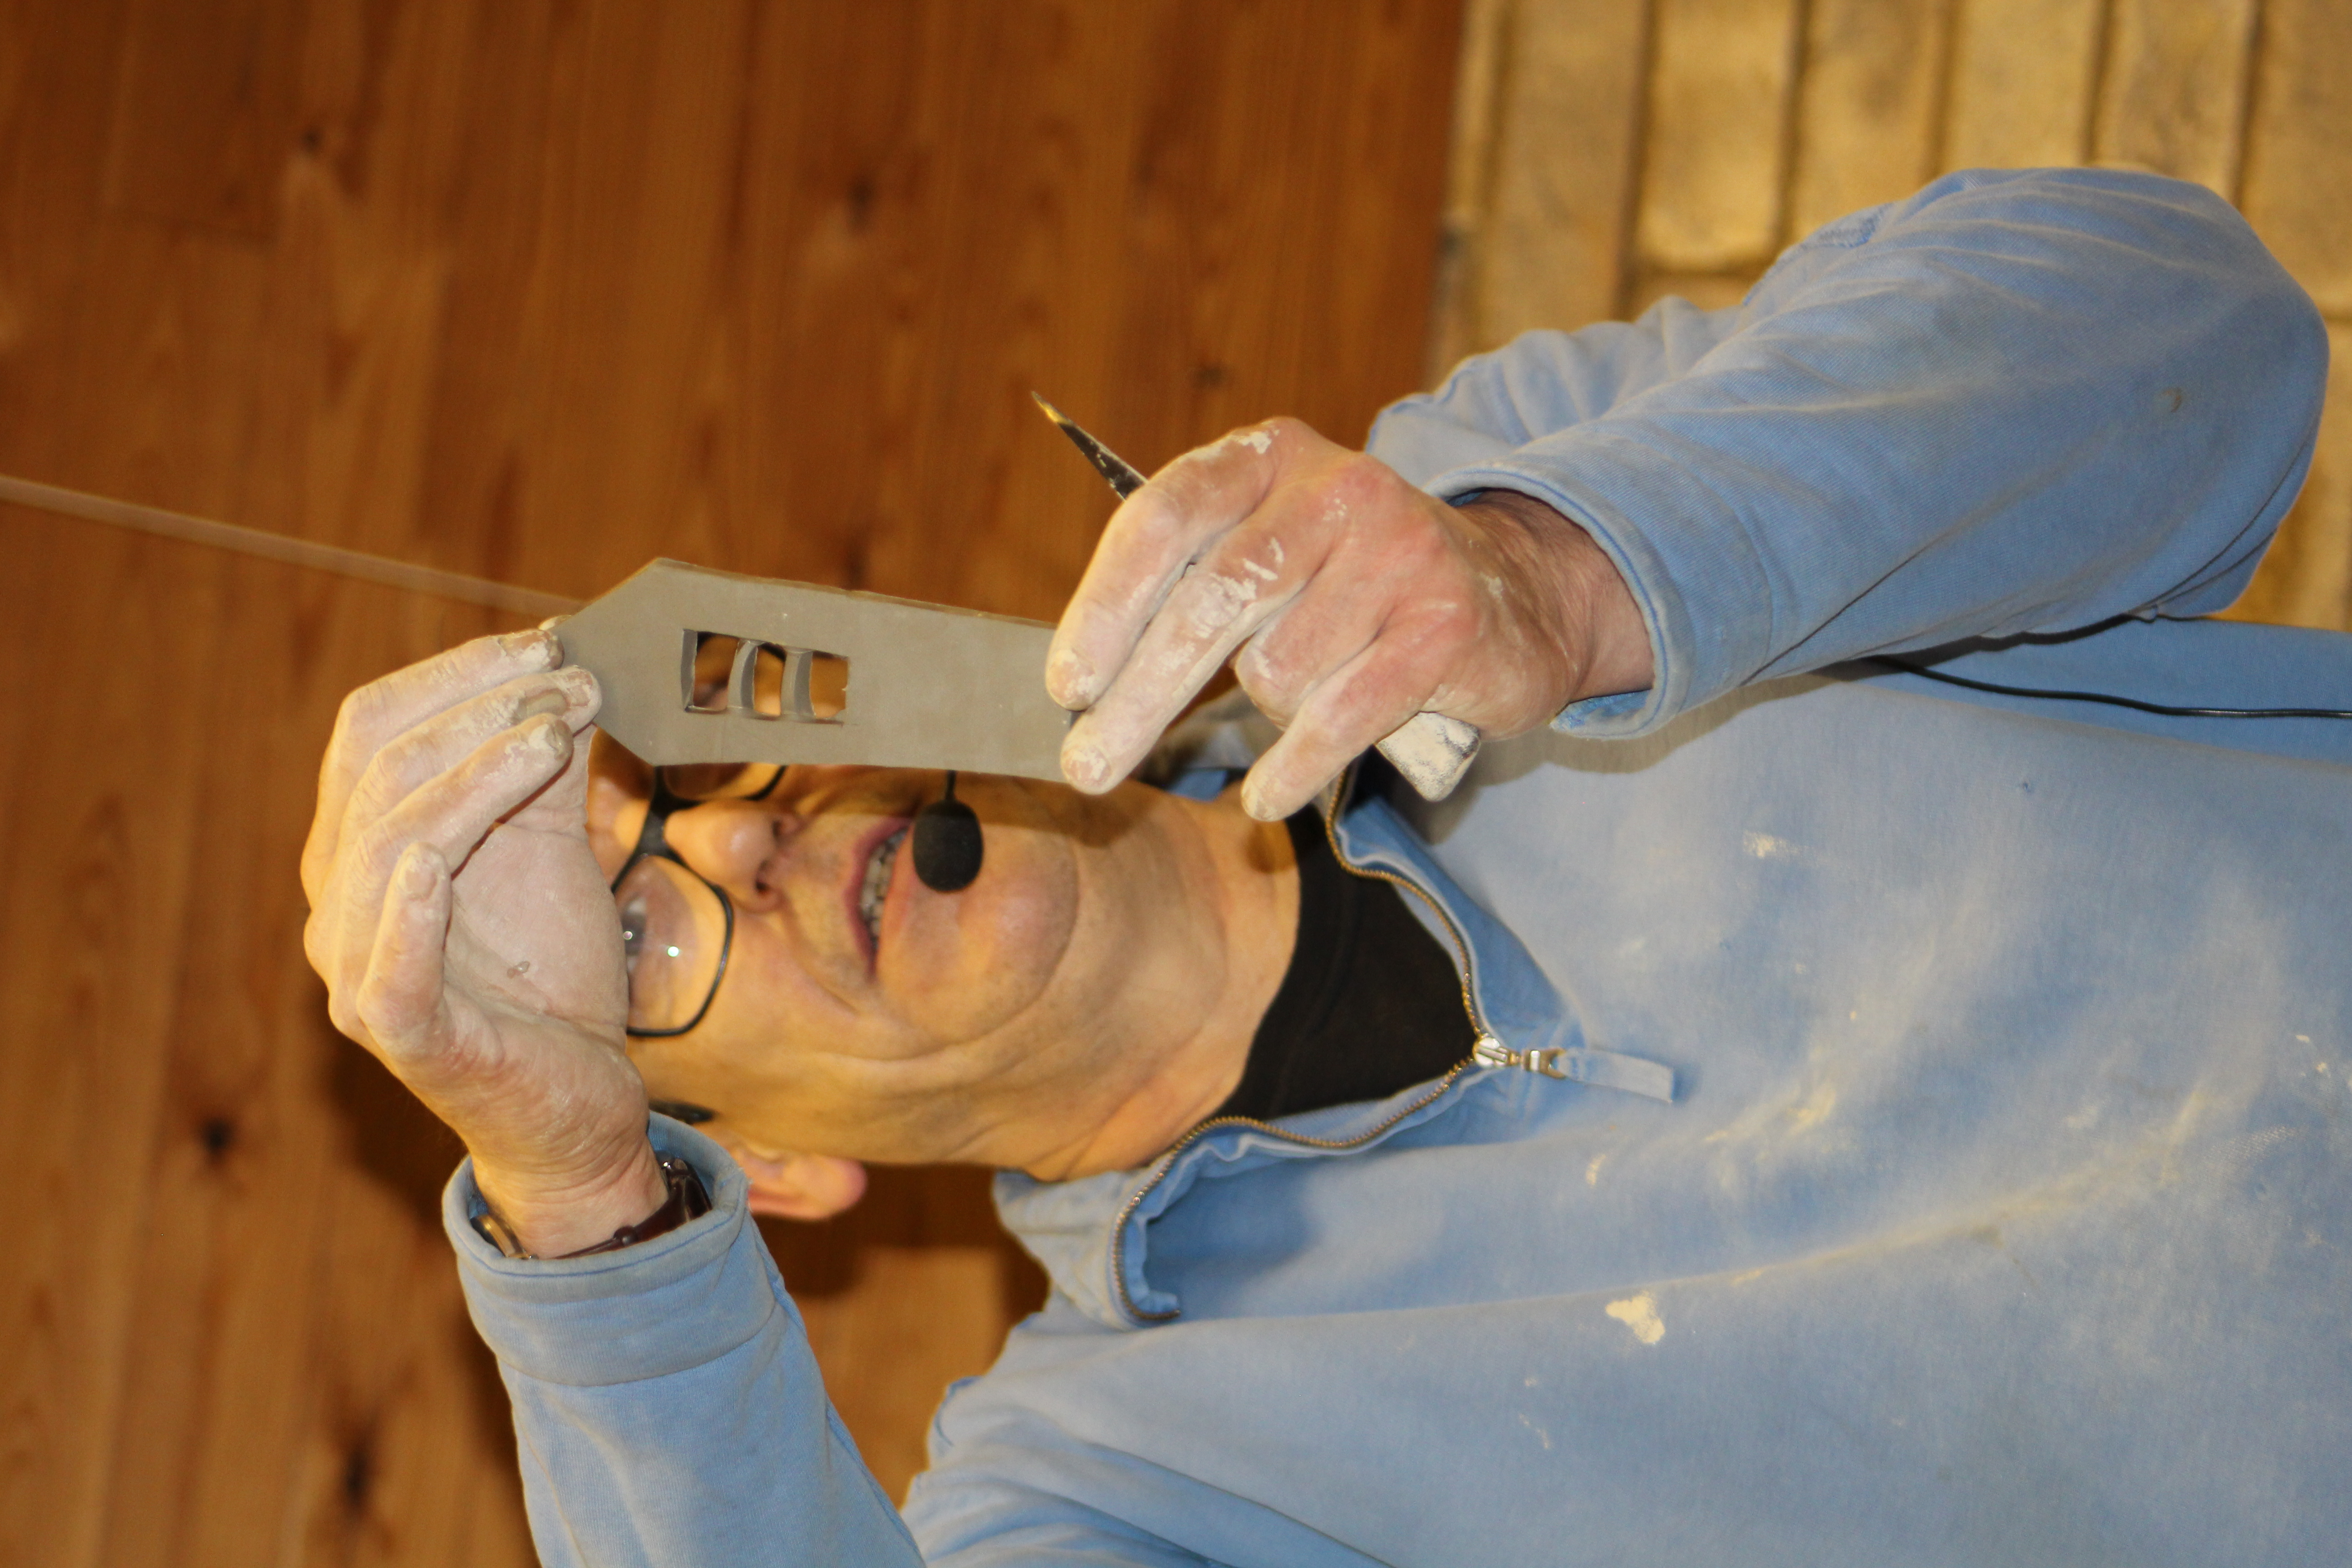
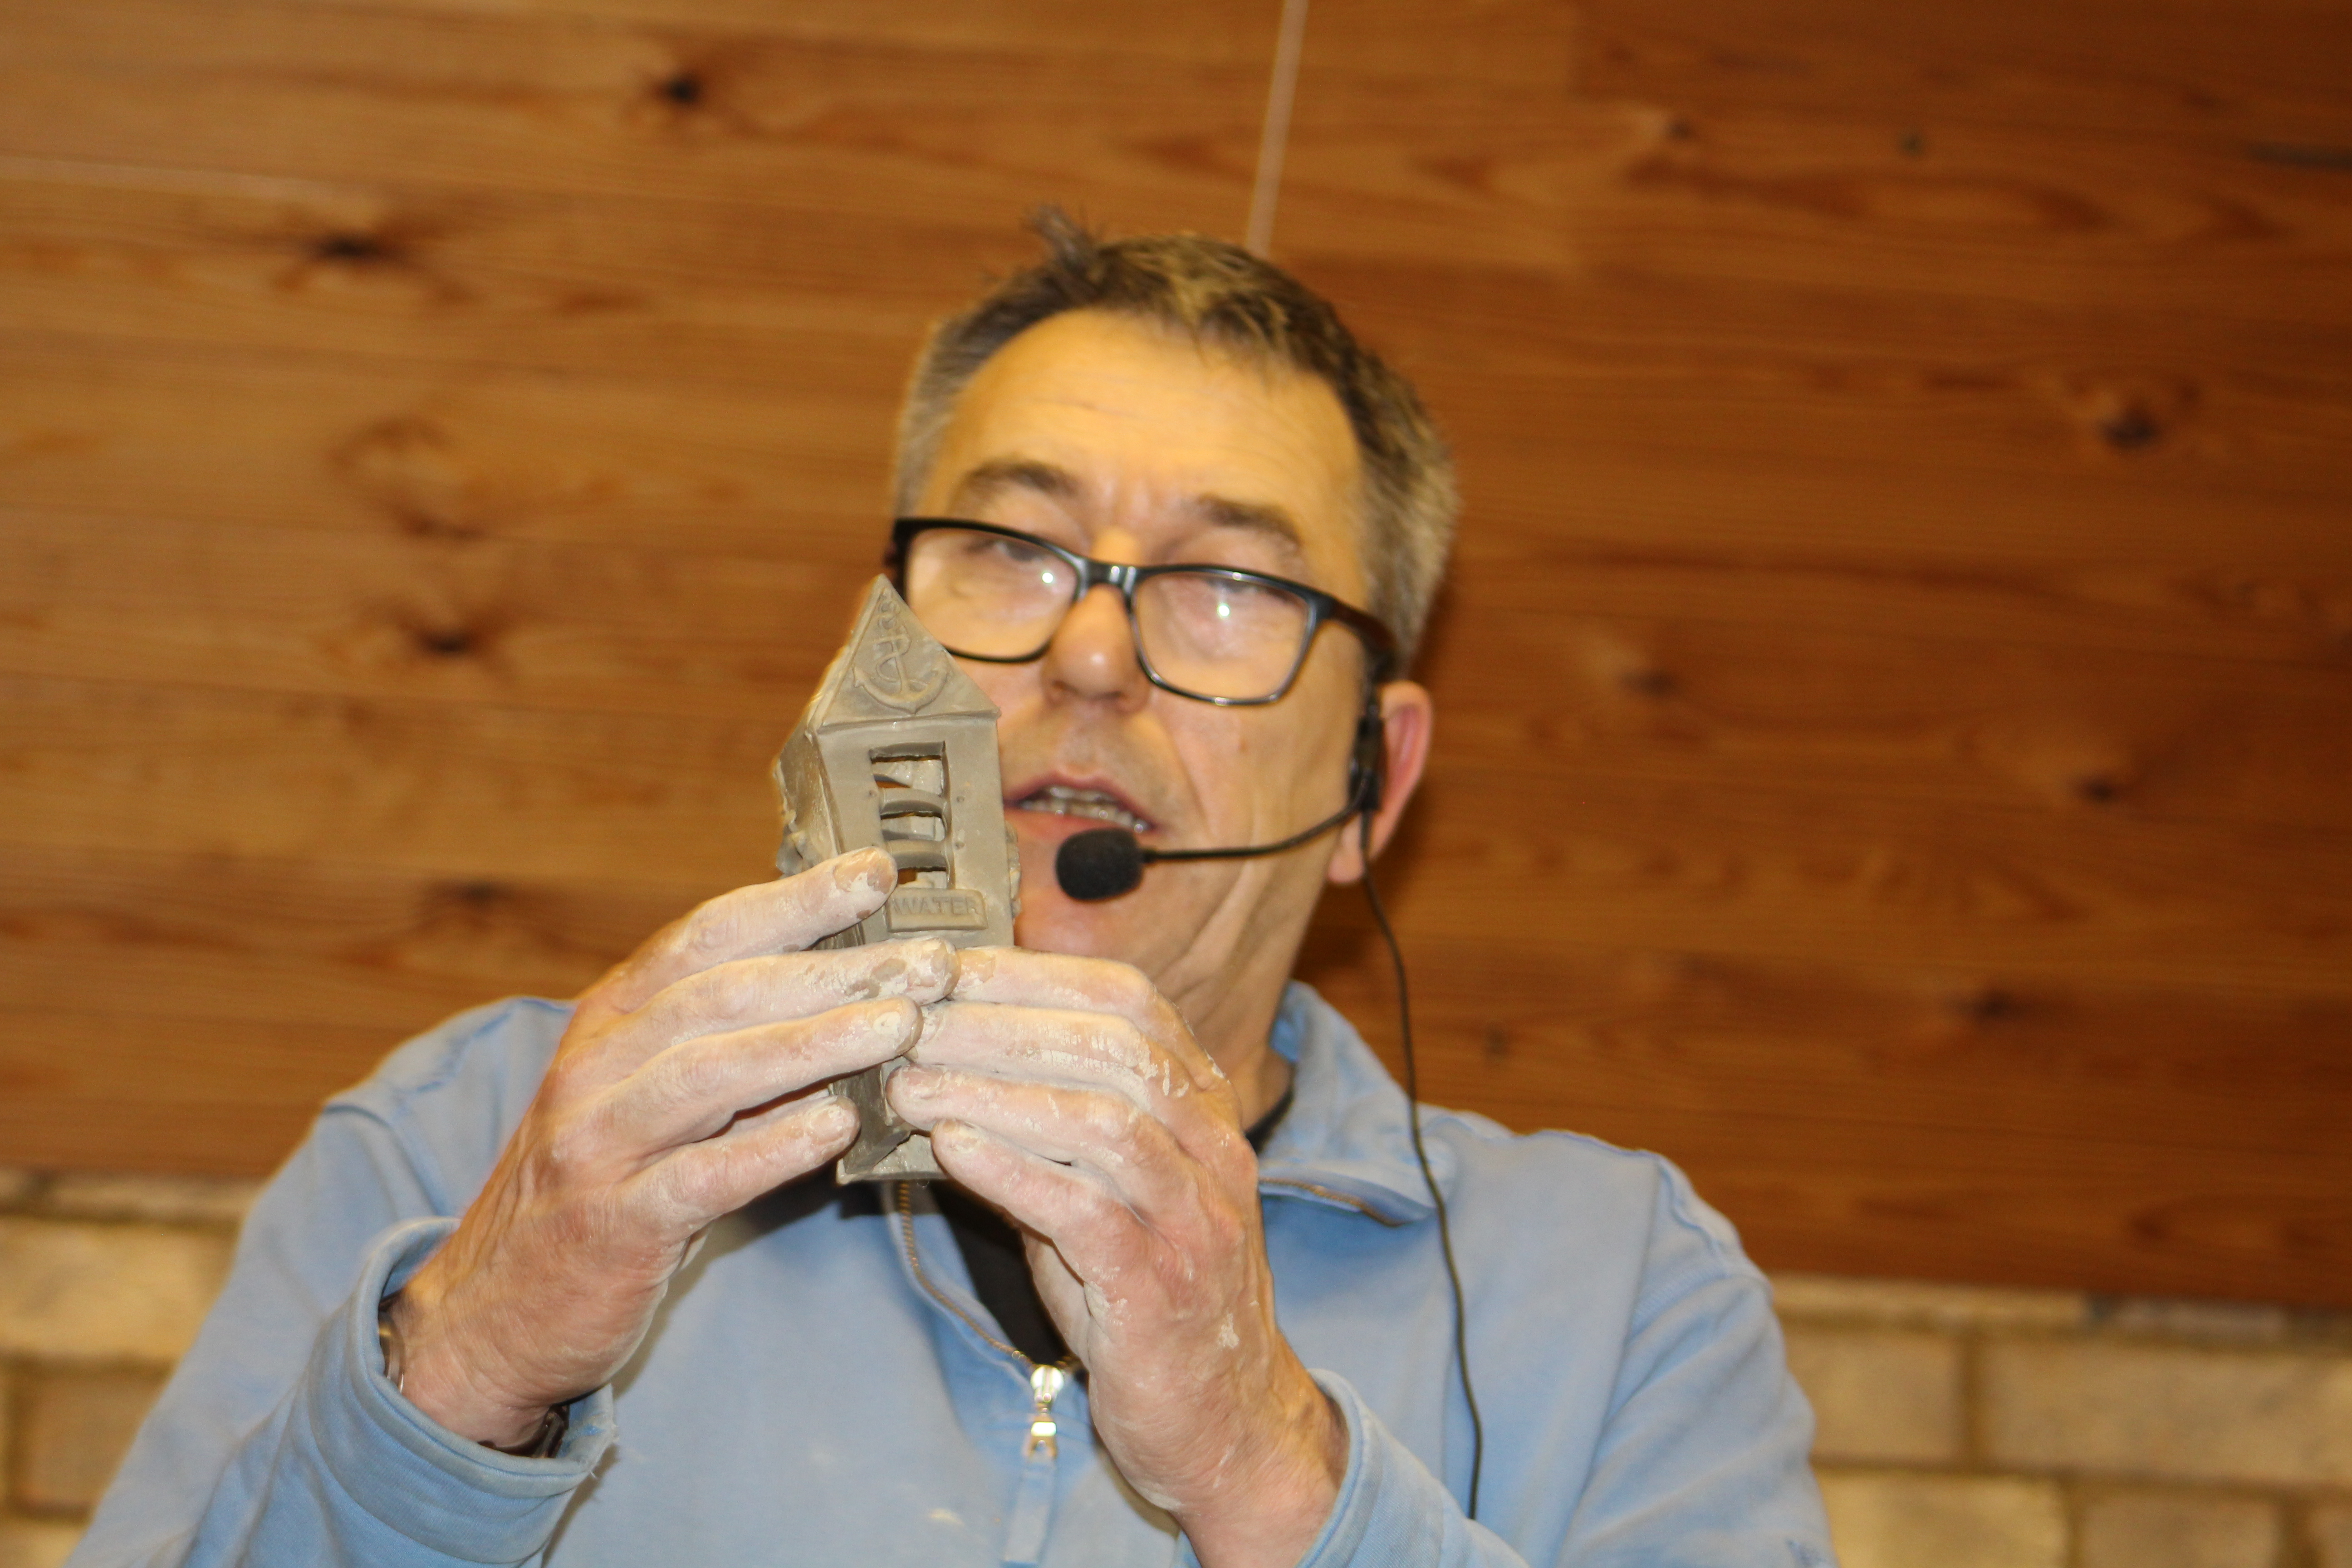
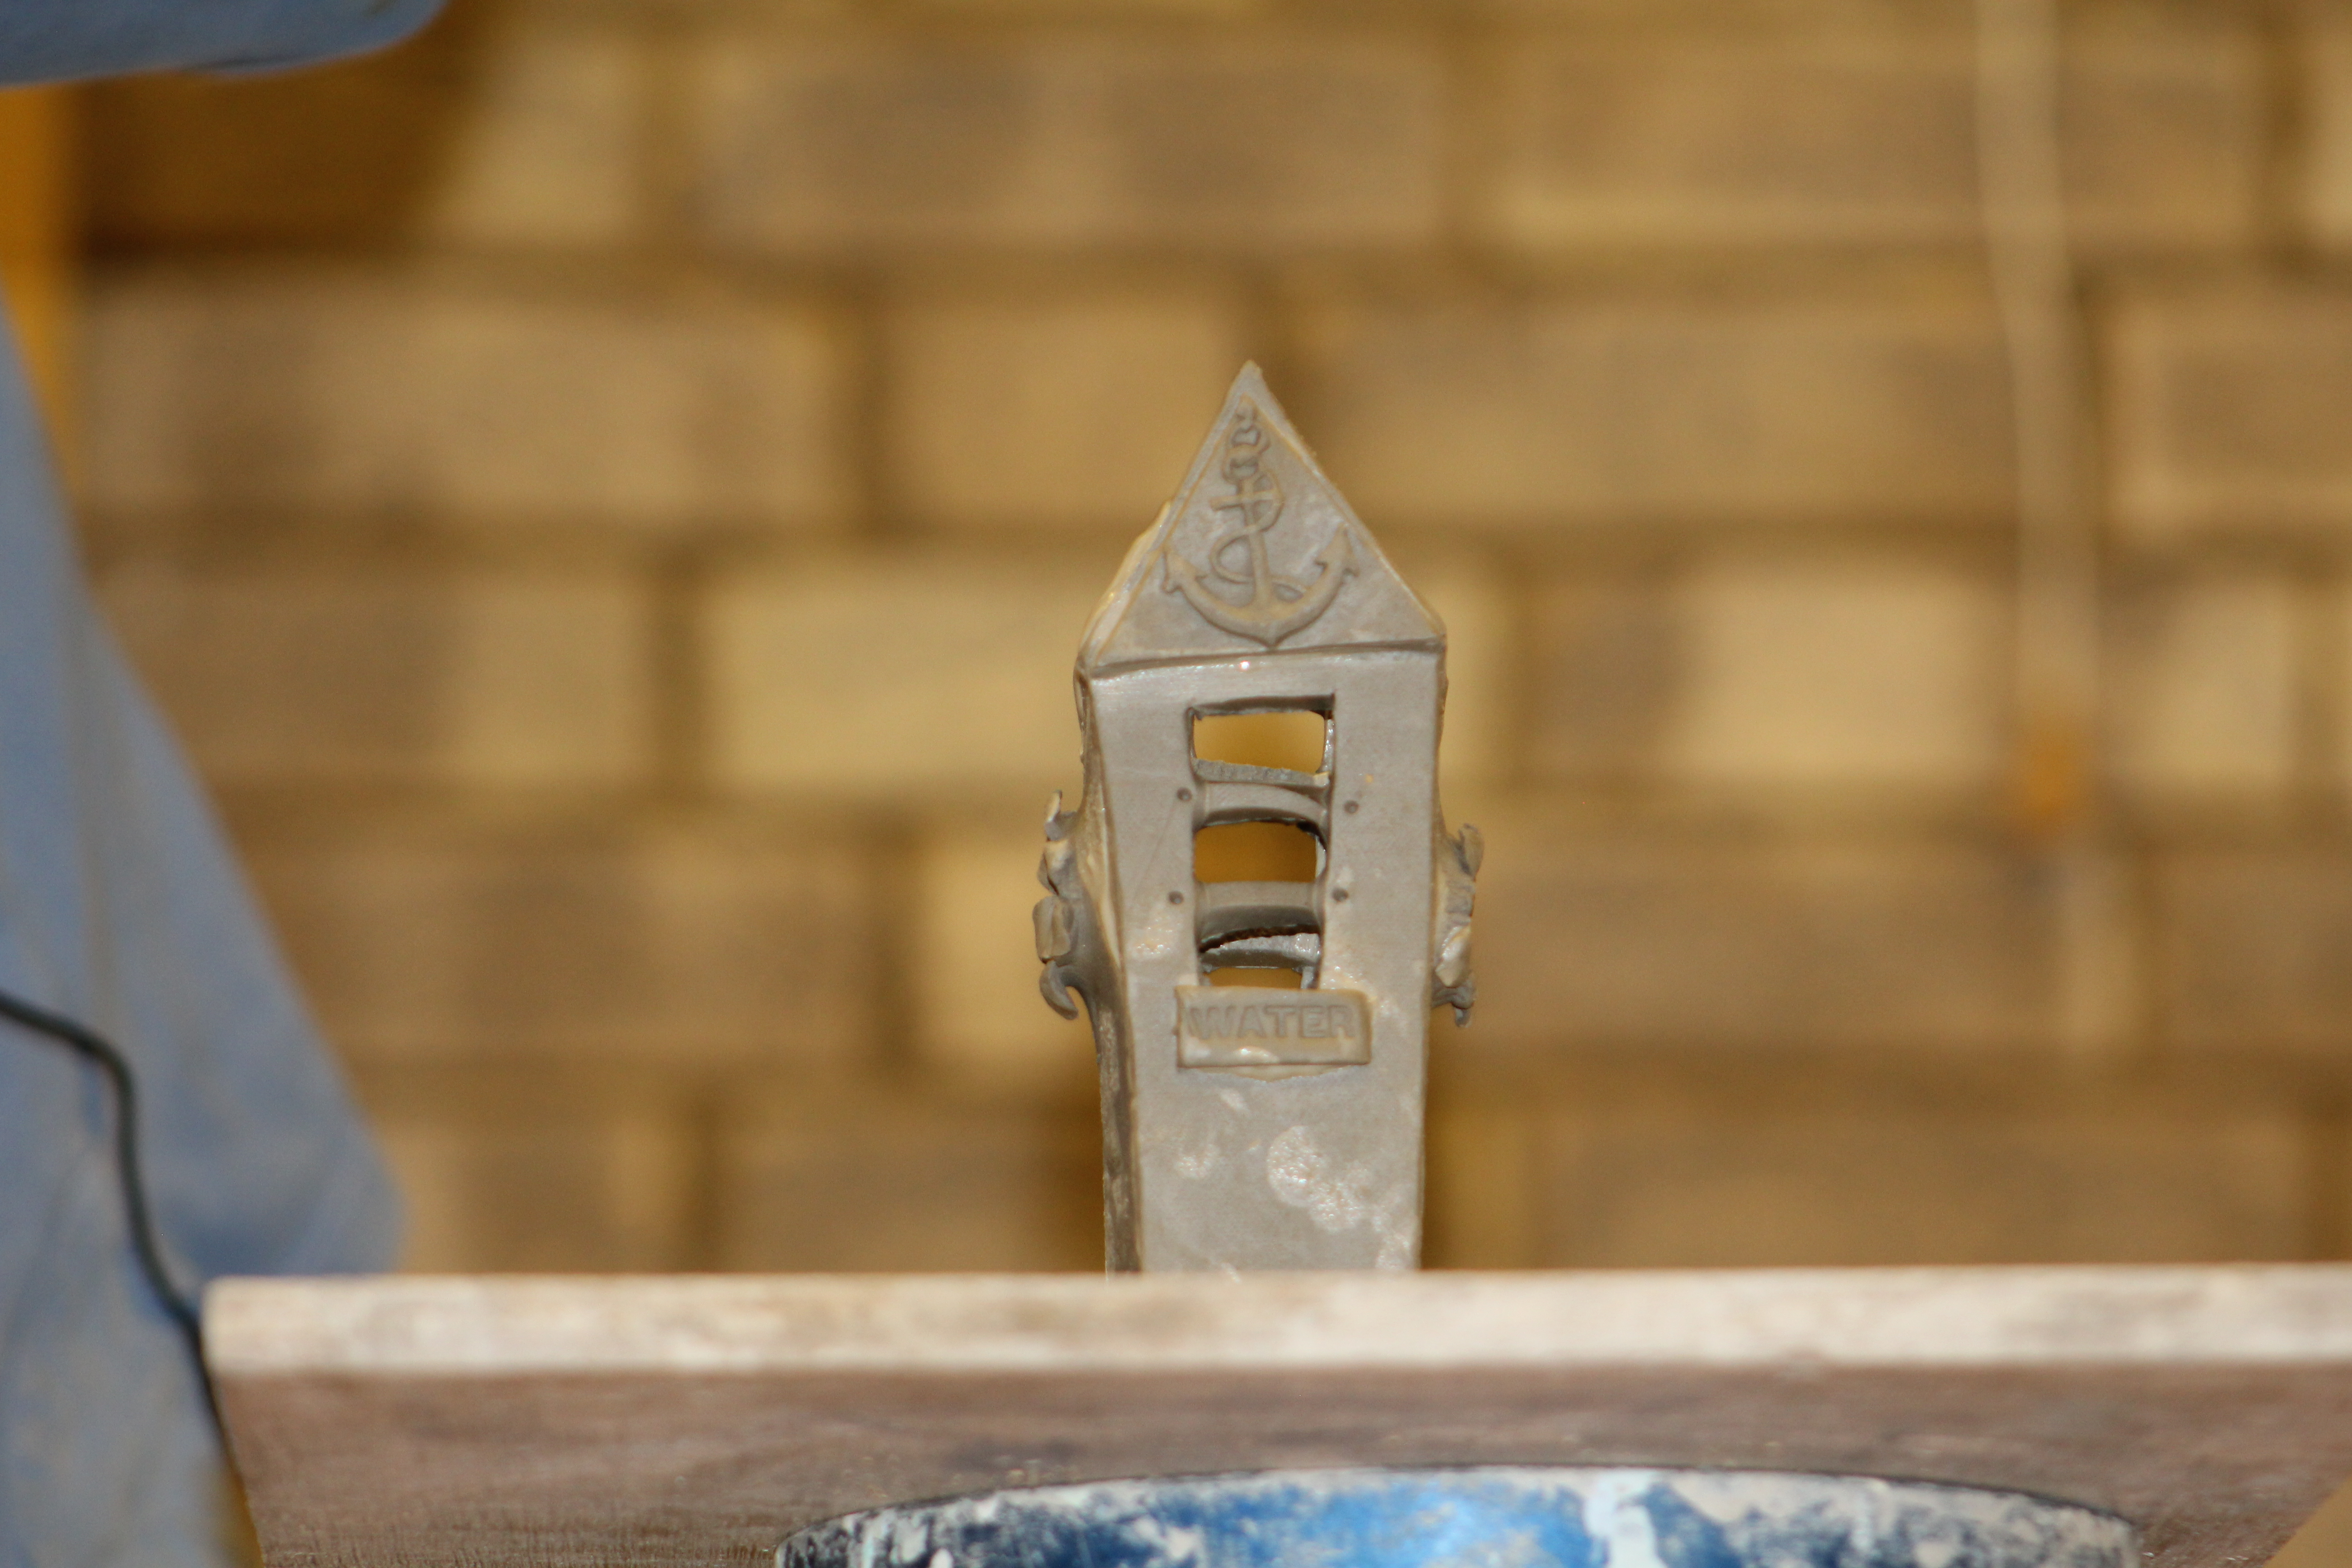
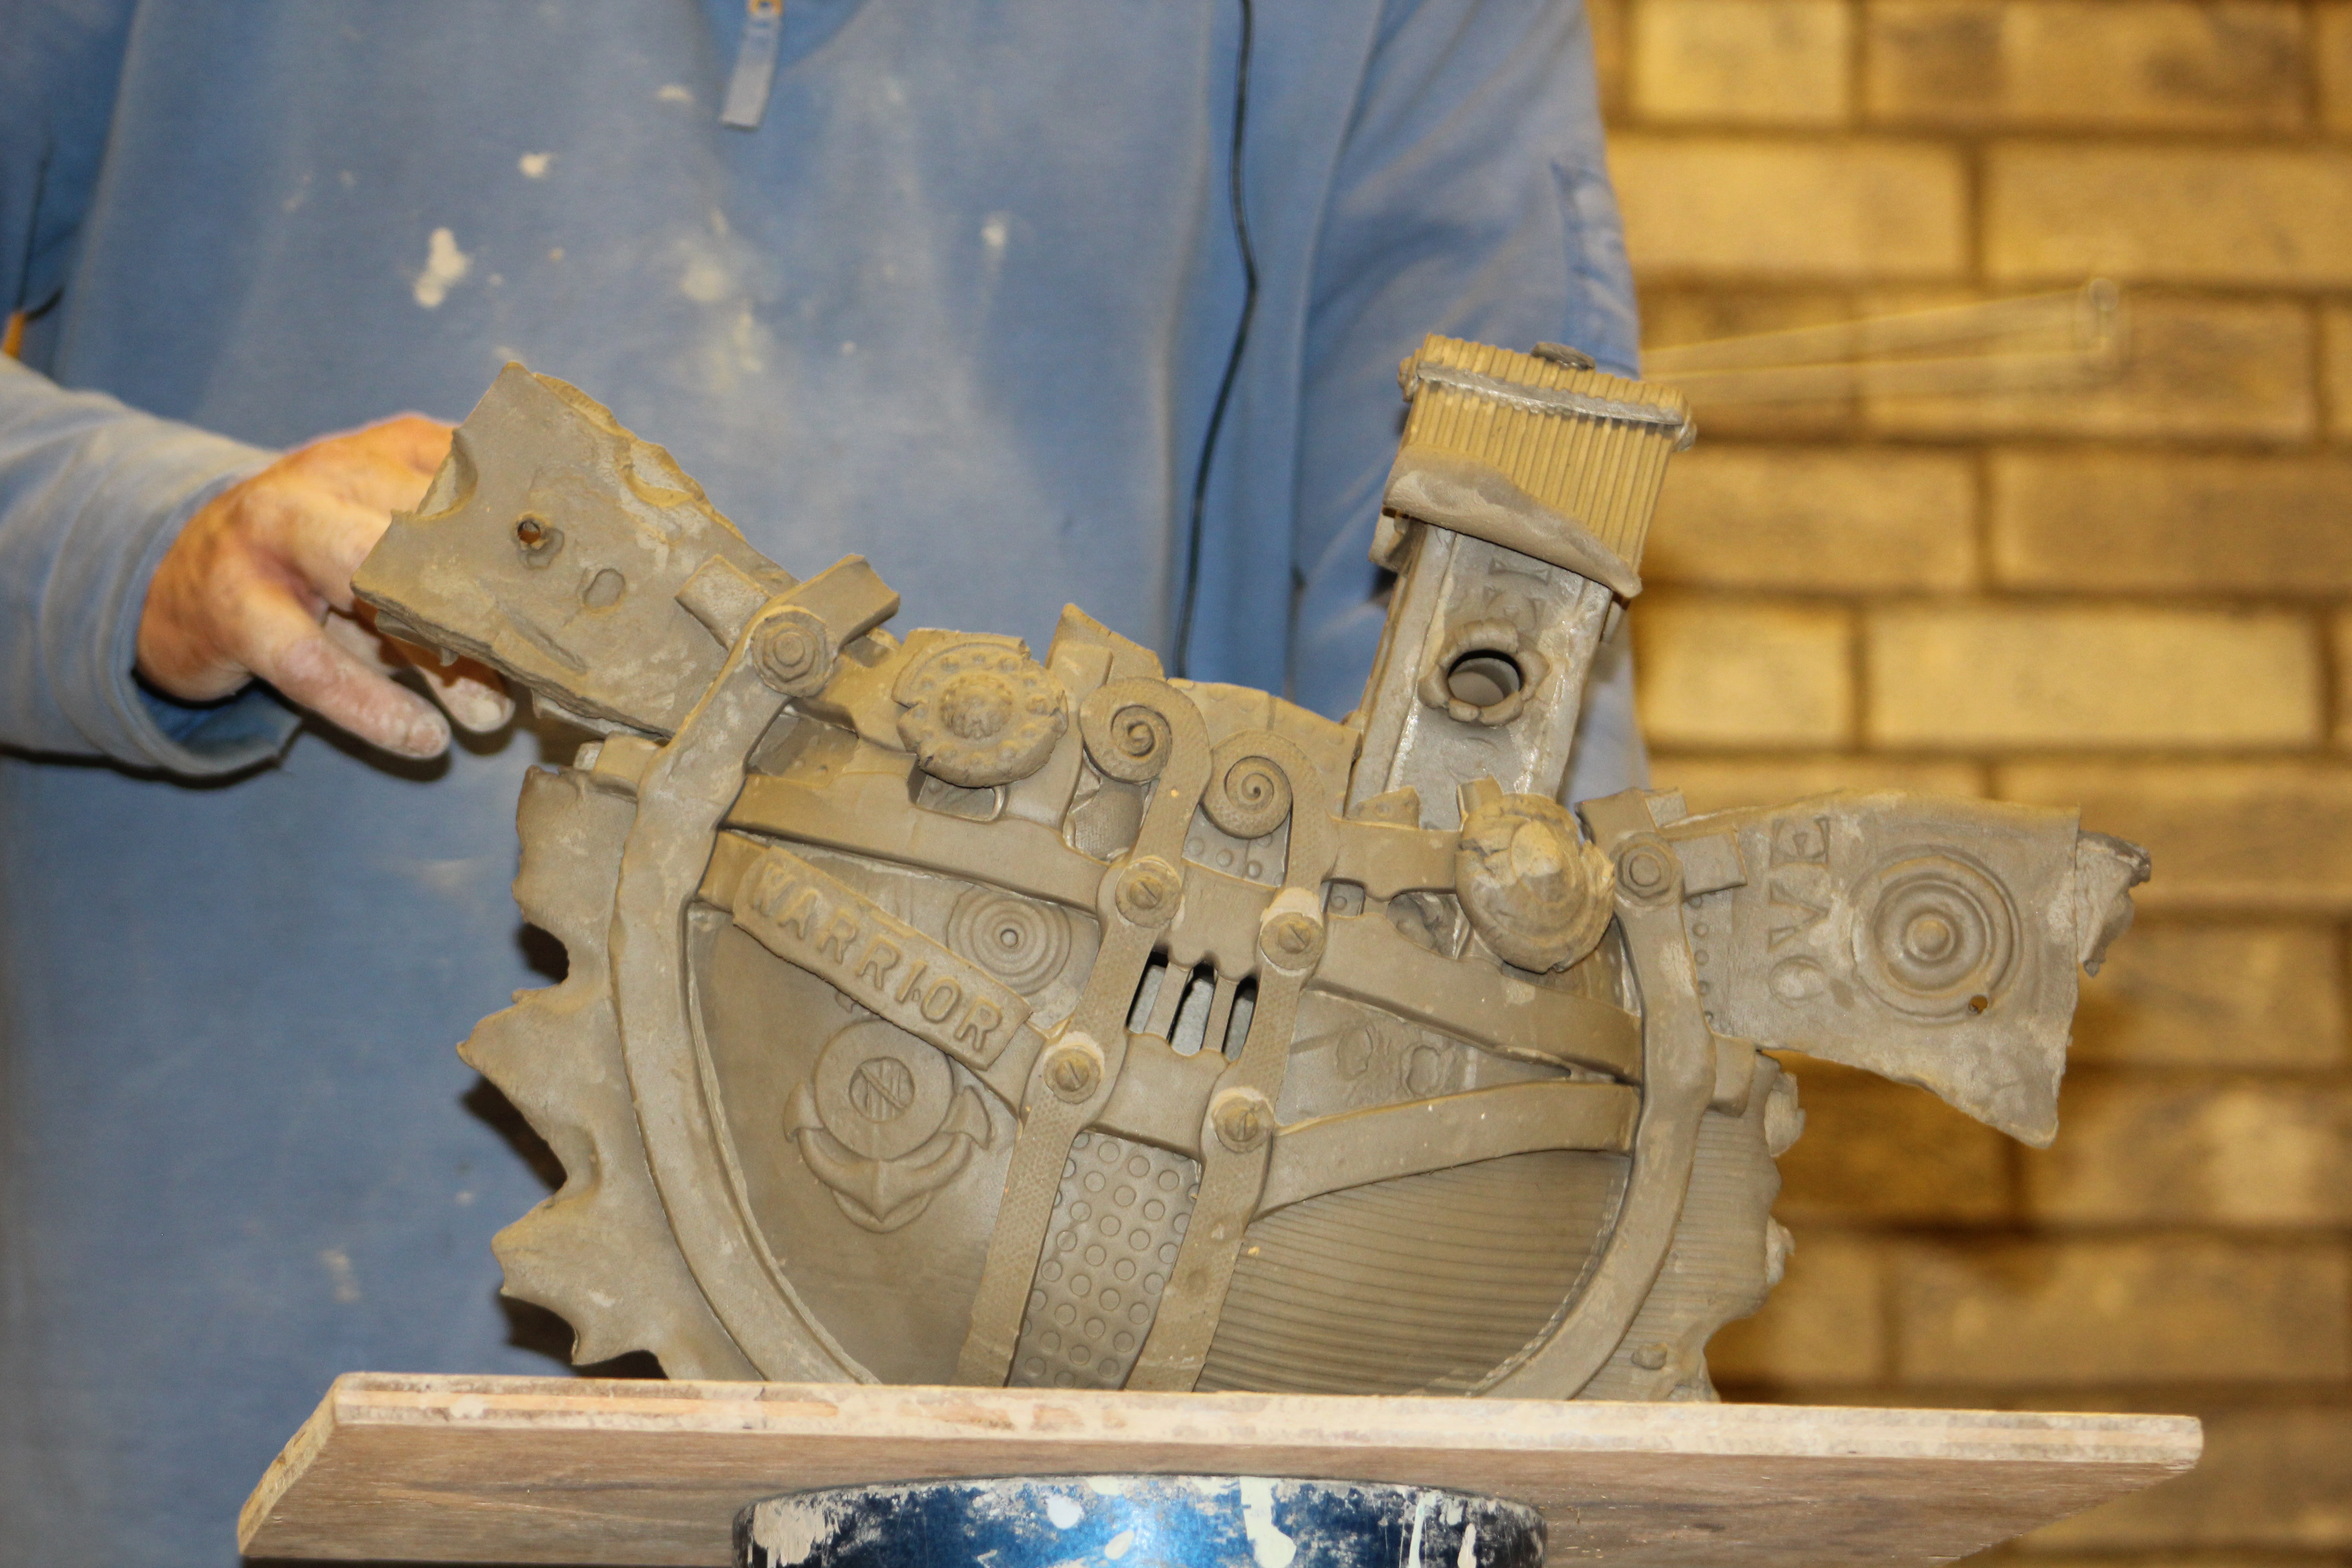
Lastly Mark showed us how he constructs his large ships. The process involves using a range of soft to hard clay, softer for the detailing and hard for the construction. Using a press mould Mark lays mid-soft strips of clay like a skeleton or stained glass window leading, later adding the detailed and textured ‘panes’ which he likes to tear from clay to fill in the gaps, this method helps to avoid the textured surface from being pressed out. Harder clay is used for window frames as it presses into the softer strips well. What we all thought was the bottom of the boat in the press mould turned out to be one of the sides! The other side he had made earlier, and of course they joined up perfectly. Before joining the sides together he added a deck and a collar for the driftwood mast. All sorts of detail was added from his mini press moulds, for example a finial, which looks like a shield, some text from a gravestone and a drain cover, buttons and a skull and crossbones. A great tip for using plastic textured items such as Lego grip board is to slam the clay onto the surface rather than rolling or pressing it in – it stops it from sticking. Once the sides were joined -using lashings of sticky slip- he cuts the bottom off the boat to get it sitting at the angle he wants before closing off the bottom using a slab to sit it on and putting a dowel peg hole in for later mounting. The hut/cabin is made from 2 house shaped slabs and two side panels and a roof. Detailing is applied to the back and front as the roof comes down low over the sides not much detail is required here except a hole punched with a brush handle so the edges splay out rather like a cannon ball hole. The hut is then secured to the deck with slip. If you don’t have a press mould Mark suggested using an old wok.
So many techniques demonstrated and such useful tips made this a really special day, a big thank you to Mark for visiting us.
Notes by Caroline Gatfield